
Hardware Setup
This guide covers the physical setup steps required before operating AI Worker, including power-on, port identification, and Remote E-STOP usage.
INFO
- The term
Followerrefers to the body of the AI WORKER robot. - Make sure to check which robot model you are using before following the steps below.
Power On and Check Ports
Powering On the FFW_BG2 Follower
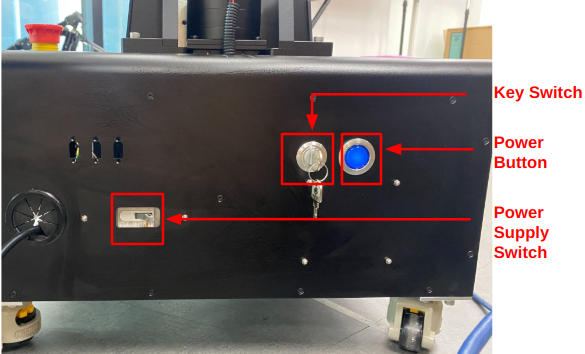
- Toggle the
Power Supply Switchto the right. - Insert the
Key Switchand turn it to the 12 o'clock position. - Press and hold the
Power Buttonfor 3 seconds. When you hear a beep, the system is powered on. You should see the robot's head light up at this point.
Hardware Ports (FFW_BG2 Follower)
 The back of the Follower body includes several ports for system access and external connections:
LAN Port: Used to access the robot PC via SSH or remote desktop.USB Ports: For connecting peripherals such as a keyboard, mouse, or USB drive.HDMI Port: Allows direct video output for connecting a monitor.
Remote E-STOP Usage

The Remote E-STOP device is the safety stop controller for AI Worker. It is used to perform an emergency stop and to release the initial safety lock.
Press the red mushroom button circled above to activate the E-STOP.
To release it, rotate the button clockwise, then press the A button.
The other buttons have no function.
WARNING
When AI WORKER is powered on for the first time, it remains in a torque-off state. To enable communication with the DYNAMIXELs, you must press the A button on the Remote E-STOP. When the safety lock is released, you will hear a beep sound.
Optional: ROBOTIS Hand Installation
If your application requires a multi-functional grip, you can replace the RH-P12-RN gripper with a ROBOTIS Hand. Follow these steps to perform the exchange:
- Remove the
RH-P12-RNGripper: Carefully unscrew the mounting bolts and disconnect the communication cable from the current gripper.
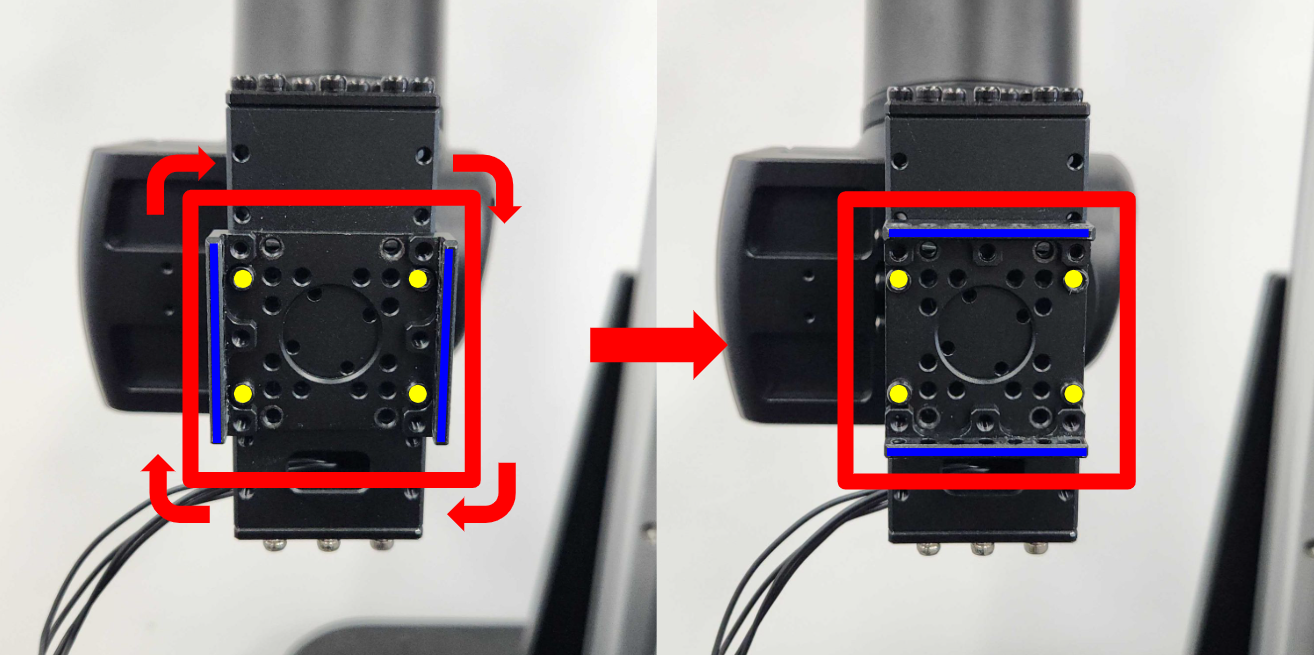
- Reorient the Mounting Bracket: Unscrew the mounting bolts on the
FRP42-A110Kbracket and rotate it by 90°. Align the bracket and mount the bolts into the highlighted holes as shown in the image above.
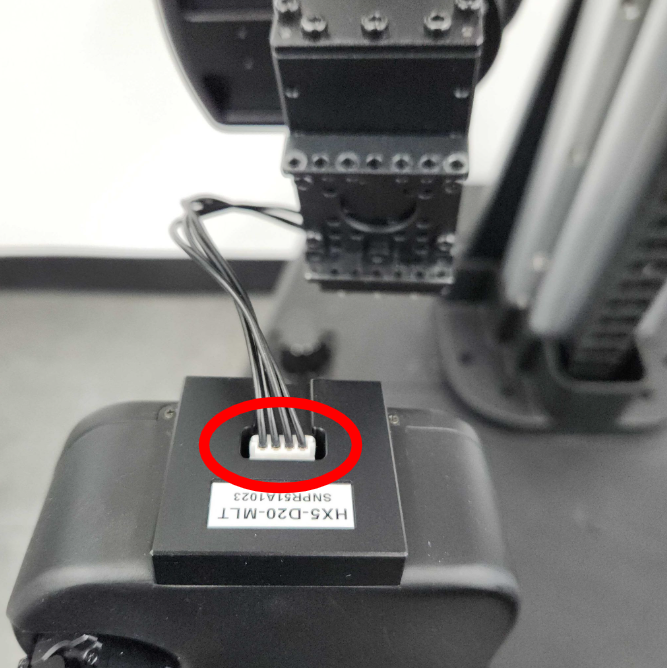
Connect the Communication Cable: Plug the
4-pin JST cableinto the port located on theROBOTIS Hand. Ensure the connector is fully seated to prevent signal loss or intermittent connectivity.Secure the
ROBOTIS Hand: Align the hand with the rotatedFRP42-A110Kbracket and tighten the mounting screws.
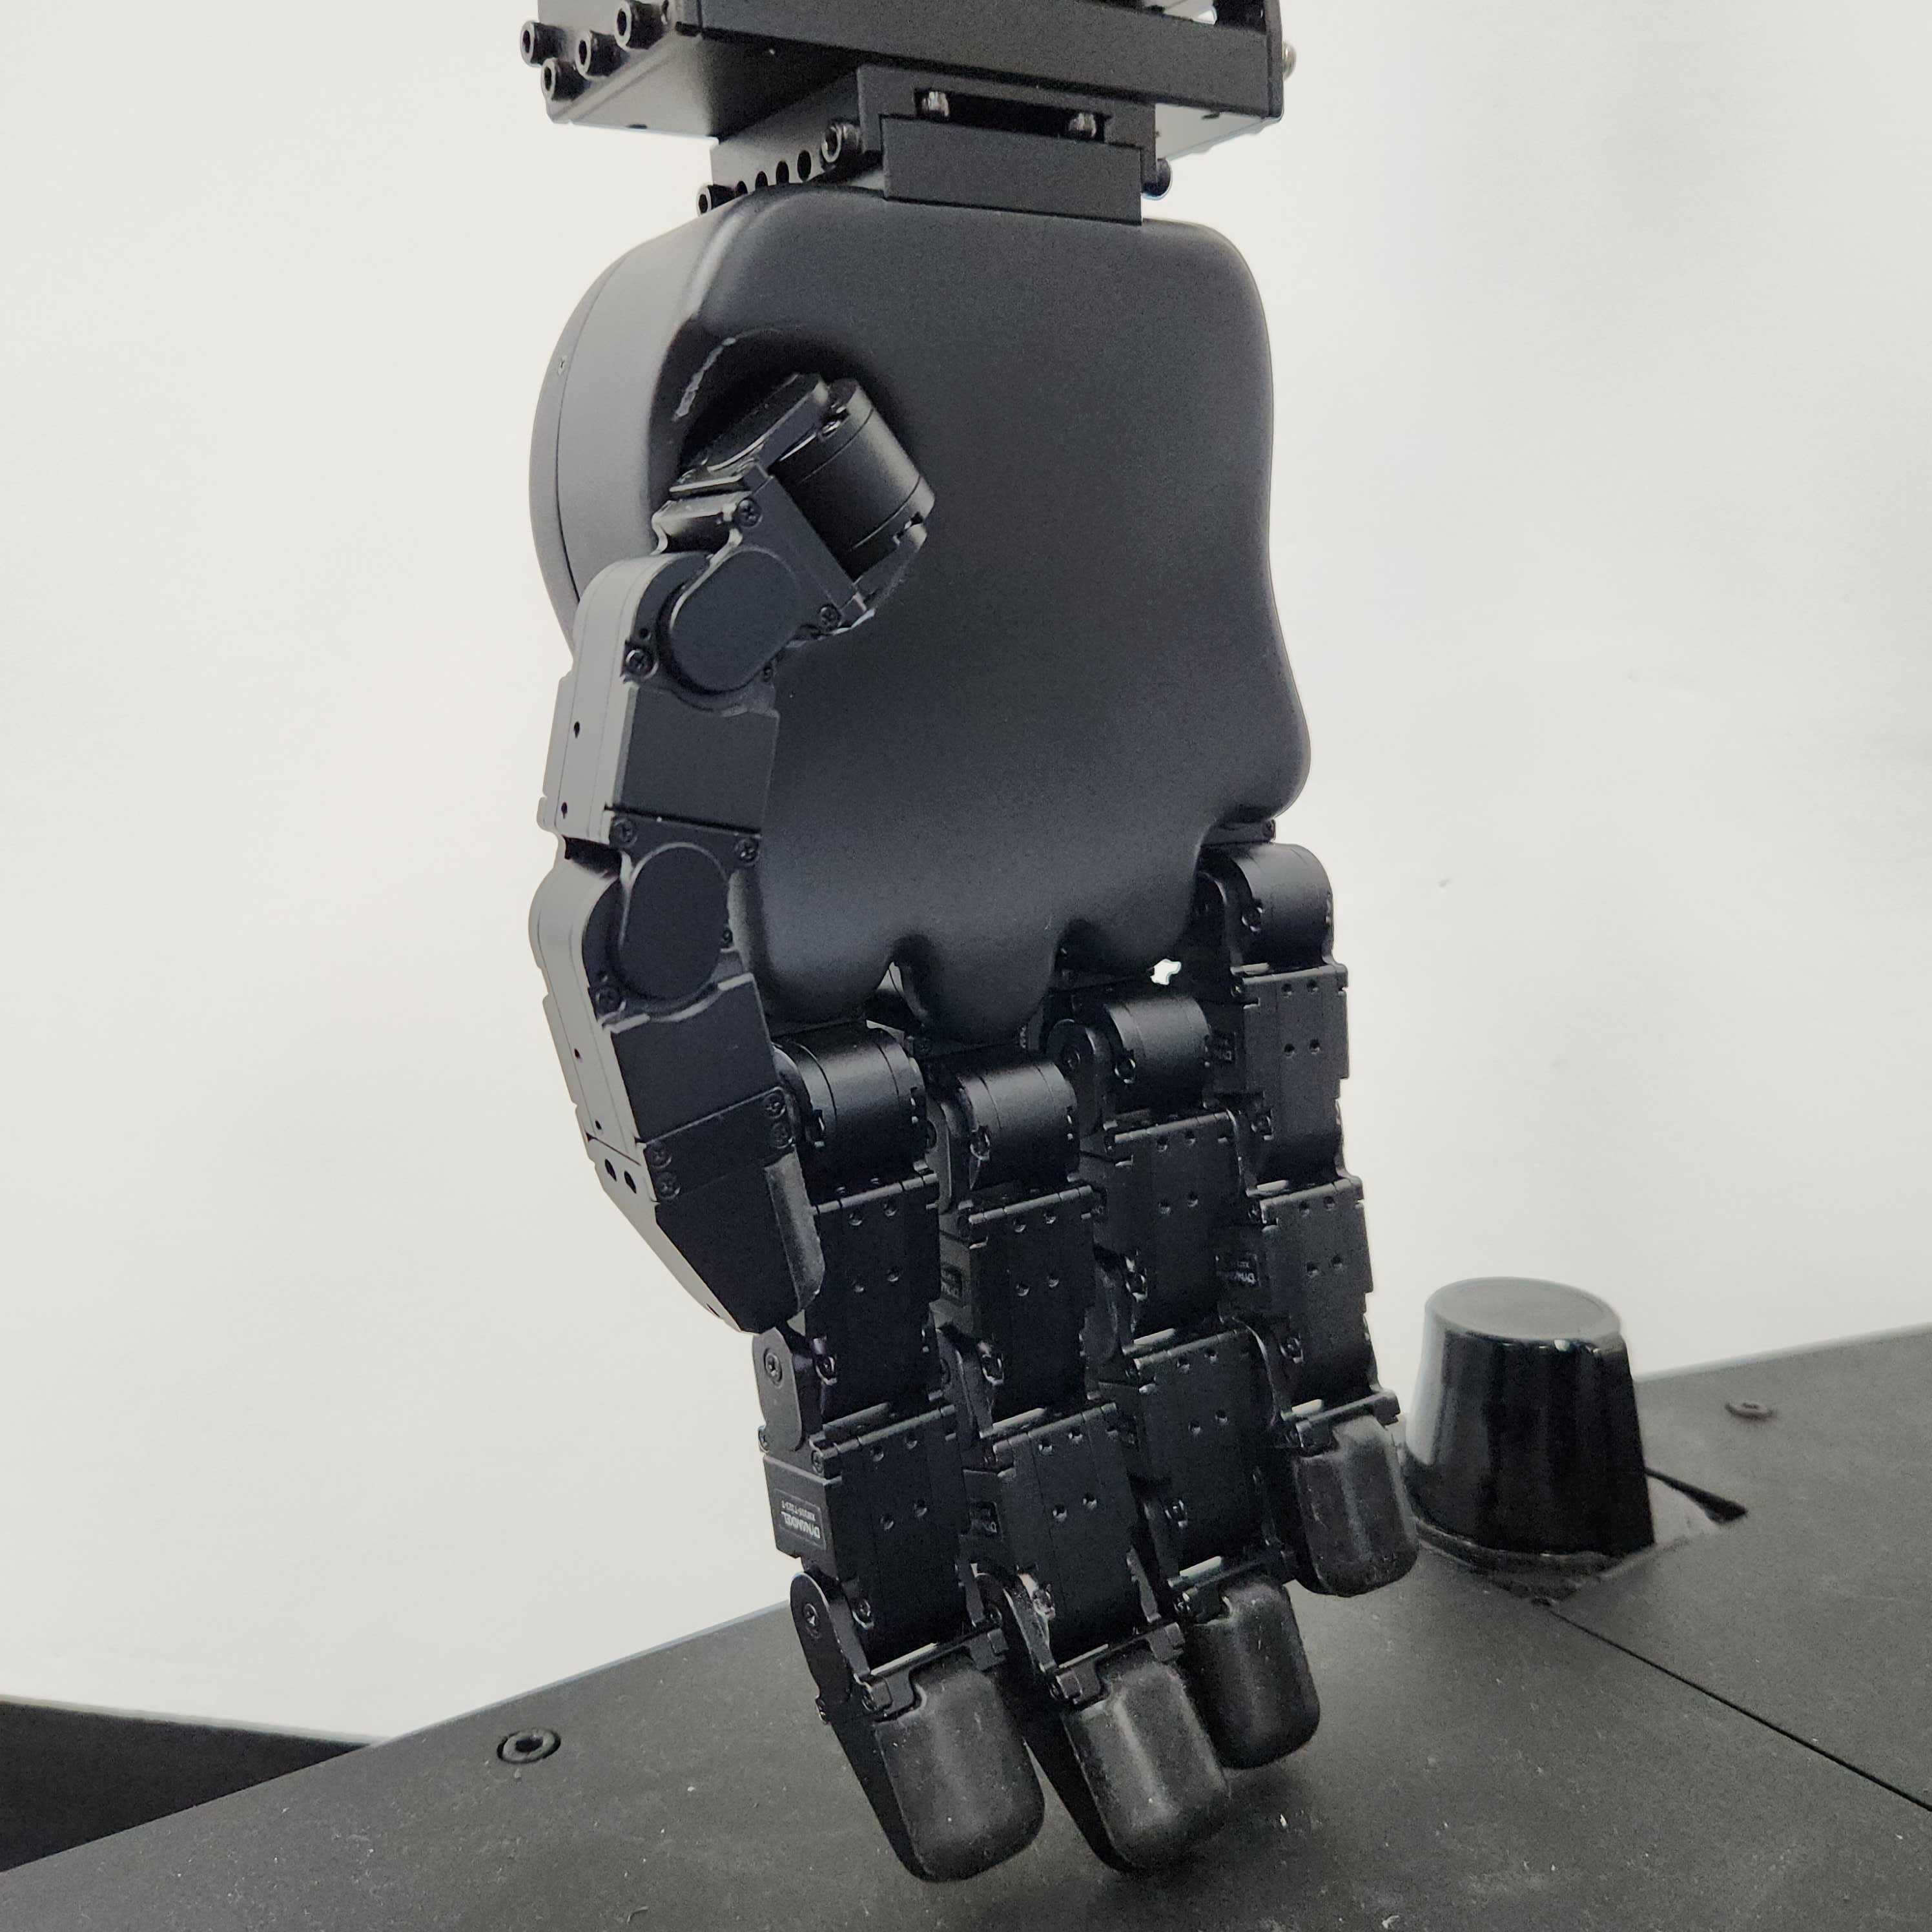
The hardware installation is now complete.