
Behavior Trees
Overview
Behavior Trees (BTs) provide a powerful framework for designing complex robot behaviors in a modular, hierarchical, and reactive manner. This guide introduces you to using Behavior Trees on the AI Worker, combining the flexibility of learned policies from imitation learning with structured control logic.
Before You Begin
Before creating behavior trees for the AI Worker, you should become familiar with Groot 2 and basic Behavior Tree concepts.
1. Learn Behavior Tree Basics
Start by understanding the core concepts of Behavior Trees:
INFO
Visit the BehaviorTree.CPP Introduction to learn:
- What Behavior Trees are and why they are useful
- How to structure complex behaviors hierarchically
- Basic node types and their purposes
2. Install Groot 2
Groot 2 is available on Linux. Please refer to the official website for the latest downloads and comprehensive installation guides:
- Official Website: https://www.behaviortree.dev/groot
Once installed, you can launch Groot 2 from the terminal:
cd ~/Groot2/bin && ./groot2TIP
If your Groot 2 directory is different, update the path accordingly.
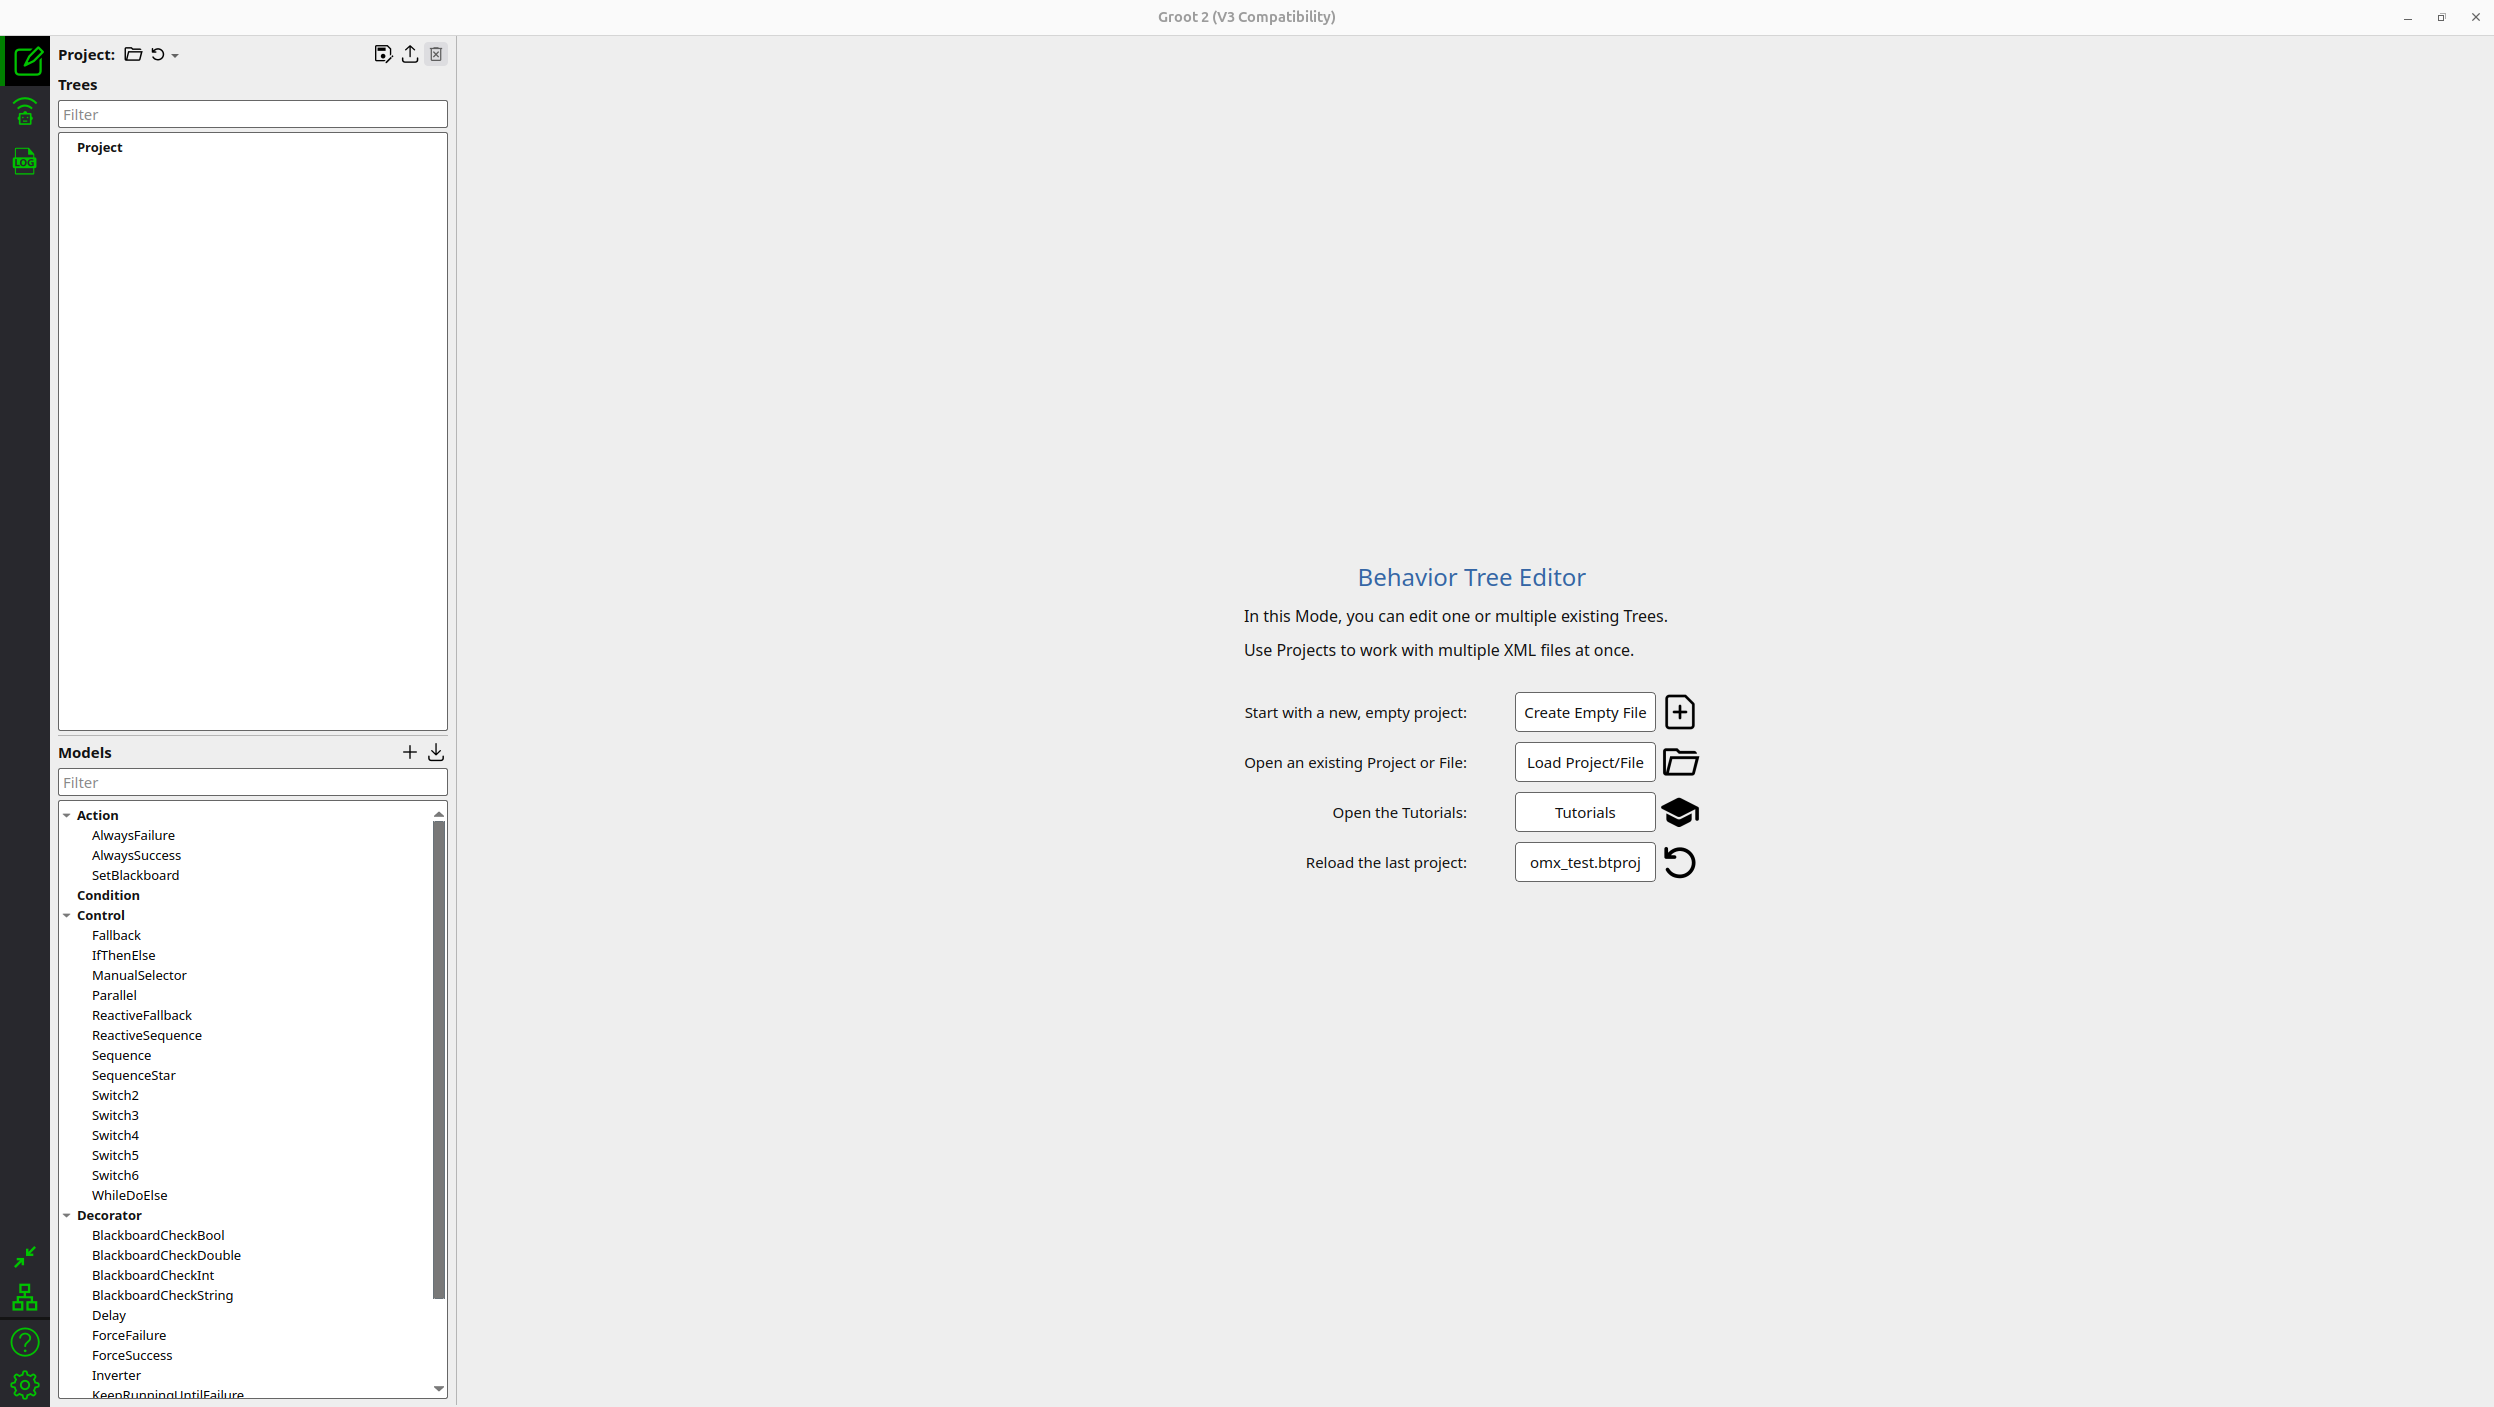
When you run the above command, the Groot 2 main window will appear:
AI Worker Behavior Tree Implementation
The AI Worker includes the physical_ai_bt ROS 2 package, which provides a complete Python-based behavior tree system specifically designed for robotic manipulation and navigation tasks.
INFO
This guide assumes the AI Worker software is installed at ~/physical_ai_tools/. If you installed it in a different location, replace ~/physical_ai_tools/ with your actual installation path throughout this guide.
Currently, behavior tree examples are provided for ffw_sg2_rev1 only. Examples for FFW-BG2, OMY, and OMX will be added in future updates.
Package Overview
physical_ai_bt/
├── physical_ai_bt/          # Python package
│   ├── actions/             # Action node implementations
│   │   ├── base_action.py   # Base classes for all nodes
│   │   ├── rotate.py        # Mobile base rotation
│   │   ├── move_arms.py     # Dual-arm control
│   │   ├── move_head.py     # Head joint control
│   │   └── move_lift.py     # Lift control
│   ├── controls/            # Control node implementations
│   │   └── sequence.py      # Sequential execution
│   ├── bt_node.py           # Main ROS 2 node
│   ├── bt_nodes_loader.py   # XML tree loader
│   └── blackboard.py        # Shared data storage
├── trees/                   # Example XML files
└── bt_bringup/              # Launch files and configs
Available Nodes
The AI Worker provides several built-in nodes that you can use in Groot 2.
INFO
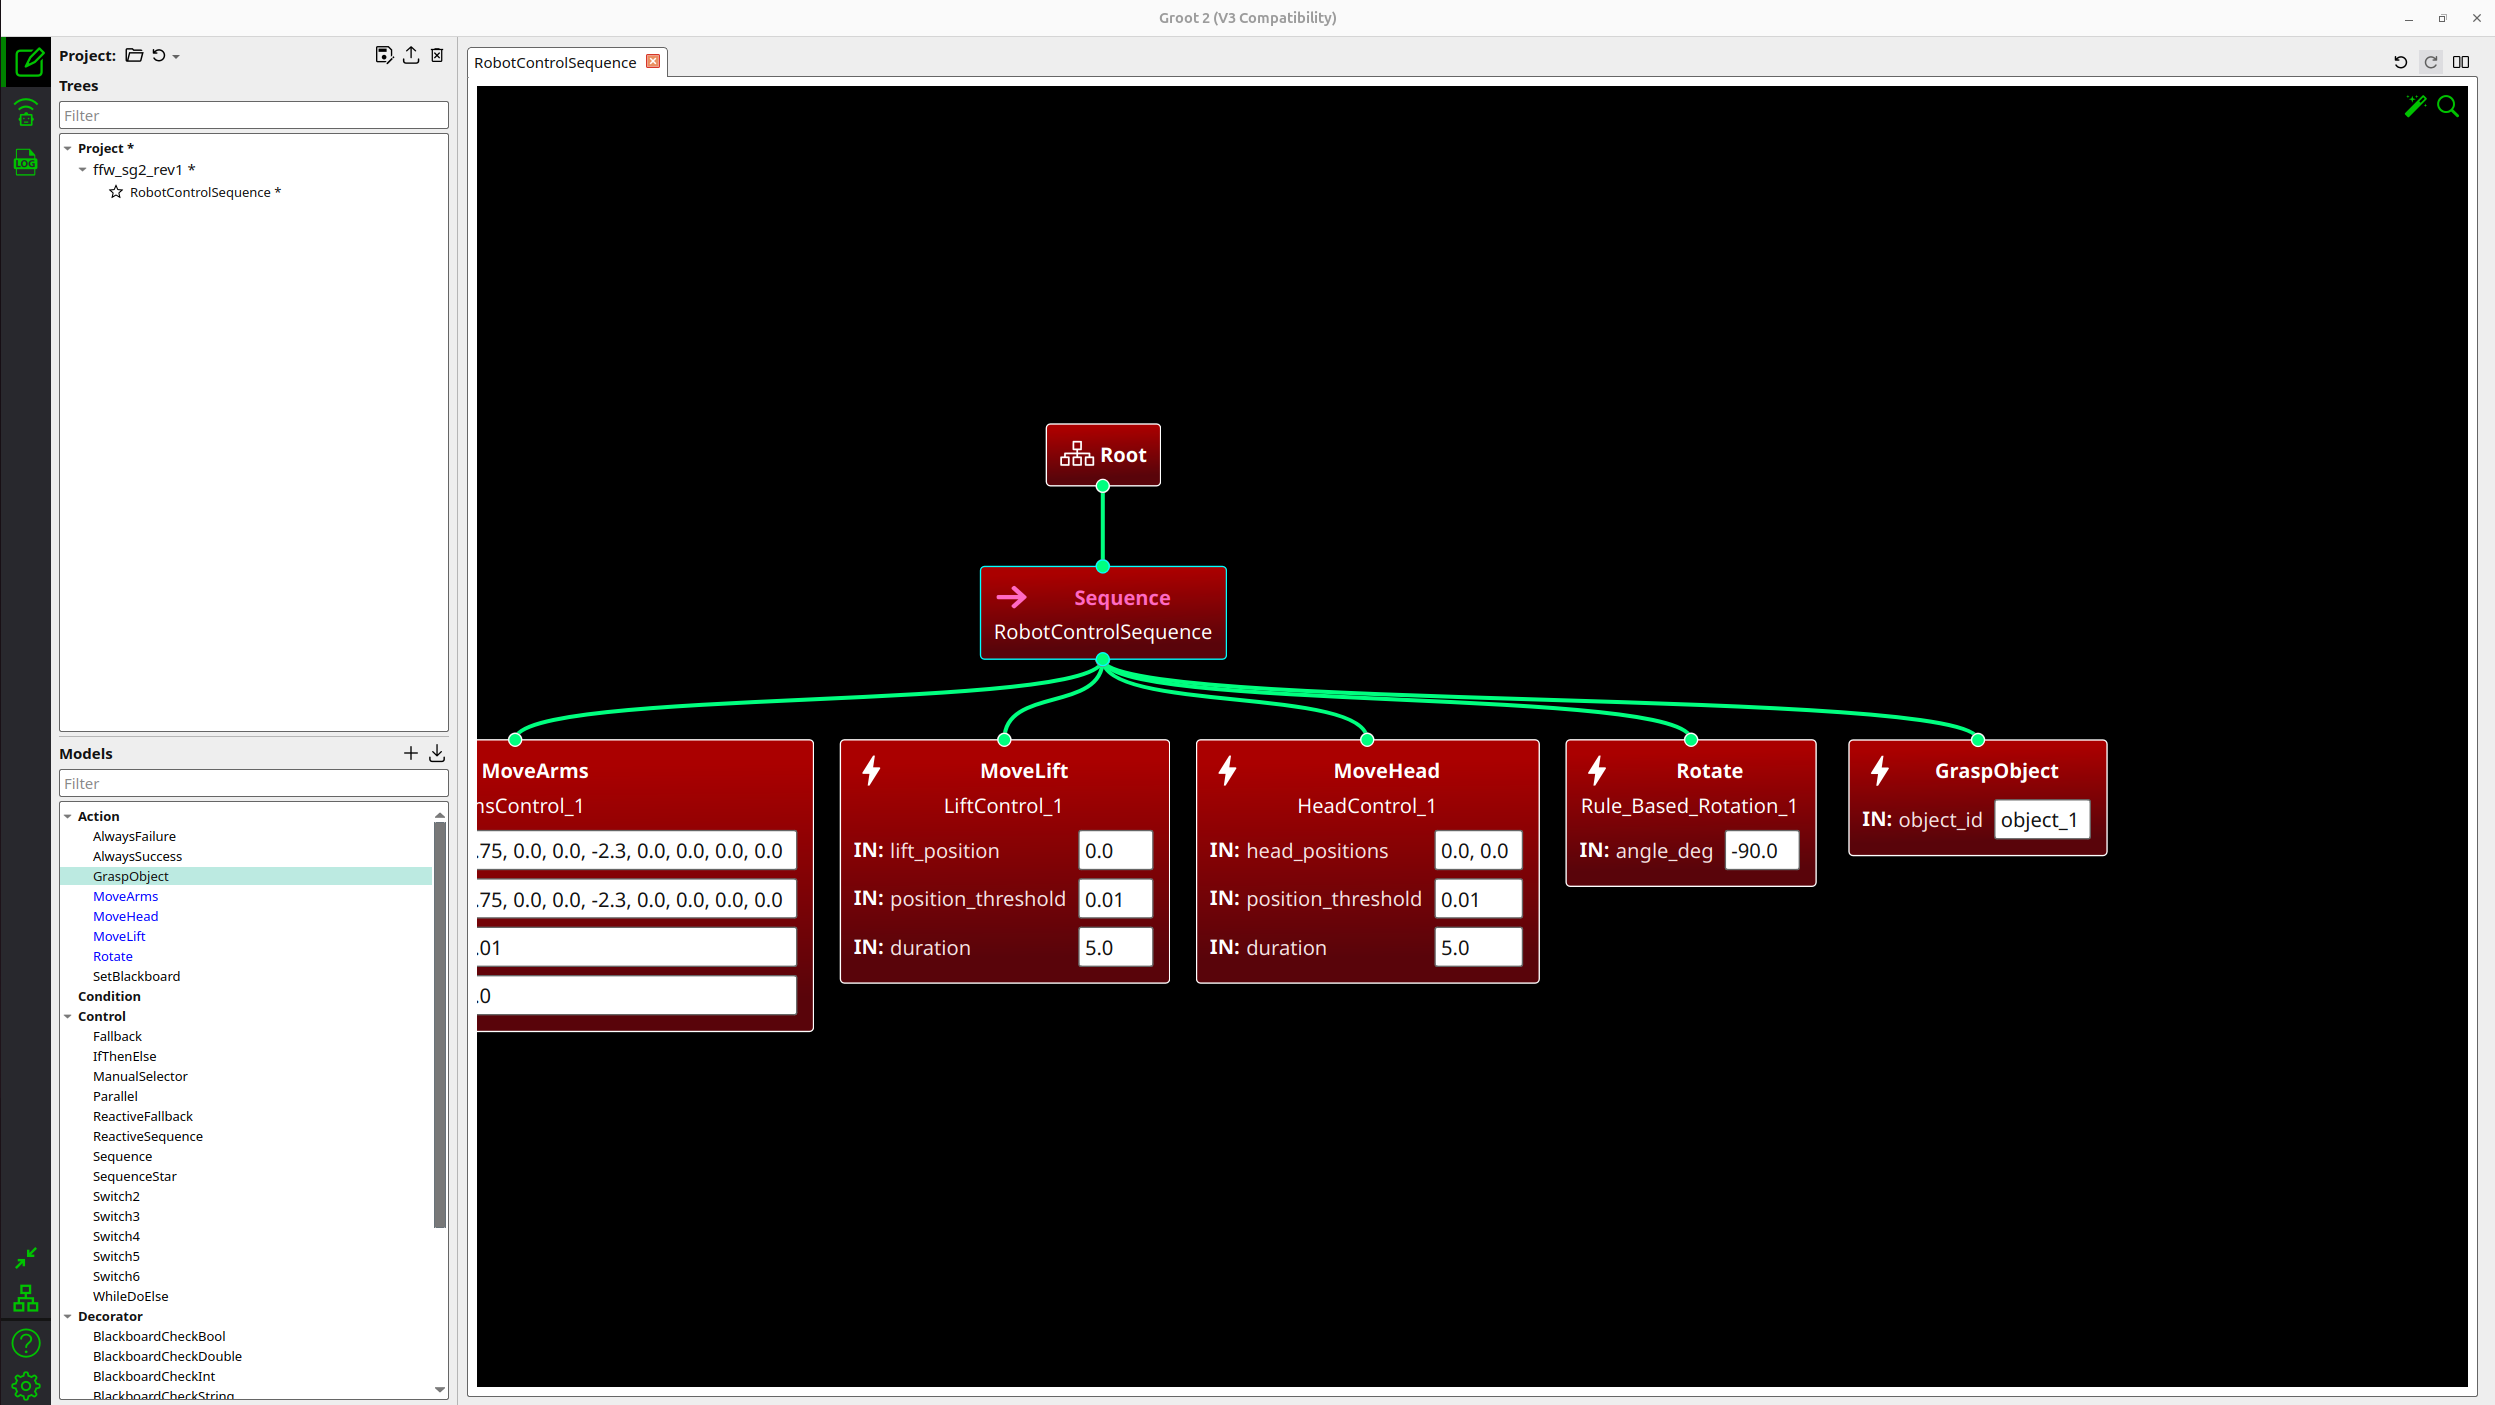
An example behavior tree is provided in ~/physical_ai_tools/physical_ai_bt/trees/ffw_sg2_rev1.xml. You can open this file in Groot 2 to see how the built-in nodes are used to create a complete robot control sequence.
When you open this file in Groot 2, you will see the tree structure as shown below:
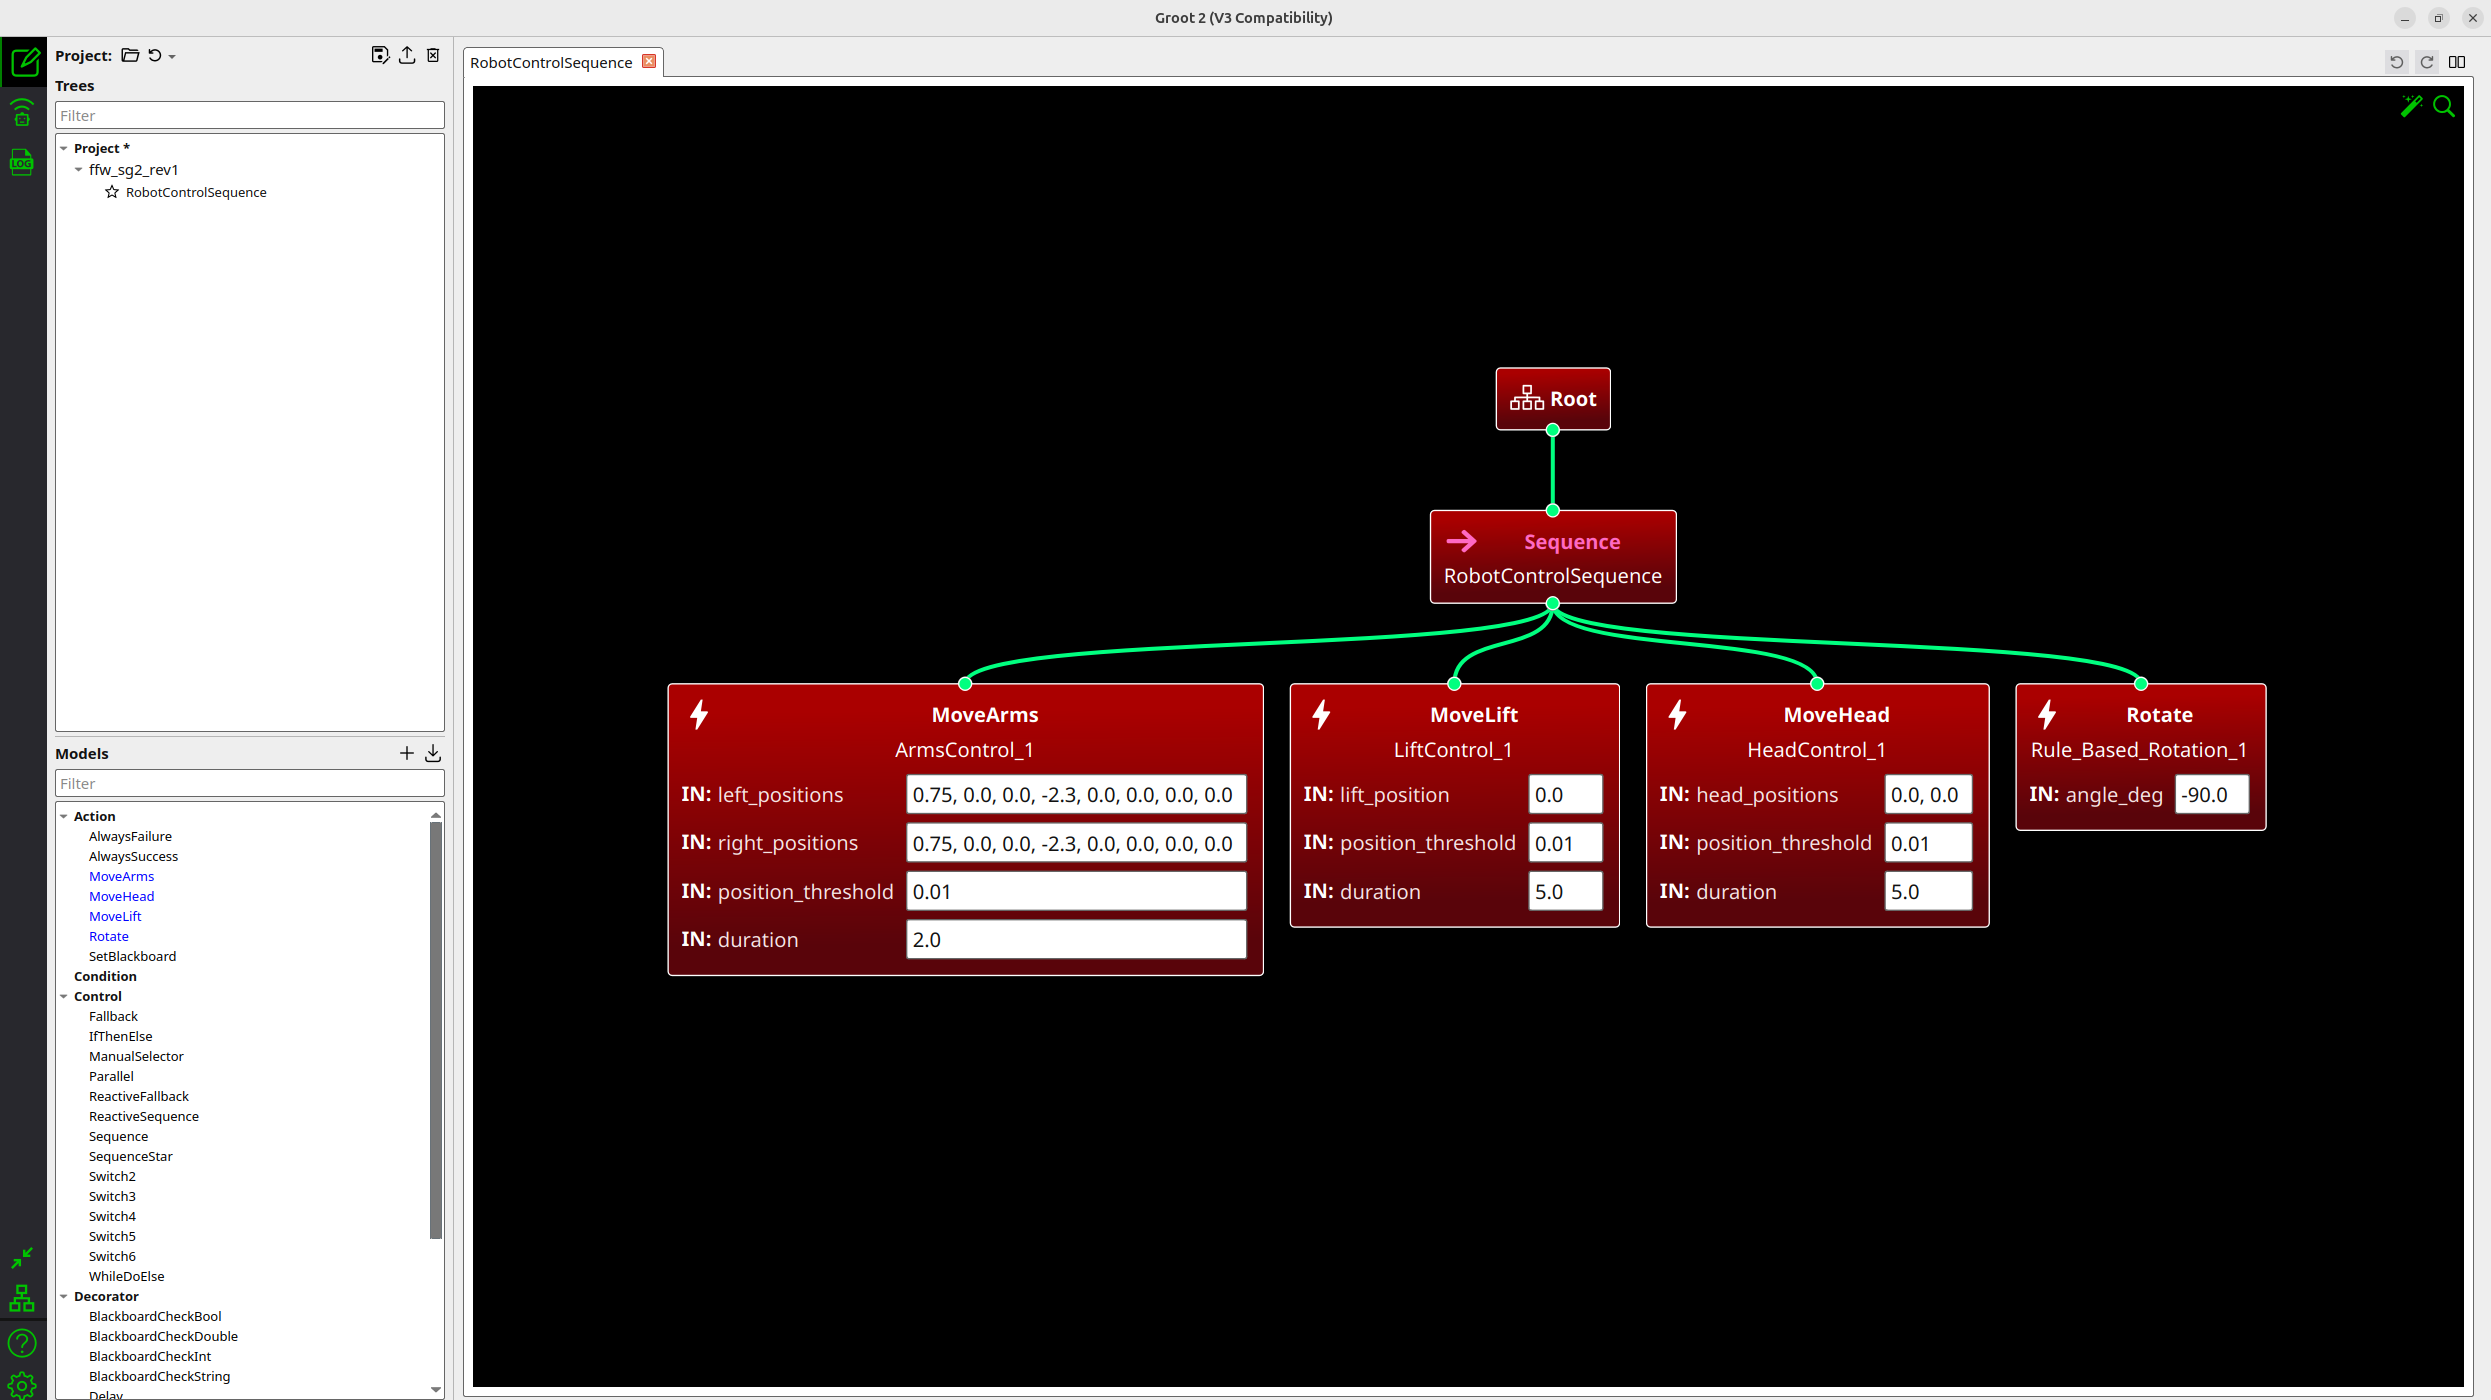
Control Nodes
1. Sequence
- Executes children sequentially from left to right
Action Nodes
1. Rotate
- Rotates the mobile base by a specified angle
- Parameters:
angle_deg: Target rotation in degrees (positive = CCW, negative = CW)
2. MoveArms
- Controls both arms simultaneously using trajectory commands
- Parameters:
left_positions: 8 joint positions for left armright_positions: 8 joint positions for right armduration: Trajectory execution time in secondsposition_threshold: Position tolerance for completion
3. MoveHead
- Controls head joint positions
- Parameters:
head_positions: Target positions for head jointsduration: Trajectory execution time in secondsposition_threshold: Position tolerance for completion
4. MoveLift
- Controls the lift mechanism
- Parameters:
lift_position: Target lift positionduration: Trajectory execution time in secondsposition_threshold: Position tolerance for completion
Extensibility
The behavior tree system is fully extensible. You can create and add your own custom nodes to suit your application needs:
- Custom Action Nodes: Implement specific robot behaviors (e.g., GraspObject, OpenDoor, ScanEnvironment)
- Custom Control Nodes: Create specialized control flow patterns (e.g., Fallback, Parallel, ReactiveSequence)
- Custom Decorator Nodes: Add node modifiers (e.g., Retry, Timeout, Inverter, ForceSuccess)
- Custom Condition Nodes: Define state checks and preconditions (e.g., IsBatteryLow, IsObjectVisible)
See the Creating Custom Nodes section below for detailed implementation instructions.
Creating Behavior Trees with Groot 2
Creating a complete behavior tree involves two main steps: implementing the Python nodes and designing the tree structure in Groot 2.
Step 1: Implement Custom Python Nodes
Before creating your tree in Groot 2, you need to implement the actual behavior logic in Python.
INFO
Depending on the node type, place your custom Python files in the appropriate directory:
- Action Nodes:
~/physical_ai_tools/physical_ai_bt/physical_ai_bt/actions/ - Control Nodes:
~/physical_ai_tools/physical_ai_bt/physical_ai_bt/controls/ - Decorator Nodes:
~/physical_ai_tools/physical_ai_bt/physical_ai_bt/decorators/(create if needed) - Condition Nodes:
~/physical_ai_tools/physical_ai_bt/physical_ai_bt/conditions/(create if needed)
1. Custom Node
Create a new Python file for your custom action in the actions directory:
# Example: grasp_object.py
from physical_ai_bt.actions.base_action import BaseAction, NodeStatus
from typing import TYPE_CHECKING

if TYPE_CHECKING:
    from rclpy.node import Node

class GraspObject(BaseAction):

    def __init__(
        self,
        node: 'Node',
        object_id: str = "object_1",
    ):
        super().__init__(node, name='GraspObject')
        self.object_id = object_id

        # Initialize your ROS 2 publishers/subscribers here

        self.log_info(f'Initialized with object_id={object_id}')

    def tick(self) -> NodeStatus:
        self.log_info(f'Attempting to grasp {self.object_id}')

        # Implement your grasping logic here
        # For this example, we'll simulate success
        return NodeStatus.SUCCESS

    def reset(self):
        super().reset()
        # Reset any internal state if needed
2. Register Your Custom Nodes
Add your nodes to the TreeLoader class:
File location: ~/physical_ai_tools/physical_ai_bt/physical_ai_bt/bt_nodes_loader.py
from physical_ai_bt.actions import GraspObject

# In TreeLoader.__init__()
self.action_types: Dict[str, Type[BaseAction]] = {
    'Rotate': Rotate,
    'MoveArms': MoveArms,
    'GraspObject': GraspObject,      # Add your custom action
    # ...
}

# For condition, control, decorator nodes, add a similar registry if needed
Step 2: Define Node Models in XML
Create an XML file that defines your custom nodes for Groot 2.
File location: ~/physical_ai_tools/physical_ai_bt/trees/your_custom_tree.xml
TIP
The TreeNodesModel section tells Groot 2 which nodes are available and what parameters they accept. This must match your Python implementation.
<?xml version="1.0" encoding="UTF-8"?>
<root BTCPP_format="3" main_tree_to_execute="MainTree">

  <BehaviorTree ID="MainTree">
    <!-- Your tree structure goes here -->
  </BehaviorTree>

  <!-- Node model definitions for Groot 2 -->
  <TreeNodesModel>
    <!-- Your custom action node -->
    <Action ID="GraspObject">
      <input_port name="object_id" default="object_1"/>
    </Action>
  </TreeNodesModel>
</root>
Step 3: Design Your Tree in Groot 2
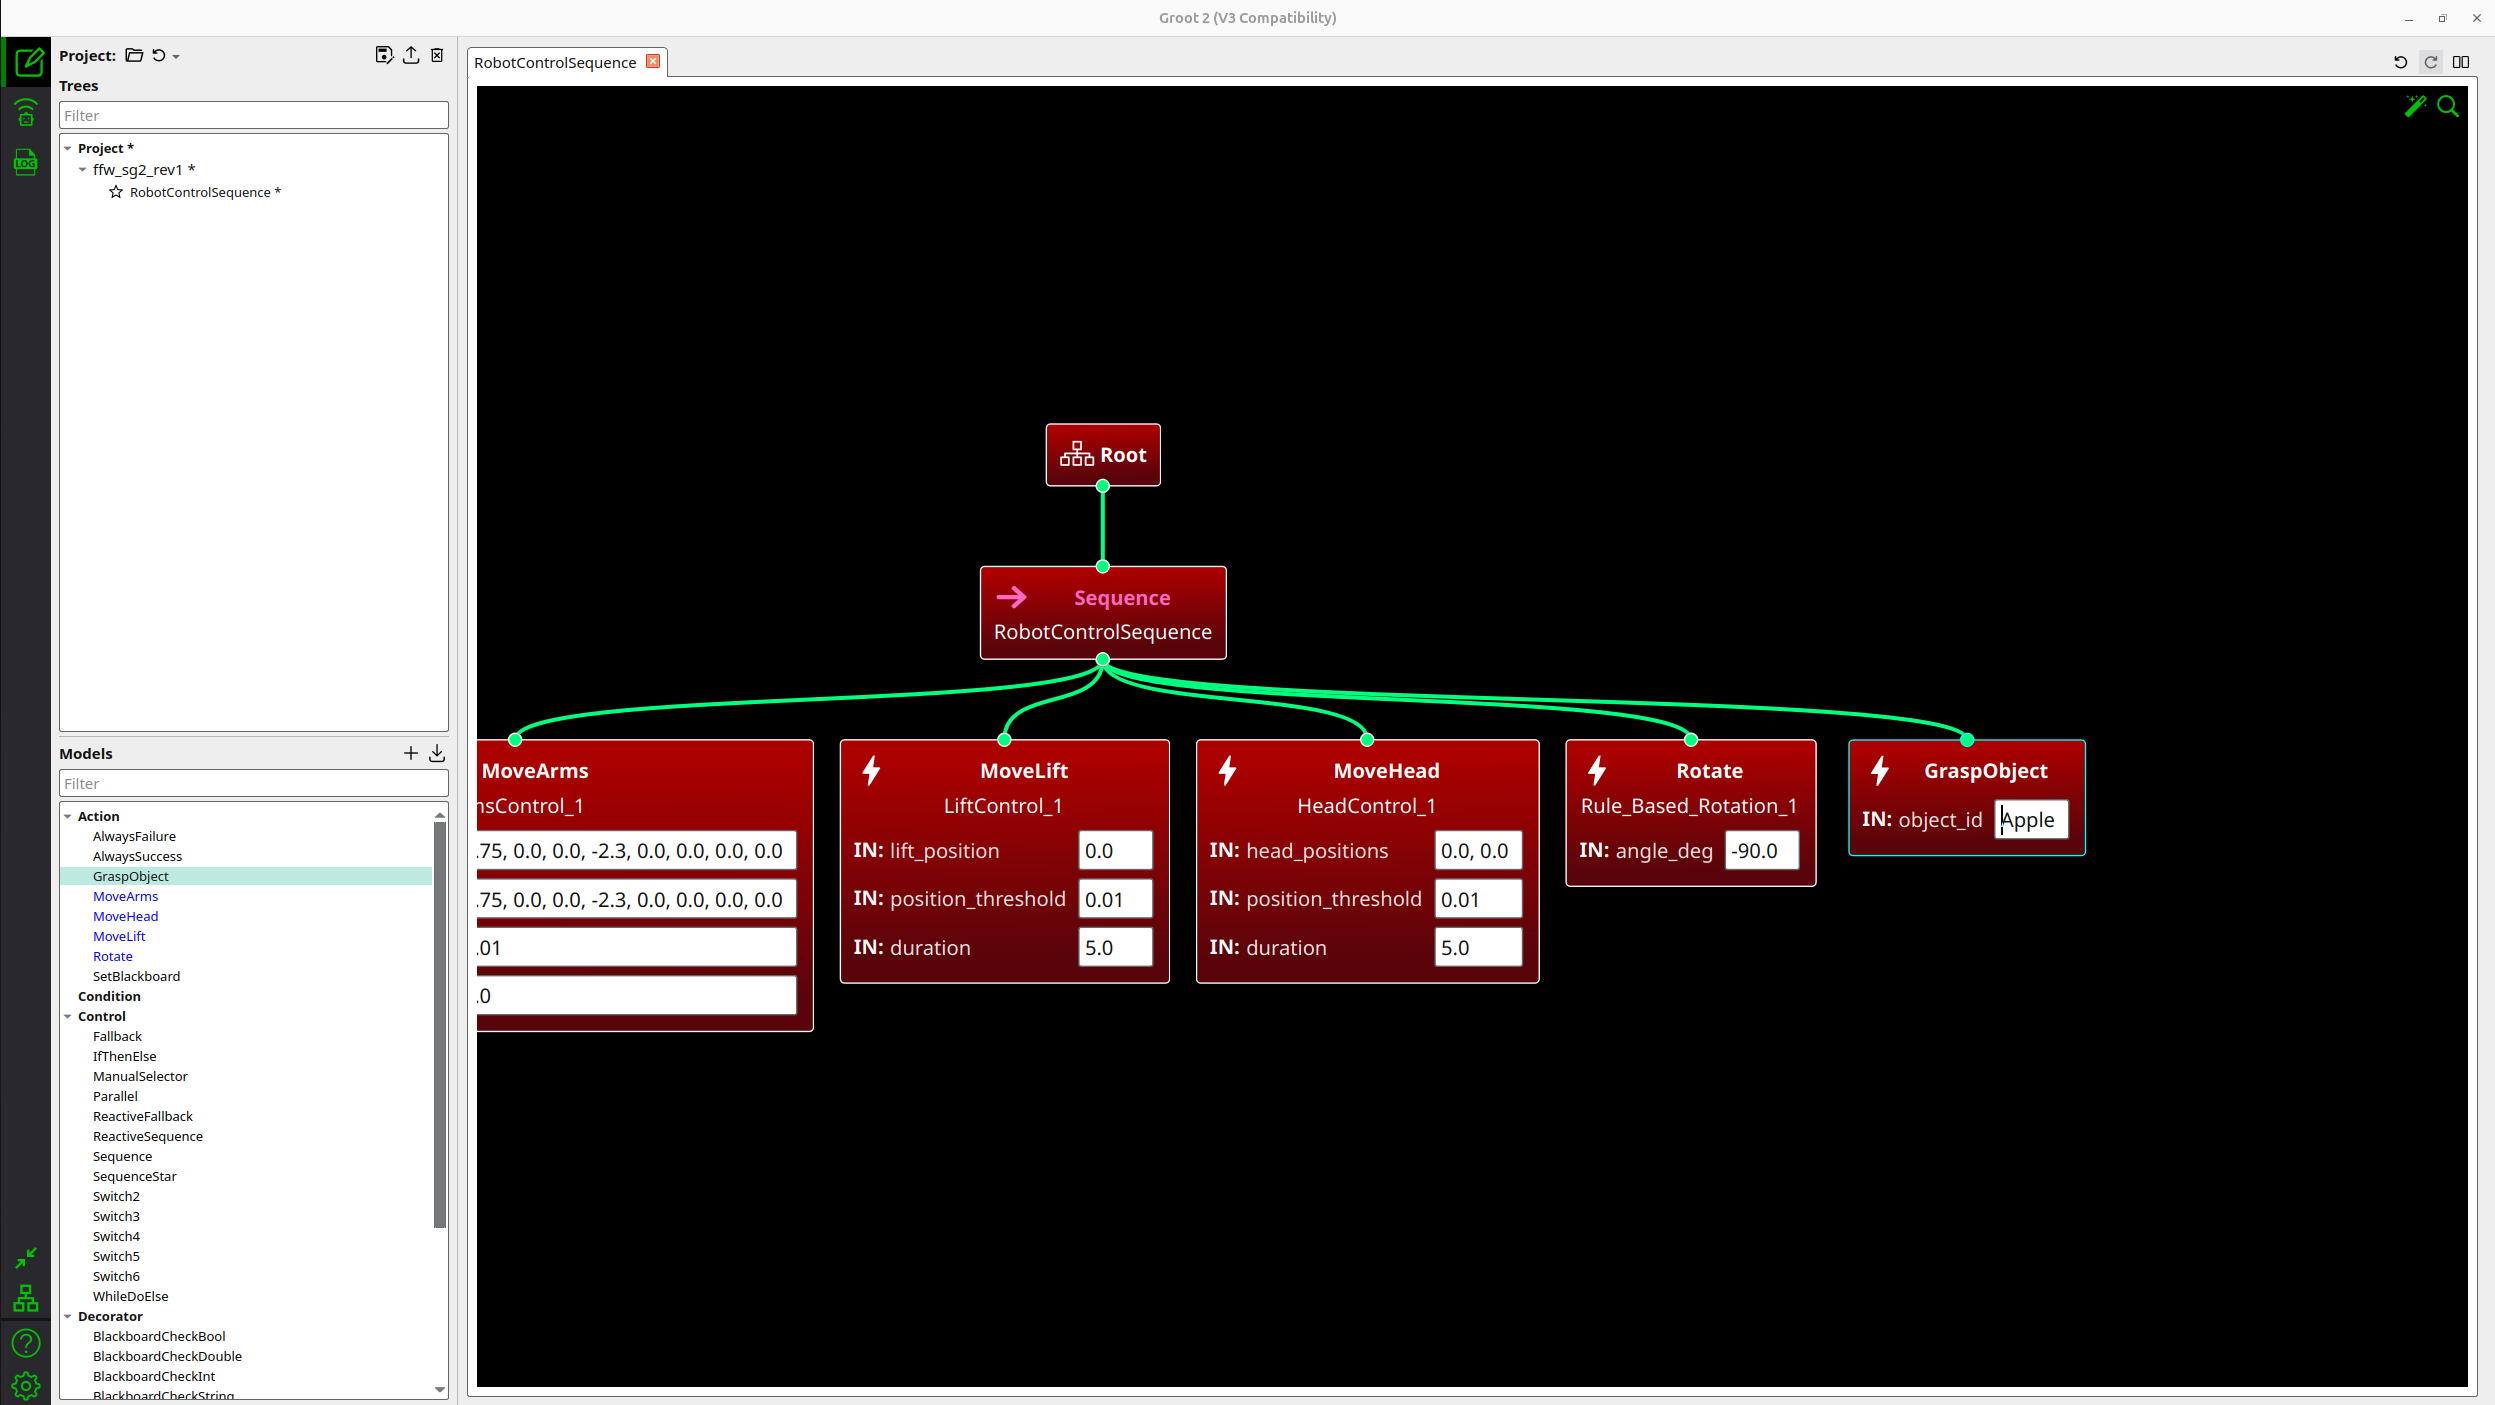
Open the XML file in Groot 2. As shown in the image below, you can see that
GraspObjecthas been added to the Action nodes in the bottom-left palette.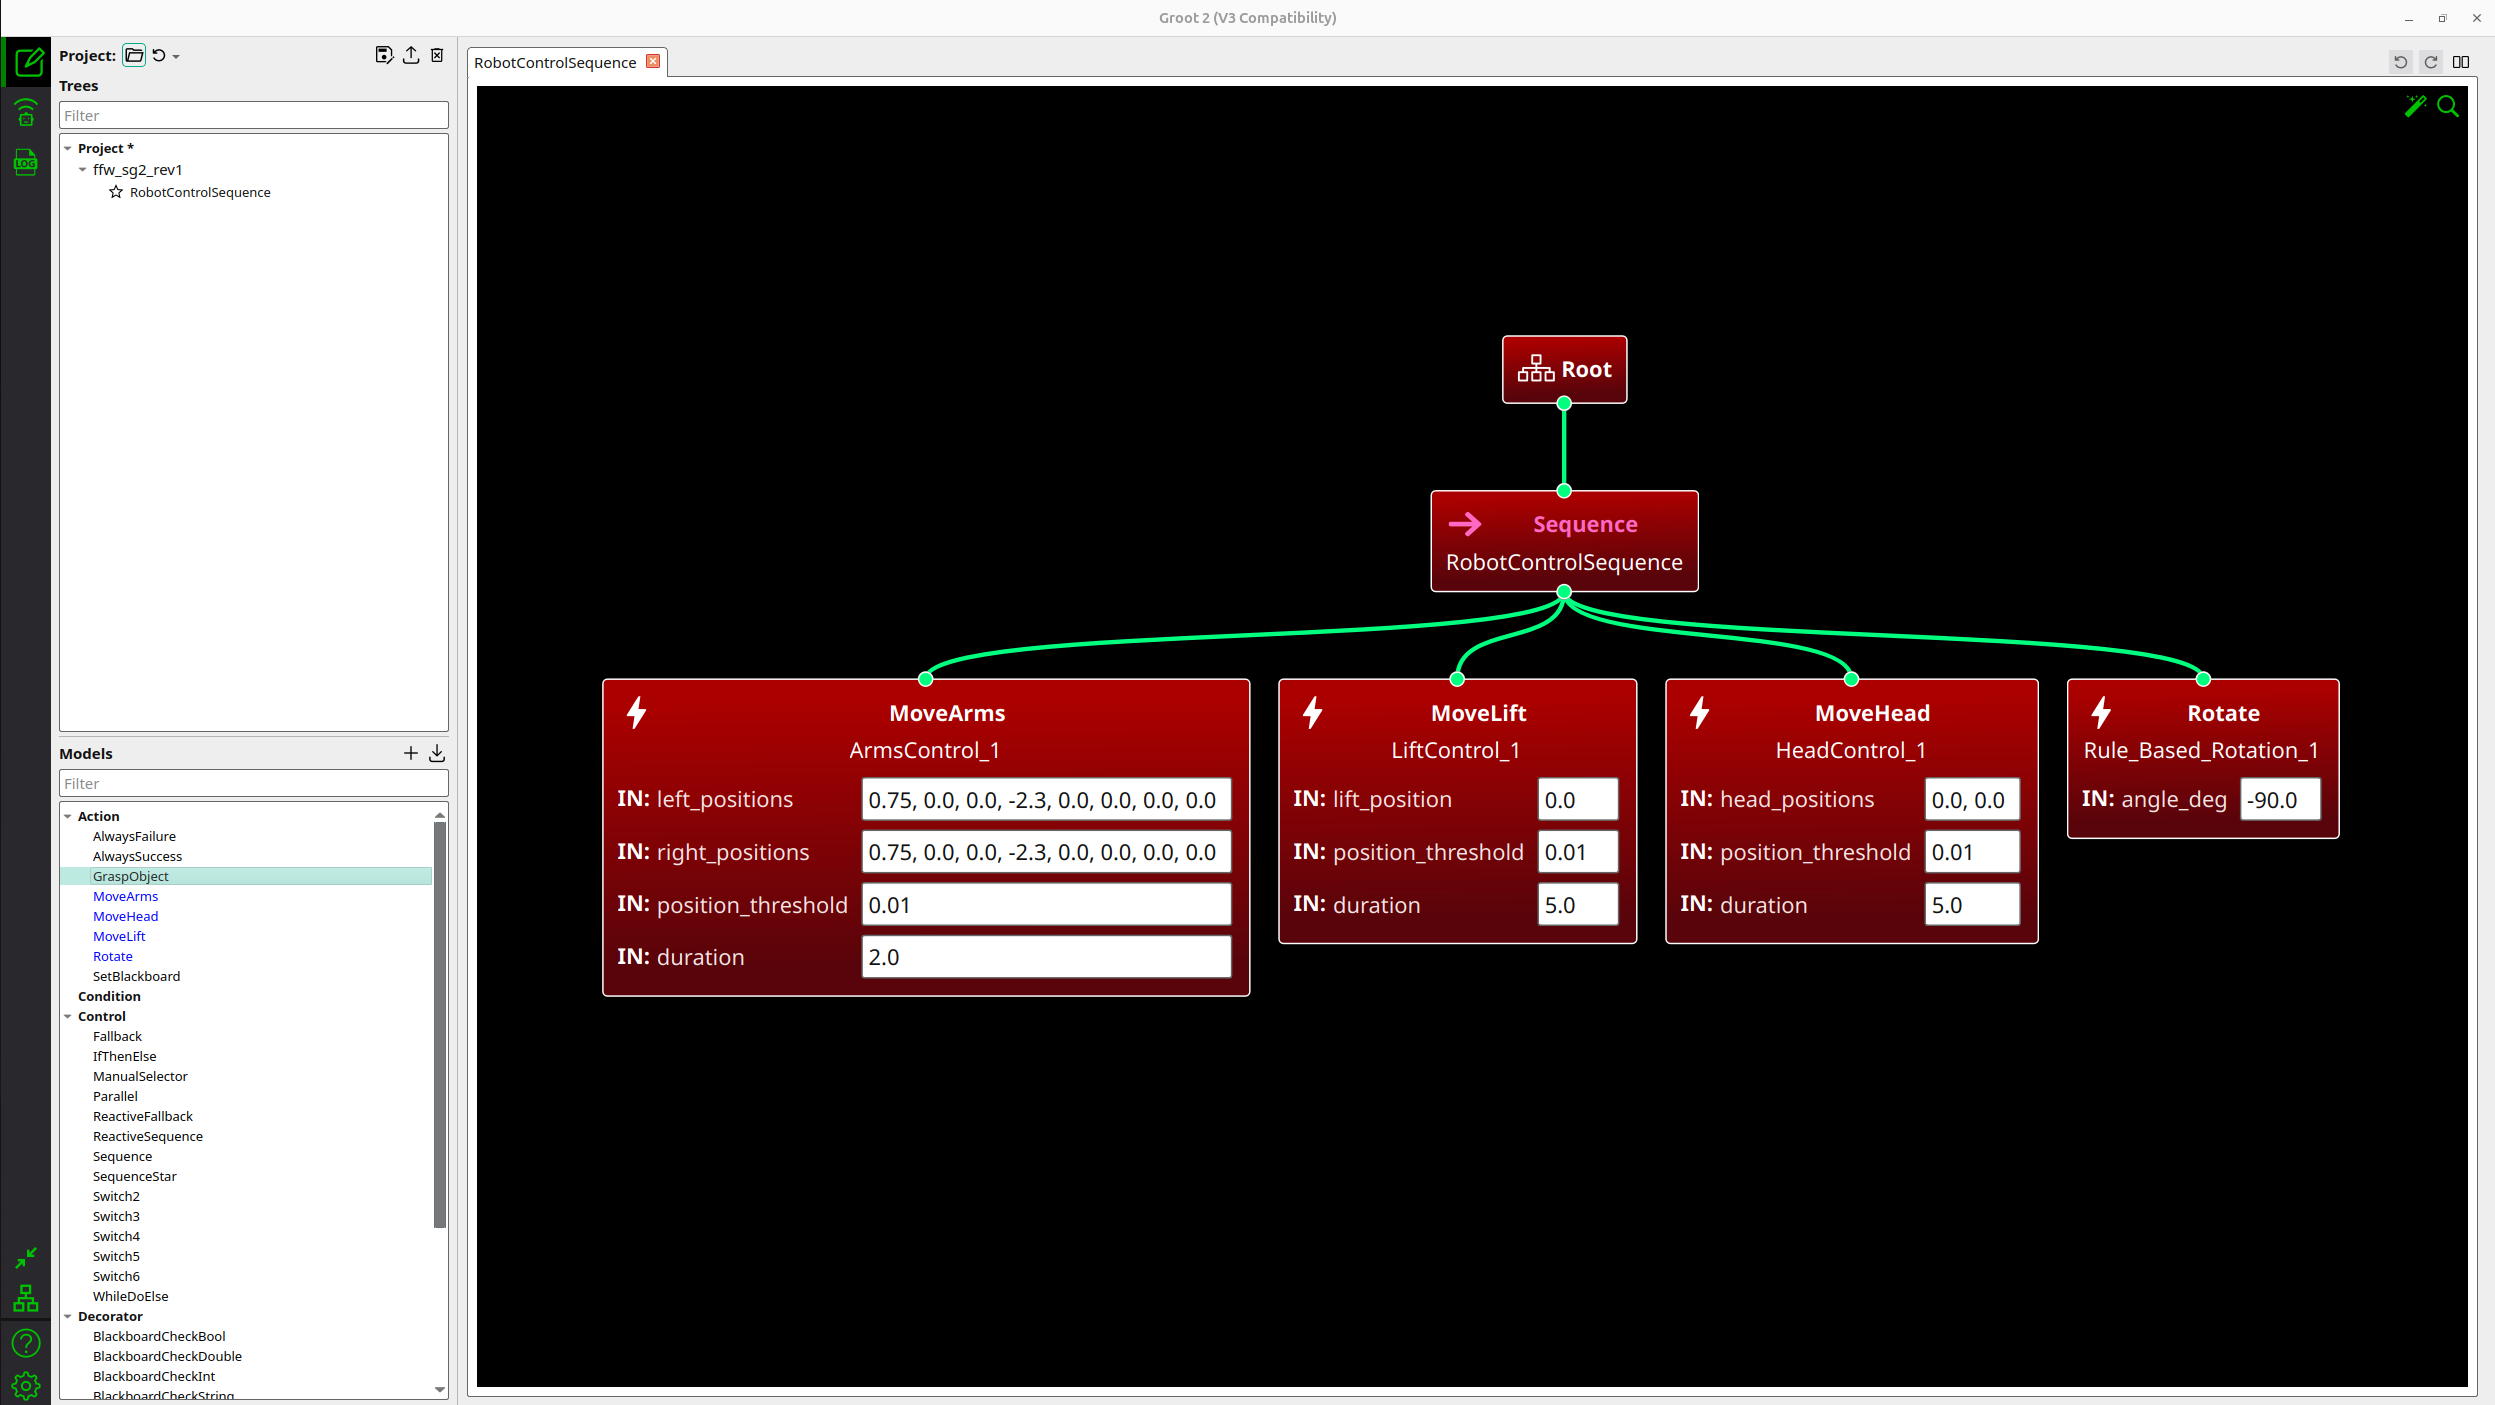
Add nodes from the palette to the canvas. Click and drag the desired action from the palette and drop it onto the canvas.
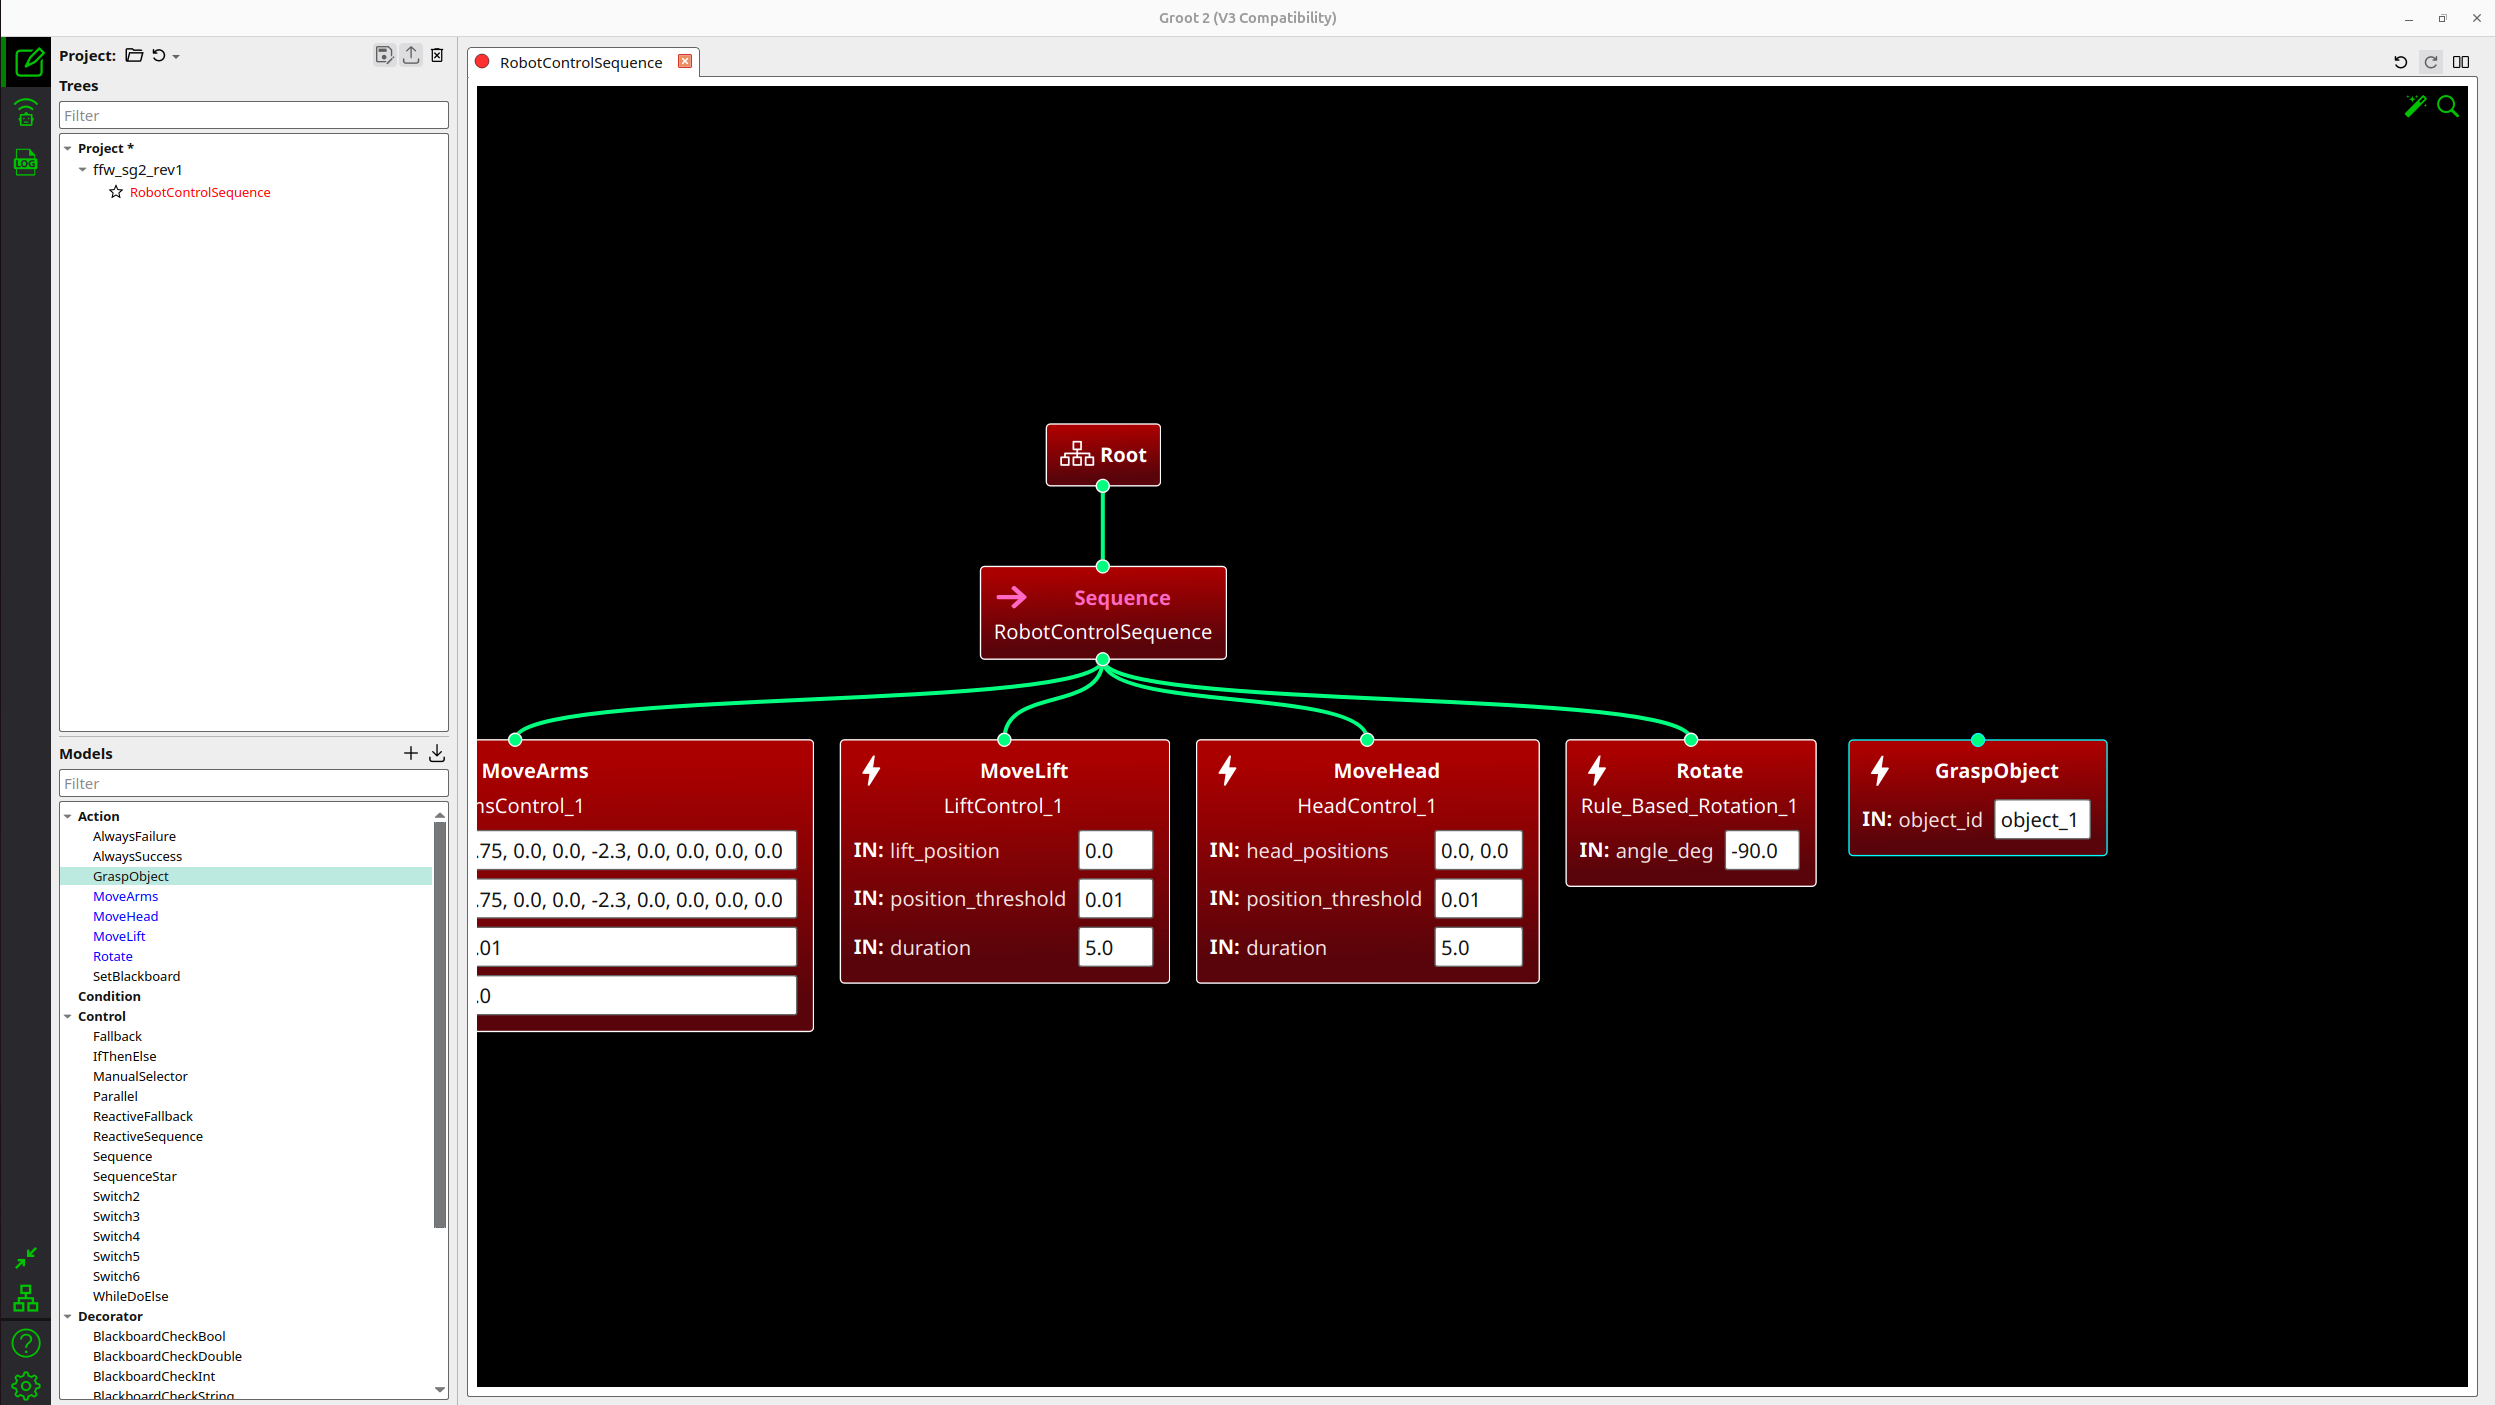
Connect nodes to build your behavior hierarchy.
Set parameters for each action node.
Save the XML file.
Step 4: Example - Complete Custom Tree
Here is a complete example using both built-in and custom nodes:
<?xml version="1.0" encoding="UTF-8"?>
<root BTCPP_format="3" main_tree_to_execute="PickAndPlace">
  <BehaviorTree ID="PickAndPlace">
    <Sequence name="PickAndPlace">

      <!-- Move arms to pre-grasp position -->
      <MoveArms name="PreGrasp"
        left_positions="0.75, 0.0, 0.0, -2.3, 0.0, 0.0, 0.0, 0.0"
        right_positions="0.75, 0.0, 0.0, -2.3, 0.0, 0.0, 0.0, 0.0"
        duration="2.0"/>

      <!-- Grasp the object -->
      <GraspObject name="Grasp" object_id="cube_1"/>

      <!-- Rotate to target location -->
      <Rotate name="RotateToTarget" angle_deg="90.0"/>

    </Sequence>
  </BehaviorTree>

  <TreeNodesModel>
    <!-- Built-in nodes -->
    <Action ID="Rotate">
      <input_port name="angle_deg" default="90.0"/>
    </Action>
    <Action ID="MoveArms">
      <input_port name="left_positions" default="0.0,0.0,0.0,0.0,0.0,0.0,0.0,0.0"/>
      <input_port name="right_positions" default="0.0,0.0,0.0,0.0,0.0,0.0,0.0,0.0"/>
      <input_port name="duration" default="2.0"/>
    </Action>

    <!-- Custom nodes -->
    <Action ID="GraspObject">
      <input_port name="object_id" default="object_1"/>
    </Action>
  </TreeNodesModel>
</root>
You have now completed the behavior tree design. Your custom tree is ready to run on the AI Worker. Proceed to the next section to learn how to launch and execute your behavior tree.
Running Behavior Trees on AI Worker
Prerequisites
Before running behavior trees, you need to launch the AI Worker's follower node first.
1. Launch the Follower
ros2 launch ffw_bringup ffw_sg2_follower_ai.launch.pyWait until the follower is fully initialized.
TIP
For more details on setting up and operating the AI Worker, refer to the Setup Overview and Operation Guide.
Launch the Behavior Tree Node
WARNING
The behavior tree will start executing immediately upon launch. Ensure the robot is in a safe position and the surrounding area is clear before running this command.
ros2 launch physical_ai_bt bt_node.launch.py robot_type:=ffw_sg2_rev1Configuration
The behavior tree node can be configured using parameters:
- robot_type: Robot model identifier (e.g.,
ffw_sg2_rev1,ffw_bg2_rev4) - tree_xml: Name of the XML file to load from the
trees/directory - tick_rate: Execution frequency in Hz (default: 30.0)
Example with custom tree file:
ros2 launch physical_ai_bt bt_node.launch.py \
  robot_type:=ffw_sg2_rev1 \
  tree_xml:=my_custom_tree.xml \
  tick_rate:=15.0