
VR Teleoperation
This guide explains how to set up and operate the AI Worker using a VR device. Currently, only the Meta Quest 3 is supported.
VR Teleoperation is compatible with all AI Worker models.
- Gripper Models:
BG2,SG2 - Hand Models:
BH5,SH5
For more information on the models, please refer to Product Models.
The VR setup process is identical for all models unless otherwise specified.
WARNING
Modify initial pose for safety.
The default initial pose for the AI Worker (arms straight down) is not ideal for VR, as VR teleoperation requires the hands to be within the camera's field of view. It is highly recommended to change the initial position to a "ready" pose (e.g., elbows bent 90° with hands forward). Refer to this Discord post for instructions on modifying the initial pose (a Discord account may be required).
VR Device Setup
1. Meta Horizon App (Developer Mode)
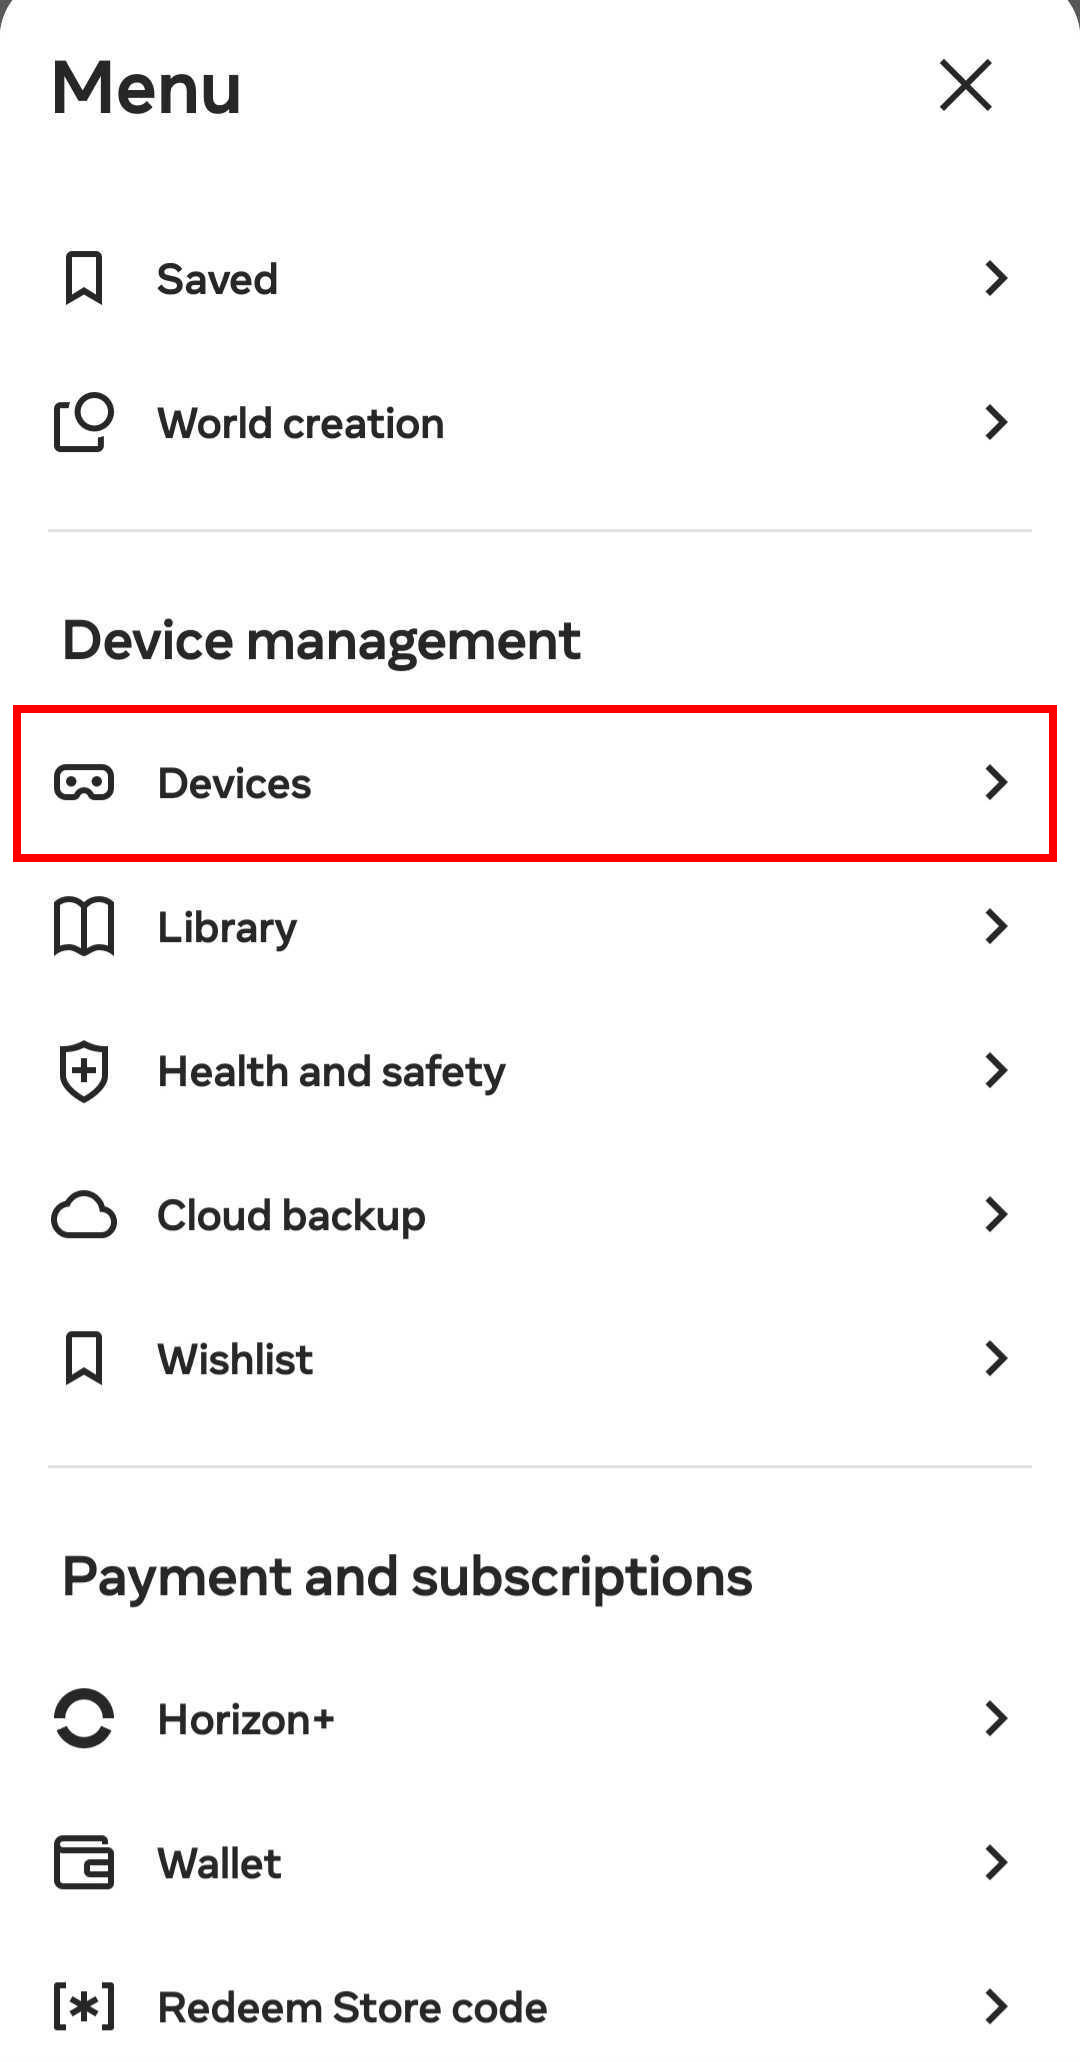
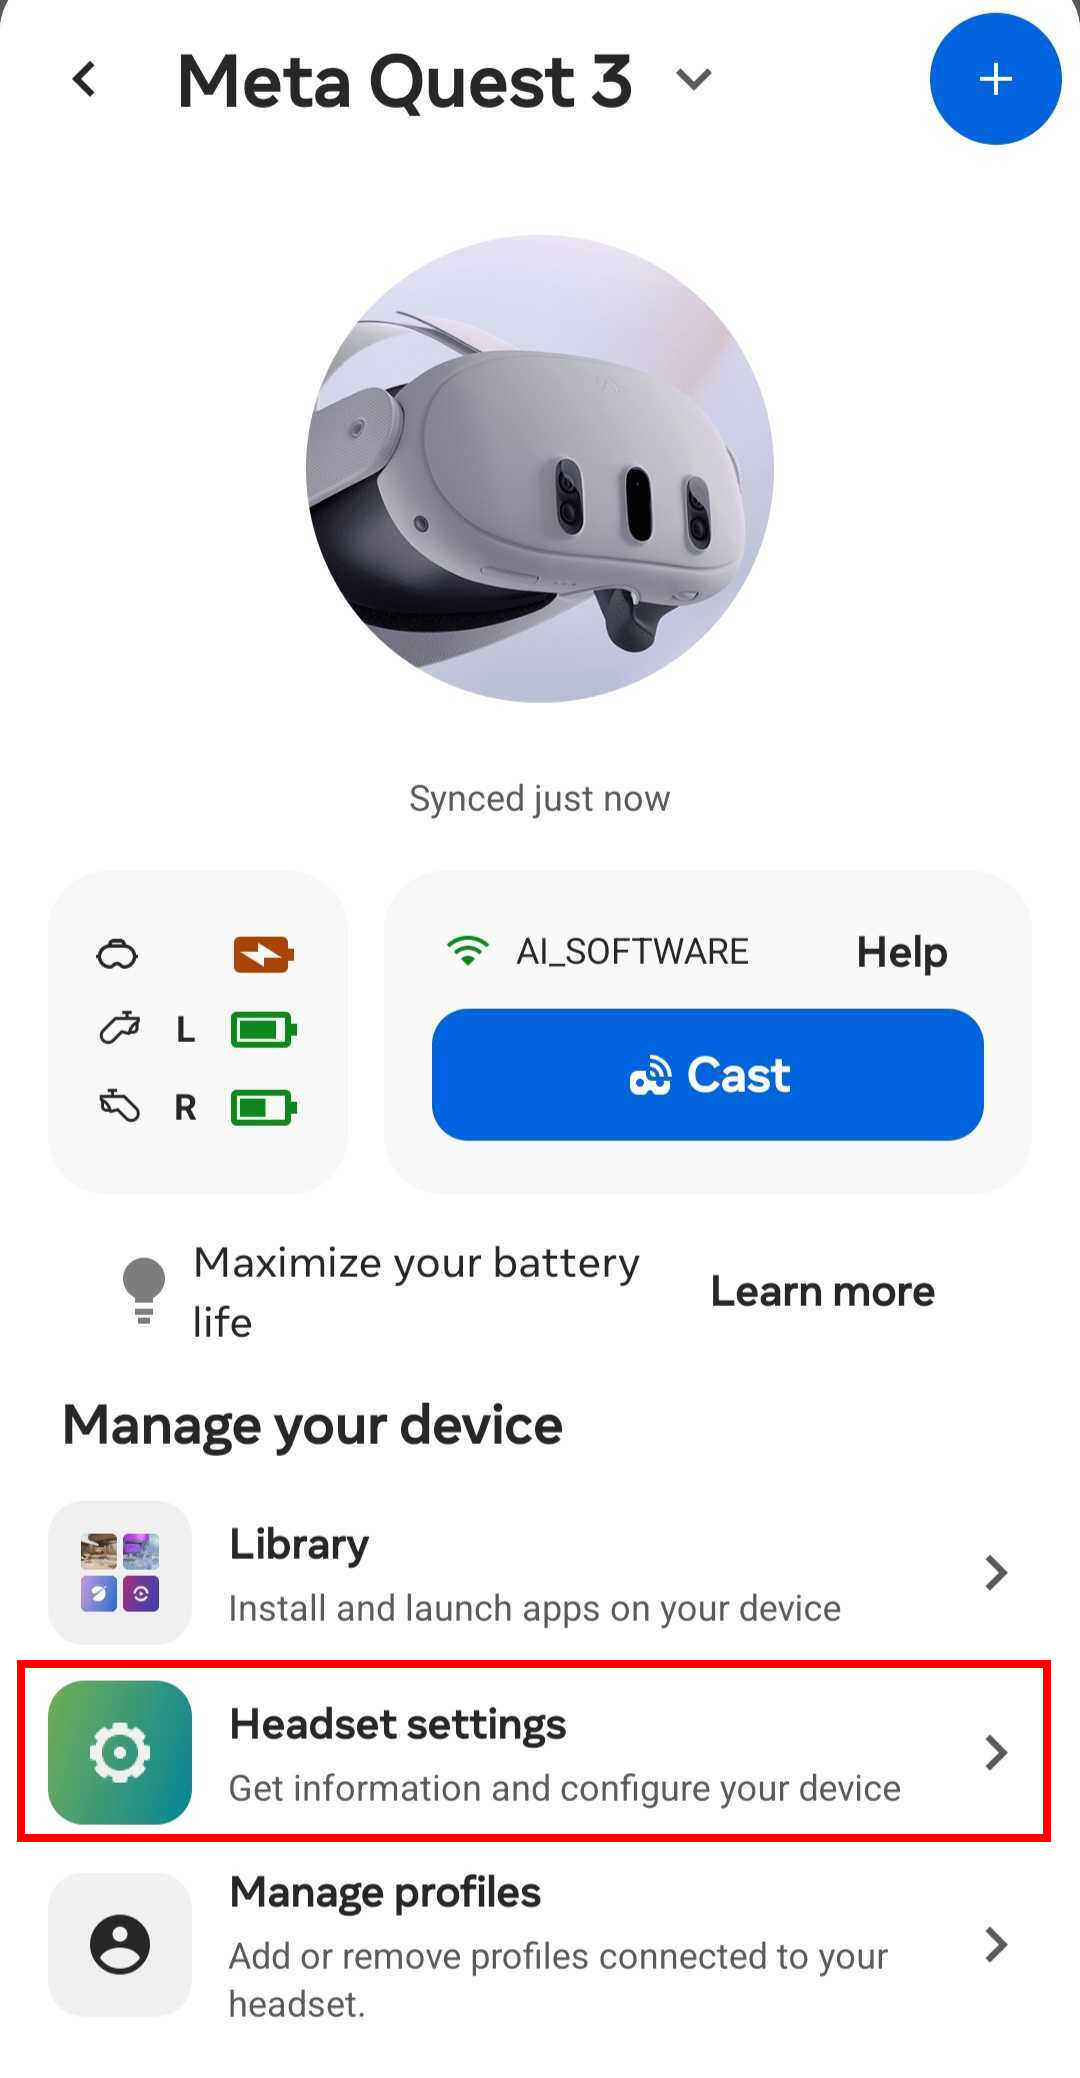
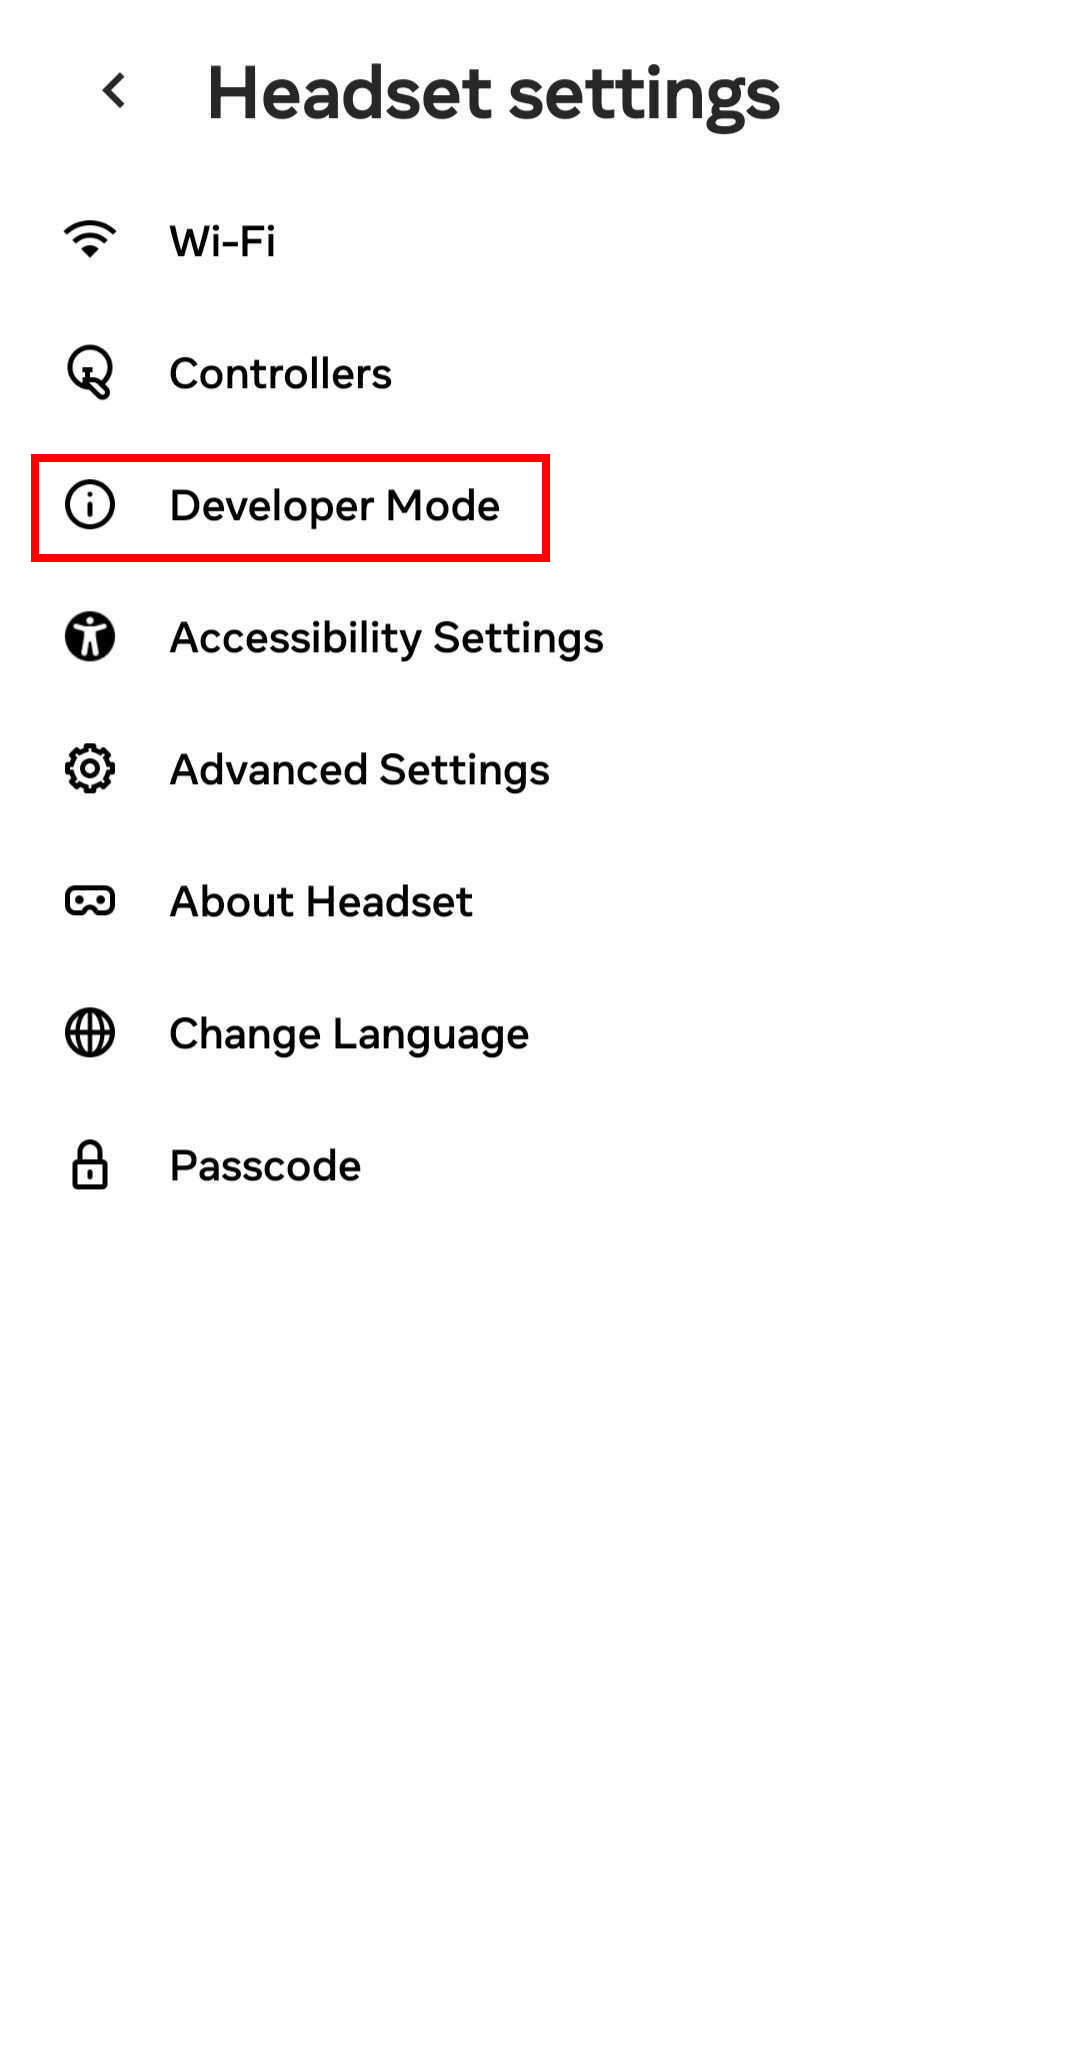
Enable Developer Mode via the Meta Horizon mobile app:
Menu → Device management → Devices → Headset settings → Developer Mode → On

2. On-headset settings
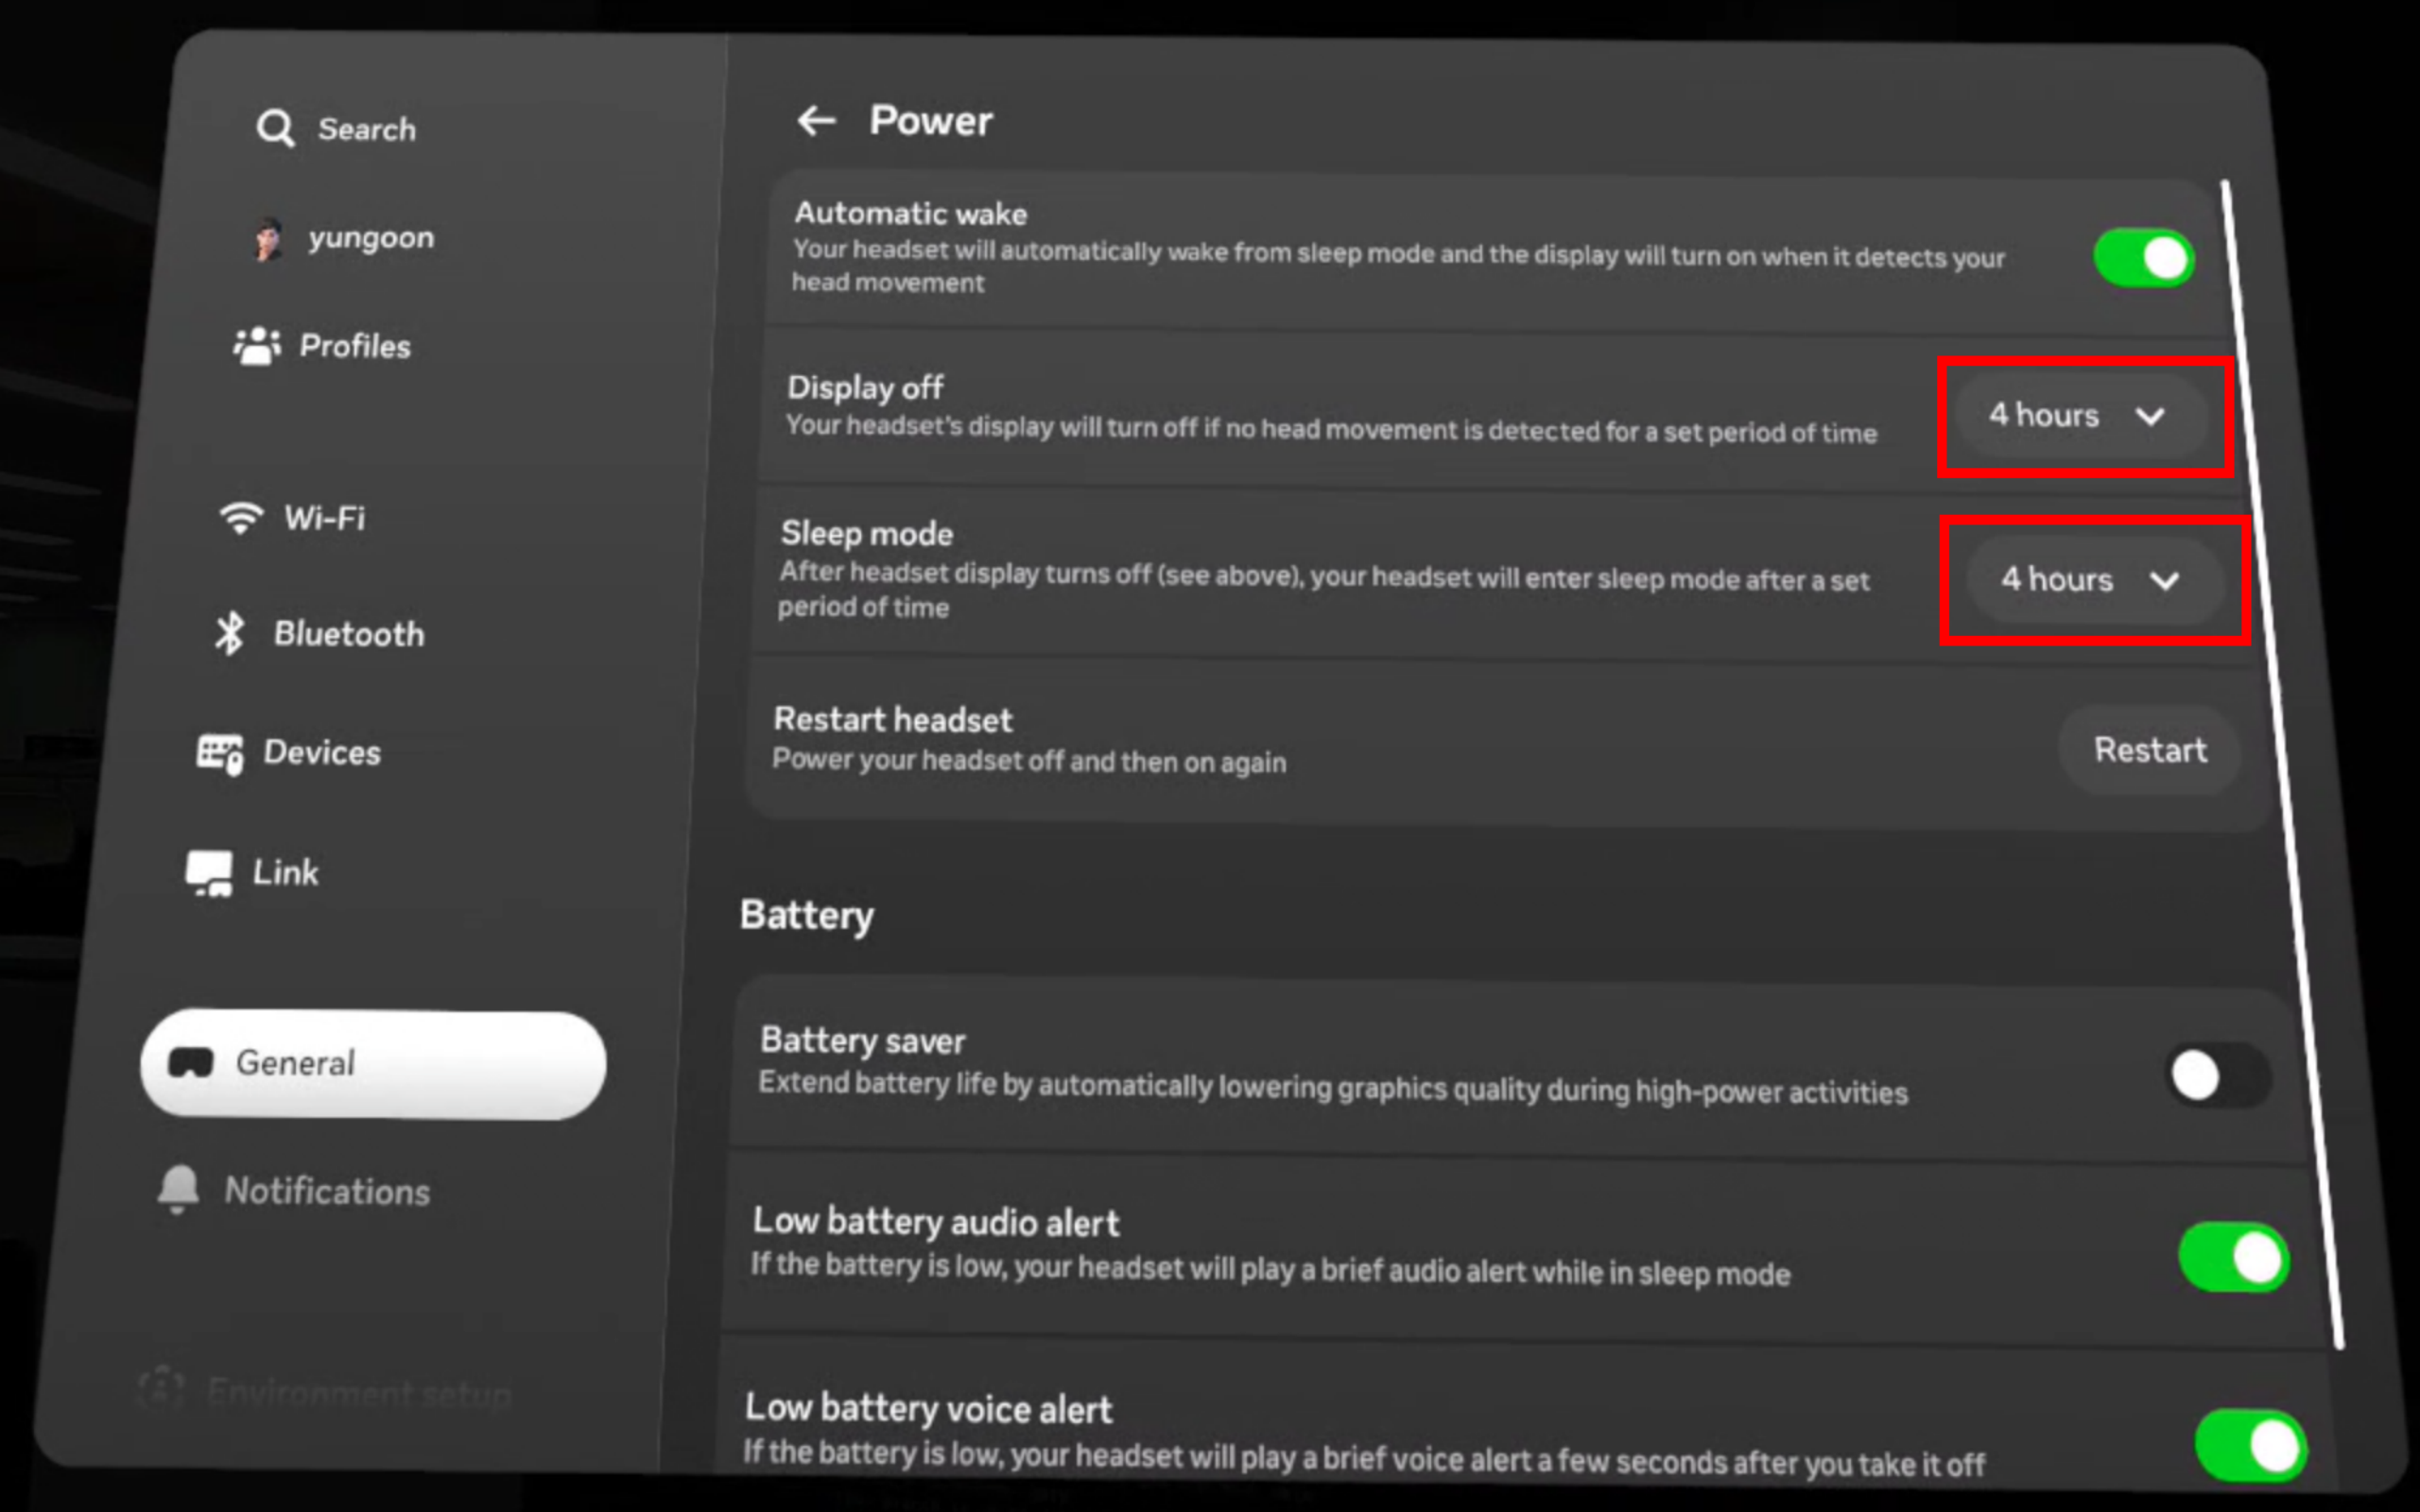
- Power / Sleep : Settings → General (use Power or Display depending on your firmware): set Display off and Sleep mode to 4 hours (or the longest option available) so the headset does not sleep during use.
- Play area : Settings → Environment setup → Boundary → Stationary boundary size → Large.
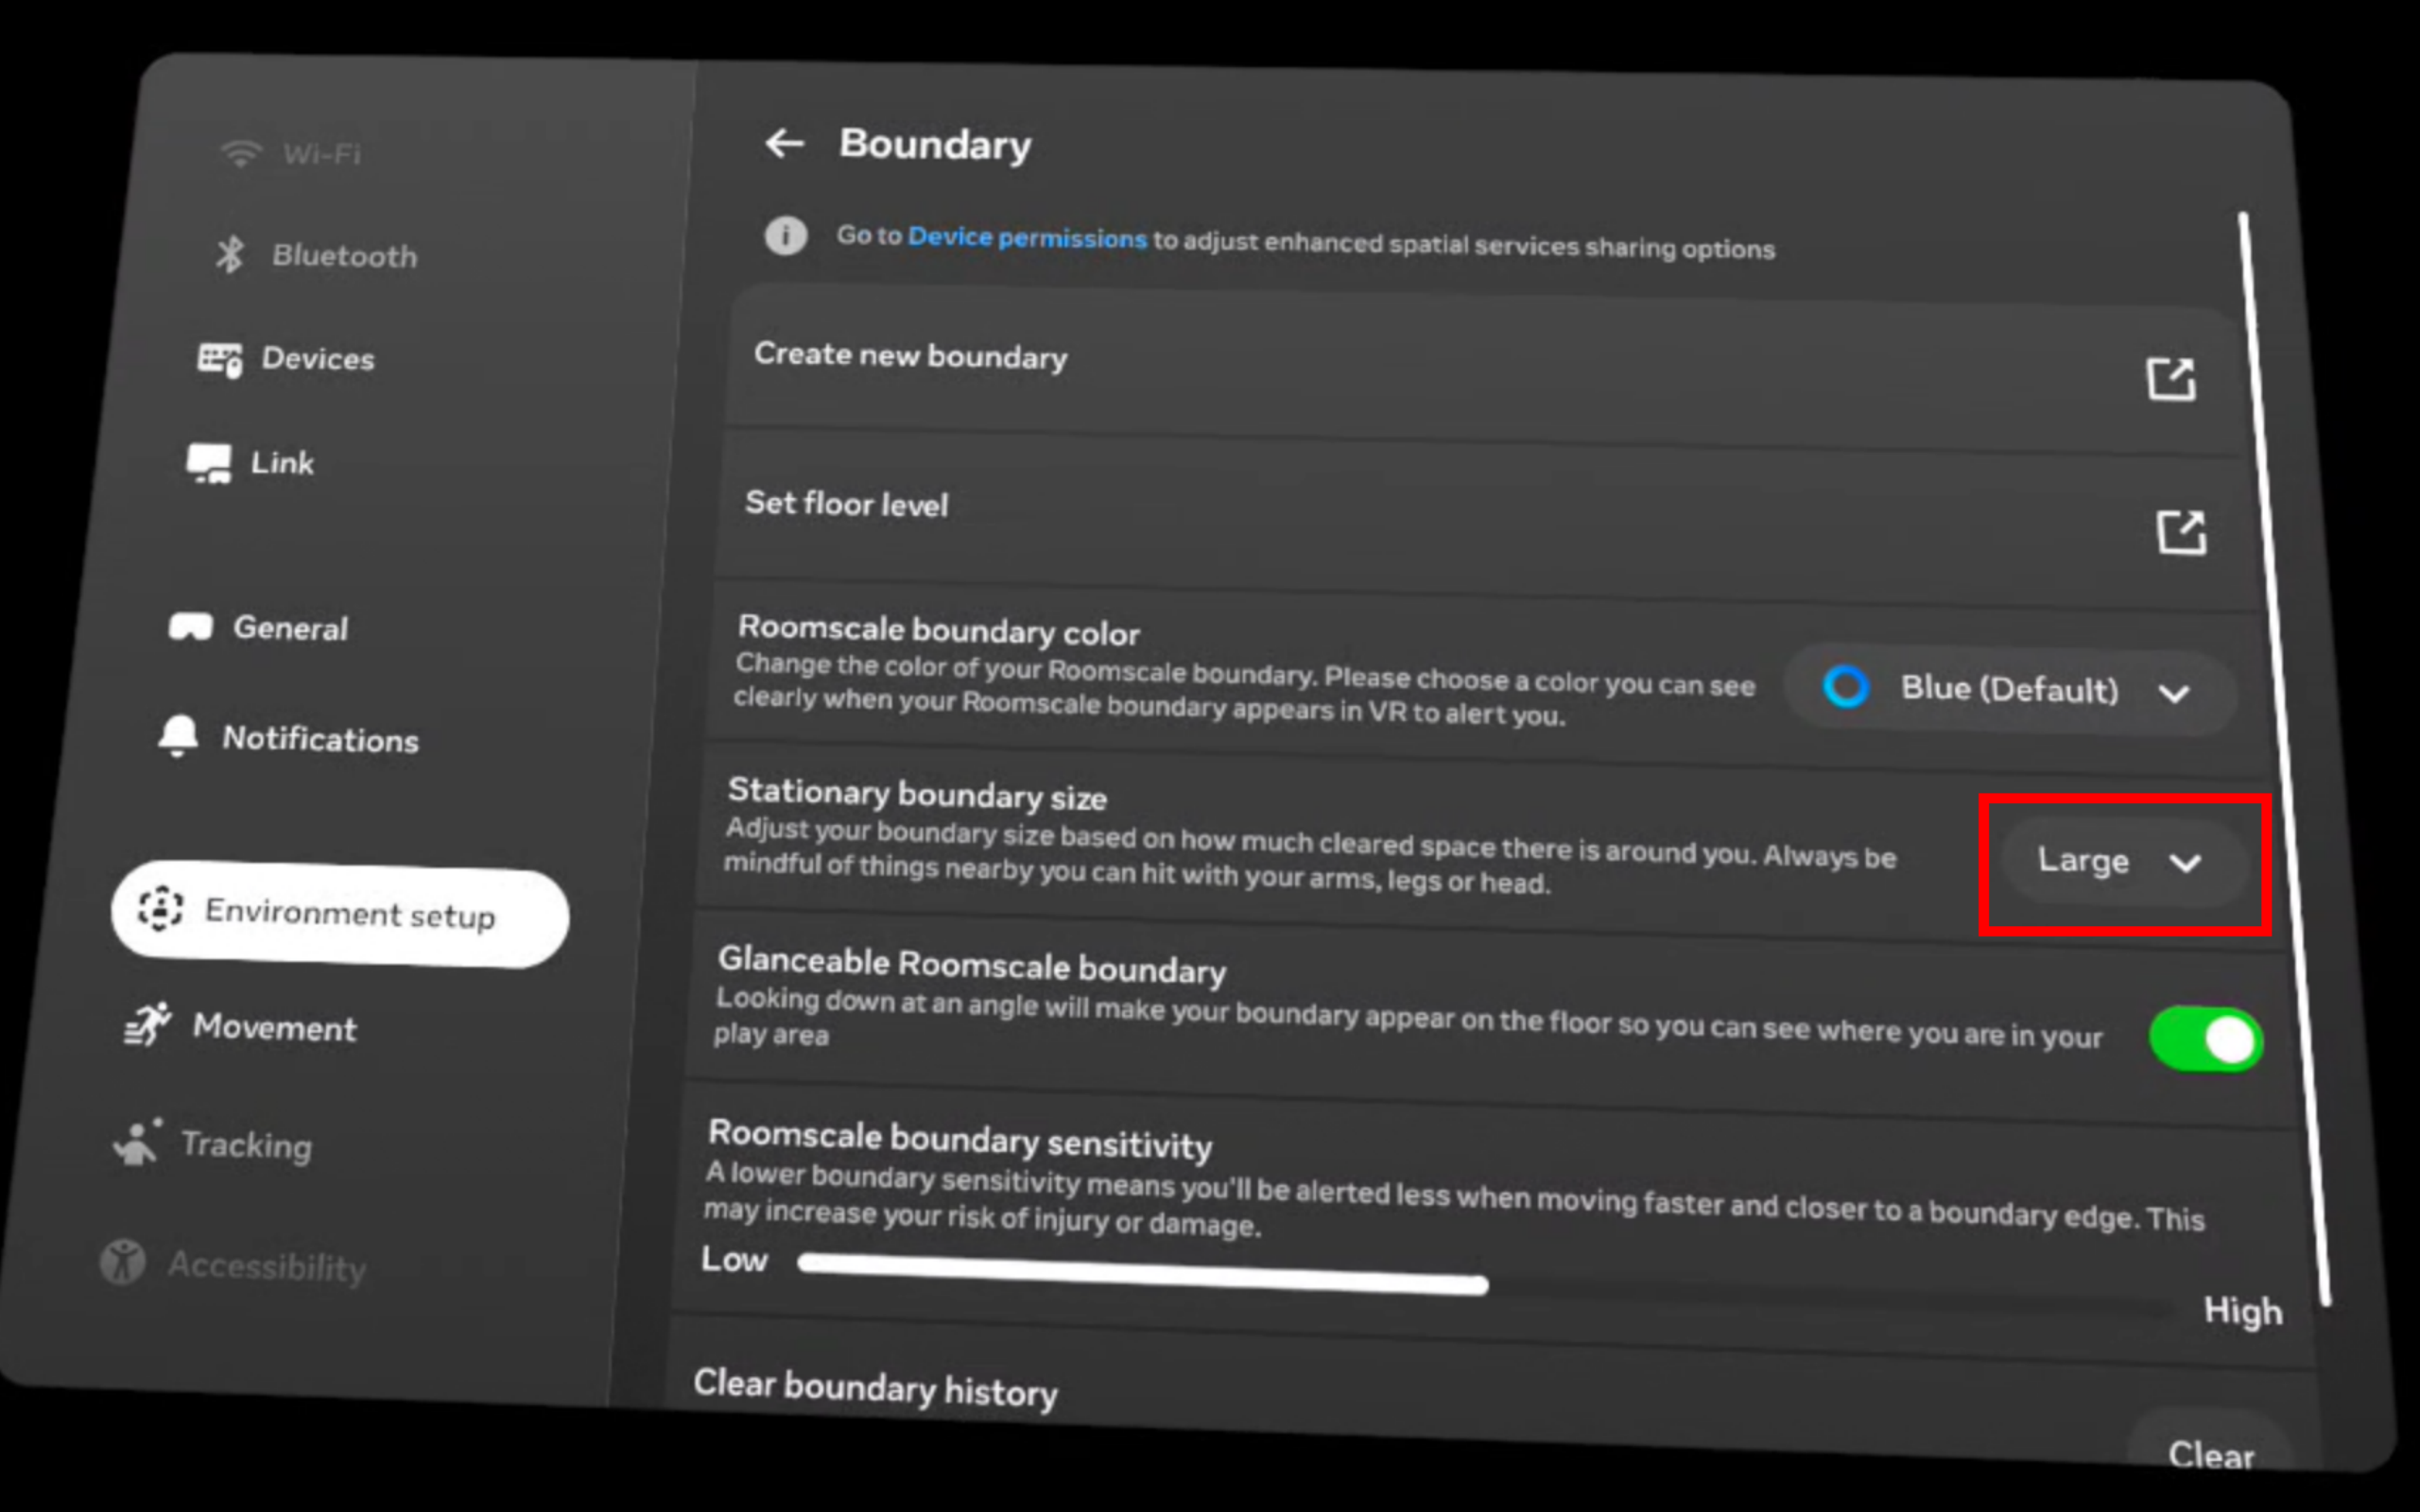
Alternatively, use Create new boundary to define the boundary manually.
VR Startup
AI Worker VR teleoperation utilizes Vuer as the browser-based VR client. For more information about the VR stack and Vuer itself, see the ROBOTIS Vuer package.
1. Clone the repository
Clone the repository on either the Robot PC or a USER PC. The default setup uses the Robot PC.
Replace SNPR48A0000 with the serial number printed on the back of the robot body.
ssh robotis@ffw-SNPR48A0000.localcd ~/
git clone -b jazzy https://github.com/ROBOTIS-GIT/robotis_applications.git
cd robotis_applications2. Start and Enter the Docker Container
cd docker

# Start container
./container.sh start

# Enter running container
./container.sh enter
3. Start VR Publisher Node
WARNING
Internet connection is required.
Before starting the VR publisher node, make sure the AI Worker is connected to the internet.
During VR teleoperation, keep the AI Worker connected to the internet at all times.
To connect the AI Worker to the internet, use the WAN port. For WAN port location, refer to Power on and Check Ports.
In the Docker environment, launch the VR publisher node corresponding to your model.
Note that sg2 model is used as an example.
ros2 launch robotis_vuer vr.launch.py model:=sg2Or use the shortcut:
vr model:=sg24. Open the Vuer Page (Quest Browser)
Open the Meta Quest browser (or a browser on the same network, if applicable) and go to:
https://{pc_ip}:8012?ws=wss://{pc_ip}:8012Replace {pc_ip} with the actual IP of the machine hosting the Vuer server.
Example: The AI Worker PC (SG2’s Orin) has the IP address 192.168.6.2.
https://192.168.6.2:8012?ws=wss://192.168.6.2:8012The PC on BG2 should be connected to a router and use a corresponding IP address within that network.
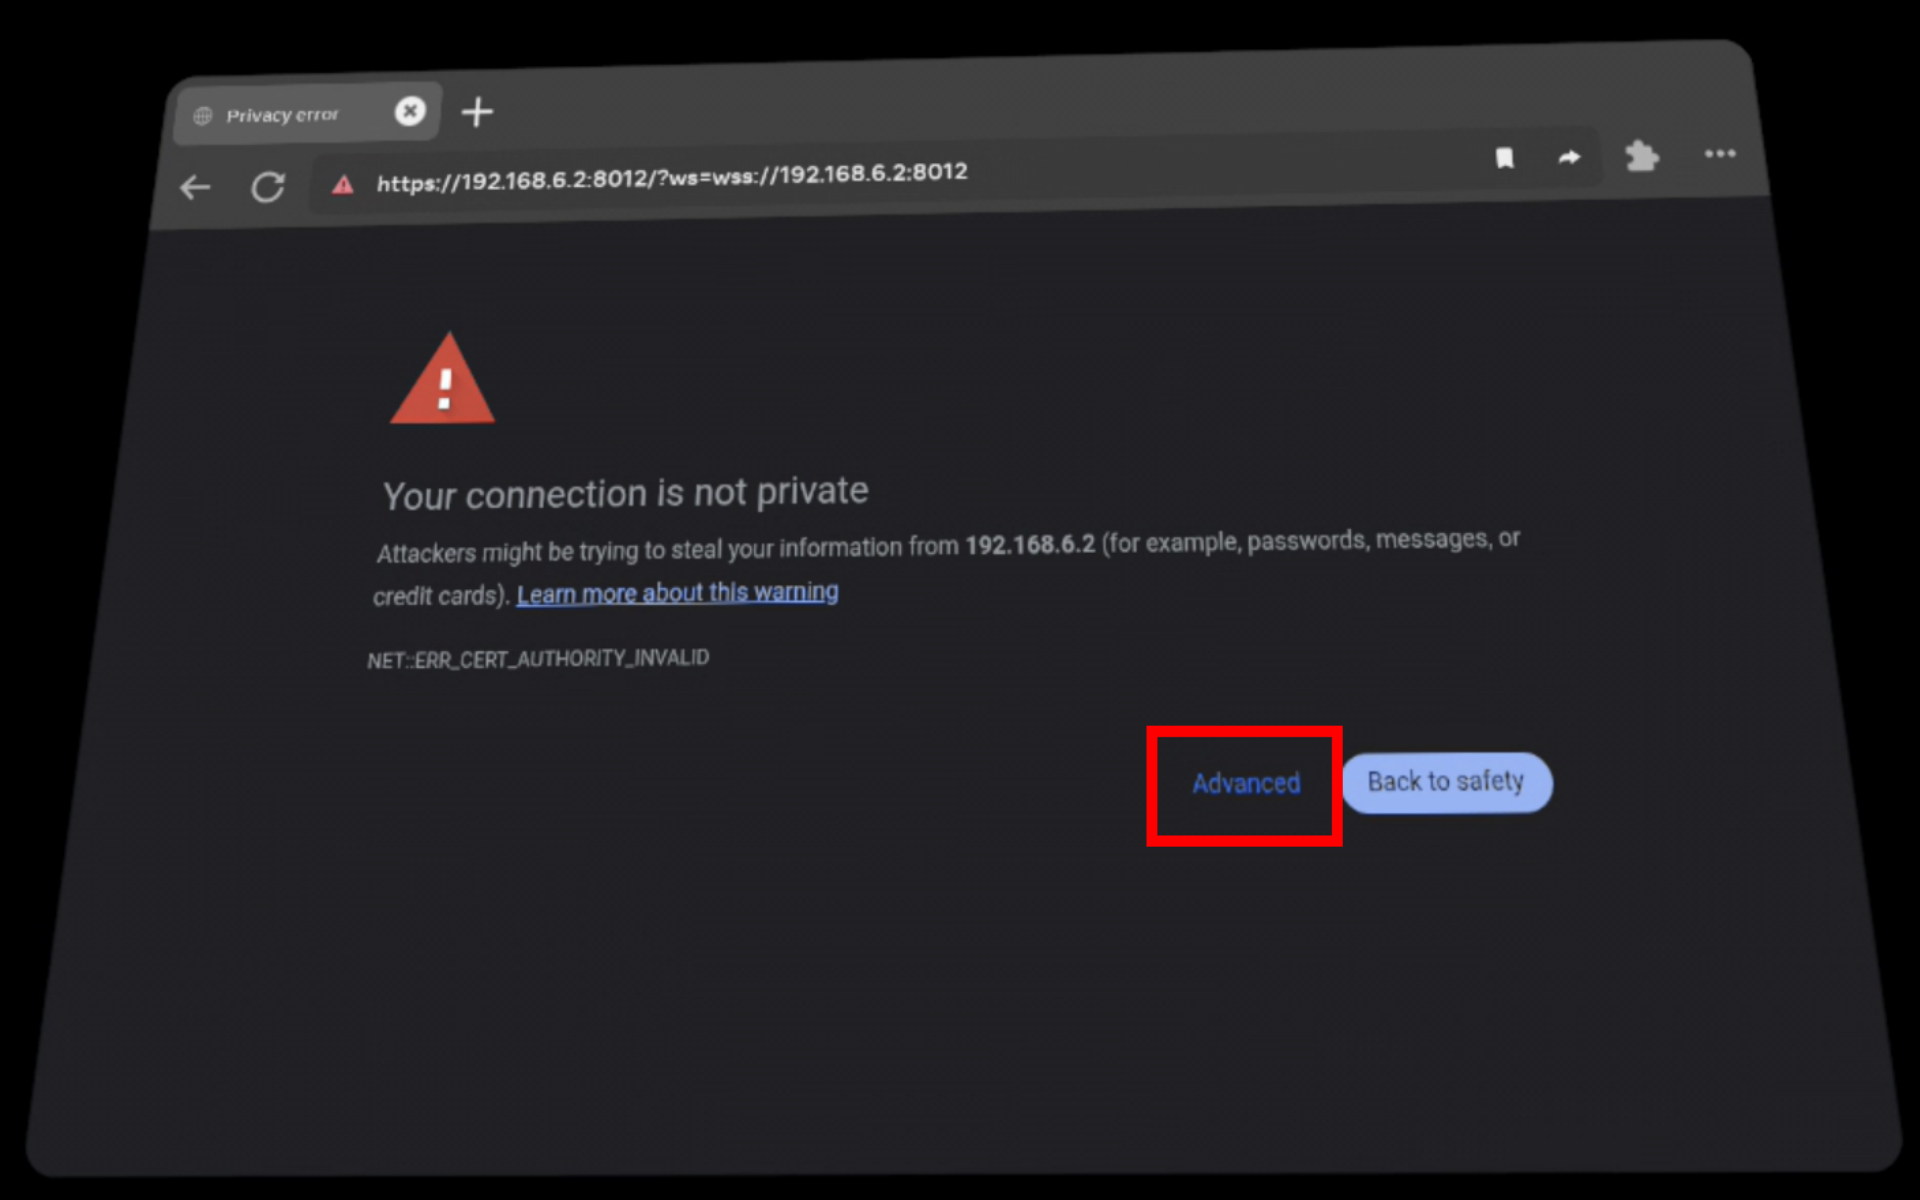
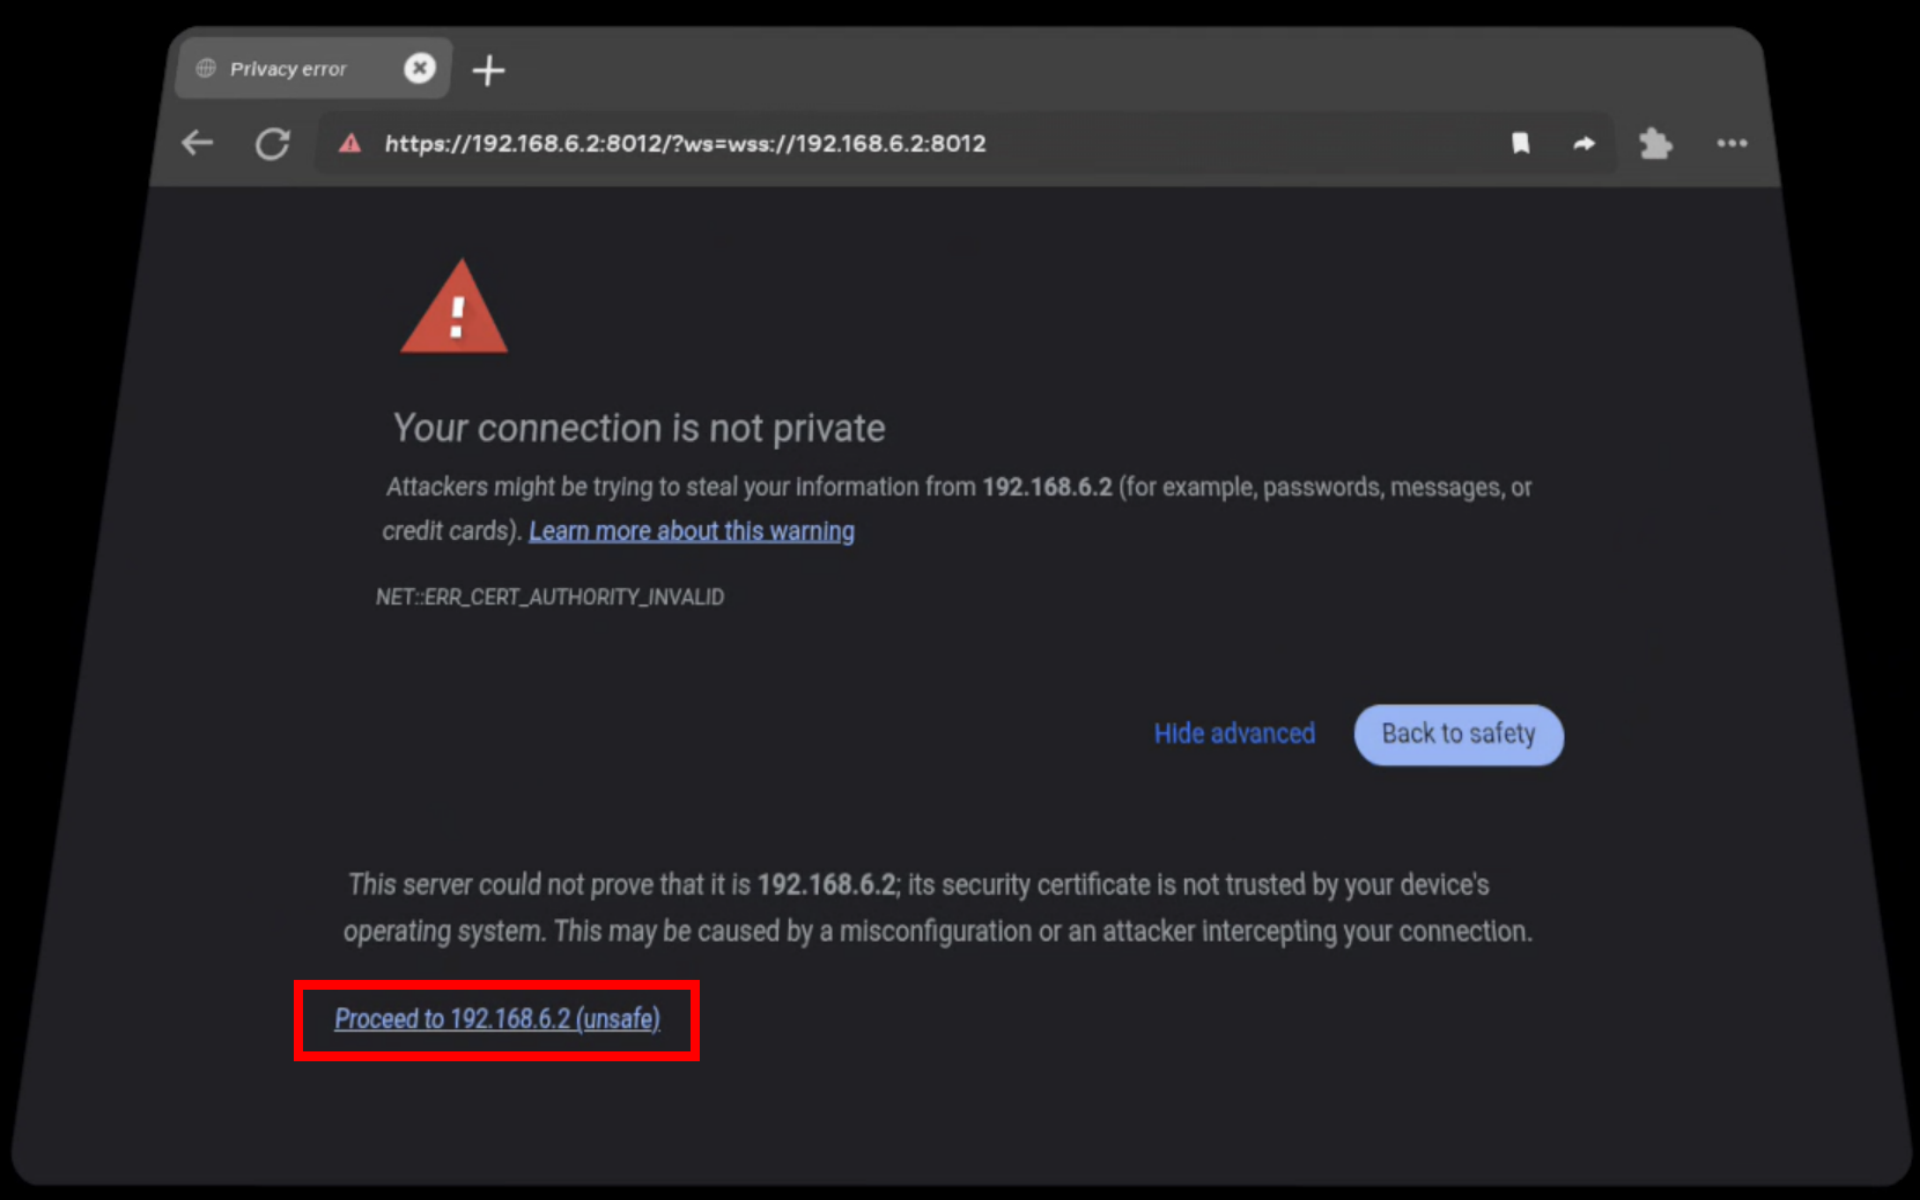
Self-signed HTTPS warning
If the browser shows a certificate warning, use Advanced → proceed to the site (wording may vary by browser).
Enter VR
WARNING
Positioning and Calibration
Ensure you are at your intended operating location before proceeding. The following step initializes the VR coordinate system based on your current physical position.
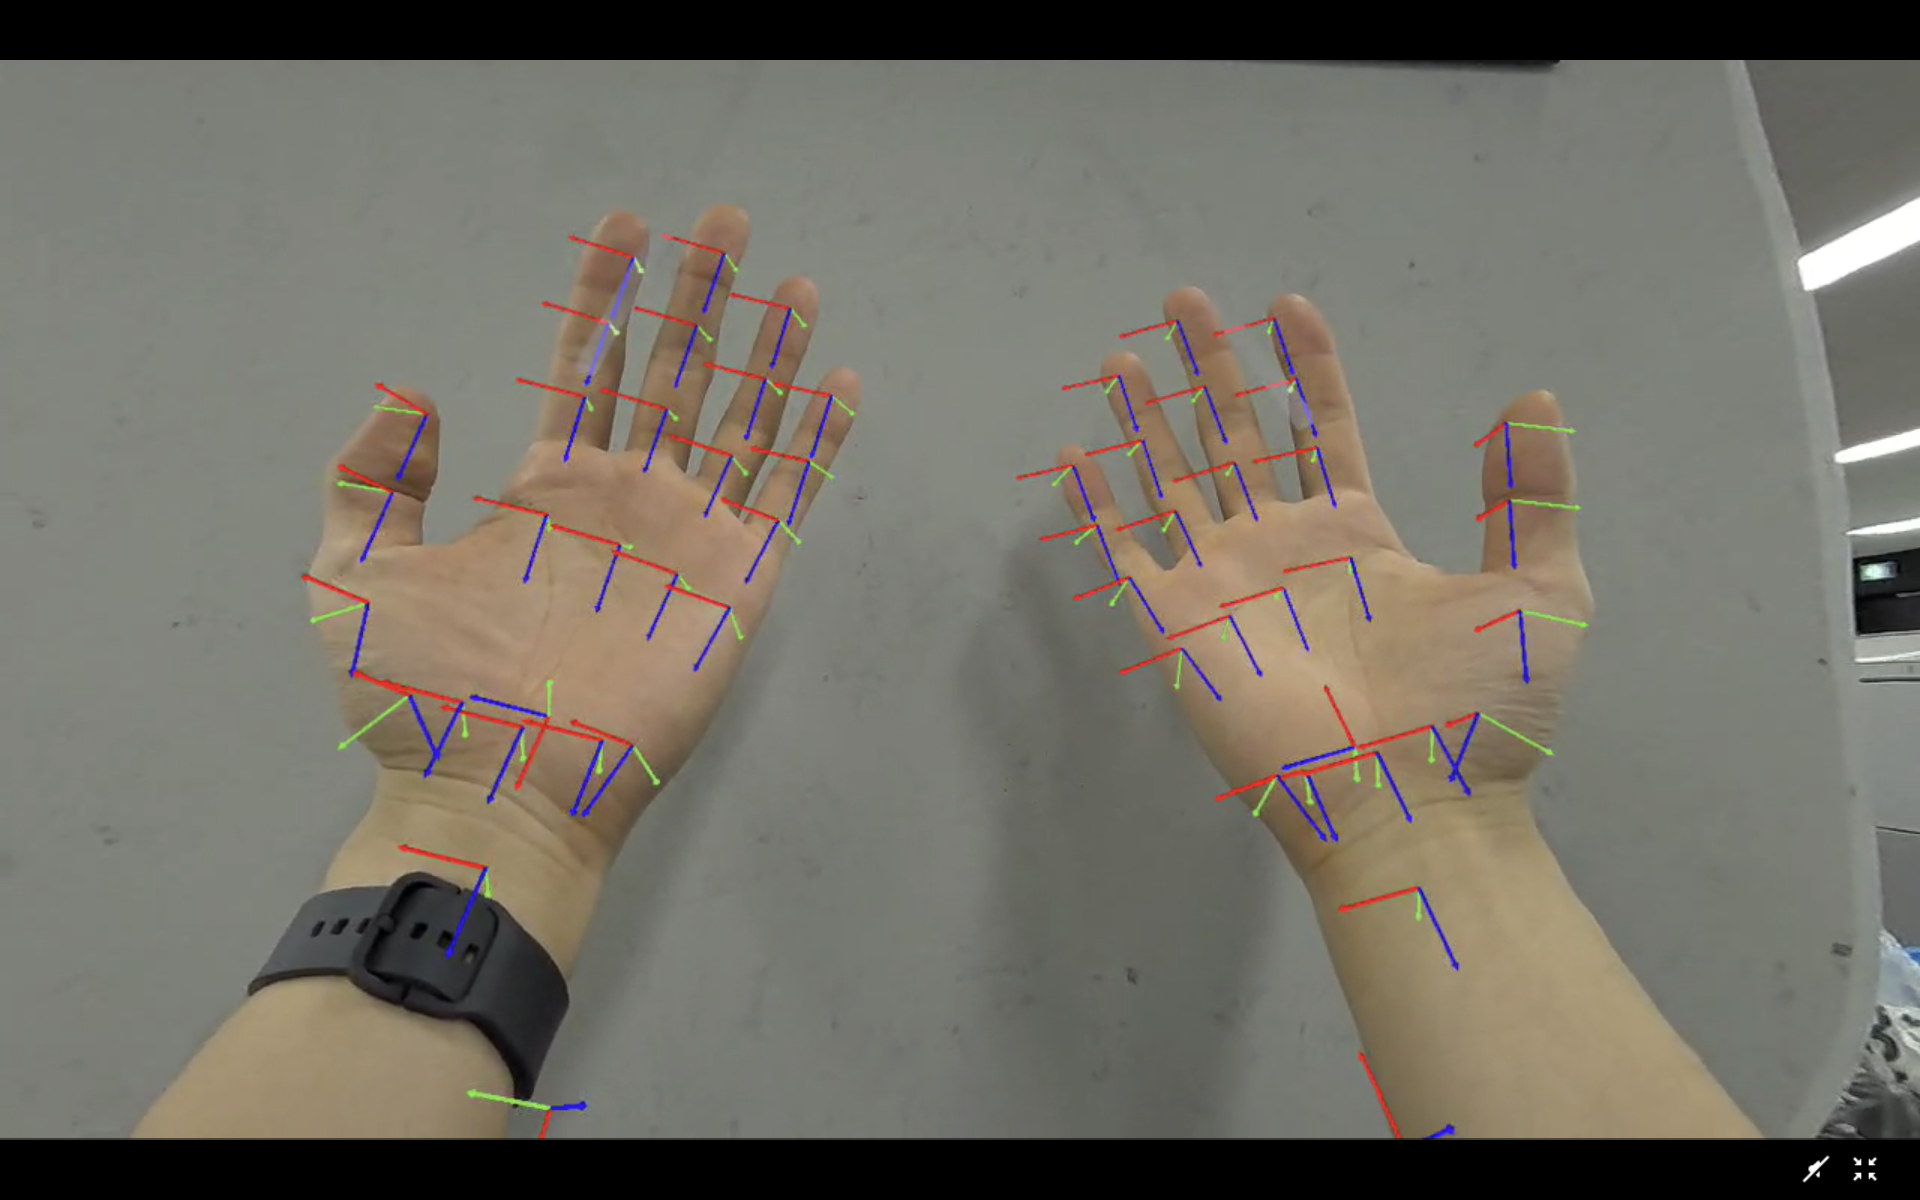
Click the Enter VR button.

The session is ready when passthrough becomes active and axis markers appear on your hands.
Once the VR setup is complete, hang the headset around your neck and tighten the strap until the device is stable and secure.
WARNING
If the Vuer server is restarted, you must refresh the browser page and click Enter VR again.
Cyclo Control Setup
VR teleoperation relies on Cyclo Control as the robot motion-control layer. It receives VR references and generates the arm trajectories that the robot follows. Ensure it is installed and configured before proceeding.
You can find the installation steps in the cyclo_control repository.
For more information, see Cyclo Control.
Running VR Teleoperation
Execute these commands on the Robot PC. You can either connect a keyboard and mouse directly to the Nvidia Orin, or access it via SSH (see the Setup Guide for instructions). Enter the ai_worker Docker container first:
cd ~/ai_worker
./docker/container.sh enterNote that sg2 model is used here as an example. If you are using a bg2, use the sg2 launch commands in this section.
1. Bring up the robot.
ros2 launch ffw_bringup ffw_sg2_follower_ai.launch.pyOr use the shortcut:
ffw_sg2_follower_ai2. Start Cyclo Motion Controller
Once the robot reaches its initial position, start Cyclo Motion Controller with controller_type parameter set as vr:
ros2 launch cyclo_motion_controller_ros ai_worker_controller.launch.py controller_type:=vrOr use shortcut:
motion_controller controller_type:=vr3. Activate VR Publisher
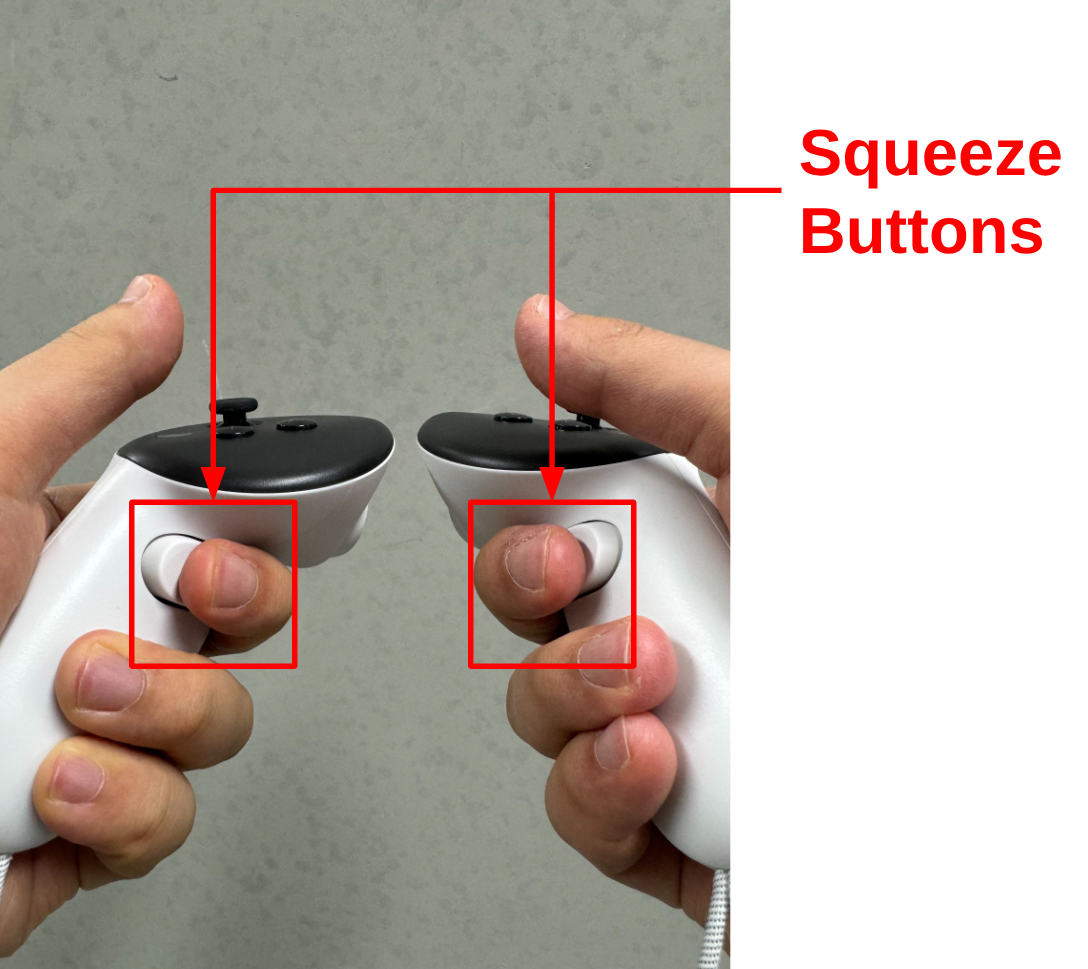
The VR node only publishes reference data while both squeeze (grip) buttons on the controllers are held down. This acts as a safety deadman switch.
4. Activate the Controller
WARNING
Pre-Activation Alignment: Align your physical arms with the robot's current pose before activating to prevent sudden movements. Maintain a safe distance from the robot.
You can activate the controller by pressing the X button on the left controller and the A button on the right controller at the same time.
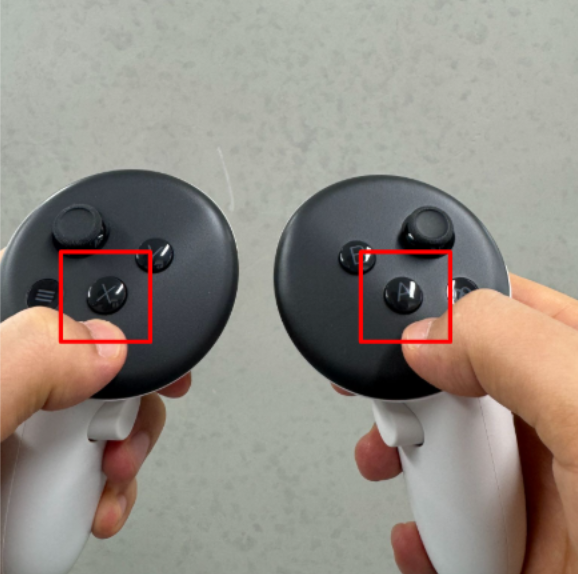
Right after the controller is activated, the system checks the difference between the detected controller poses and the robot wrist poses. If the difference is small enough, the arm controller starts after 3 seconds. After startup, the slow start function remains active for 5 seconds. Because of this, it is recommended to keep your arm posture as close as possible to the robot posture before activating the controller.
5. Pause and resume teleoperation
- Release the squeeze buttons.
- To resume, repeat Step 3 and 4.
WARNING
Avoid resuming VR publishing when your hands are far from the previous pose, because the robot may move quickly. Before resuming, it is recommended to make your arm posture as close as possible to the robot posture.
Troubleshooting
Communication Issues
- If ROS communication is not working: check the
ROS_DOMAIN_ID. (ROS_DOMAIN_IDis set to30by default within the provided Docker container.) - If the Vuer server is not running: check the terminal logs.
- If the robot fingers move but the arms remain still after the gesture trigger, make sure your physical hand pose is sufficiently aligned with the robot's wrist pose.
Network Performance
- If value updates are slow: check your Wi-Fi connection. Network performance has a major effect. A wired connection is recommended.
- If wireless performance is insufficient, host the VR server directly on the
Robot PCand use a USB-C to Ethernet adapter to establish a wired connection for the Meta Quest 3. Ensure the Ethernet cable is connected to the LAN port of the AI Worker, not the WAN port. Refer to the Hardware Setup Overview for port identification.
Hardware Tips
- Proximity Sensor Workaround: The Meta Quest 3 may pause the session if it detects that the headset has been removed. Placing a small piece of non-transparent tape over the internal proximity sensor (located between the lenses) can help keep the session active.