
VR Teleoperation
This guide explains how to set up and operate the HX5-D20 using a VR device. Currently, only the Meta Quest 3 is supported.
VR Device Setup
1. Meta Horizon App (Developer Mode)
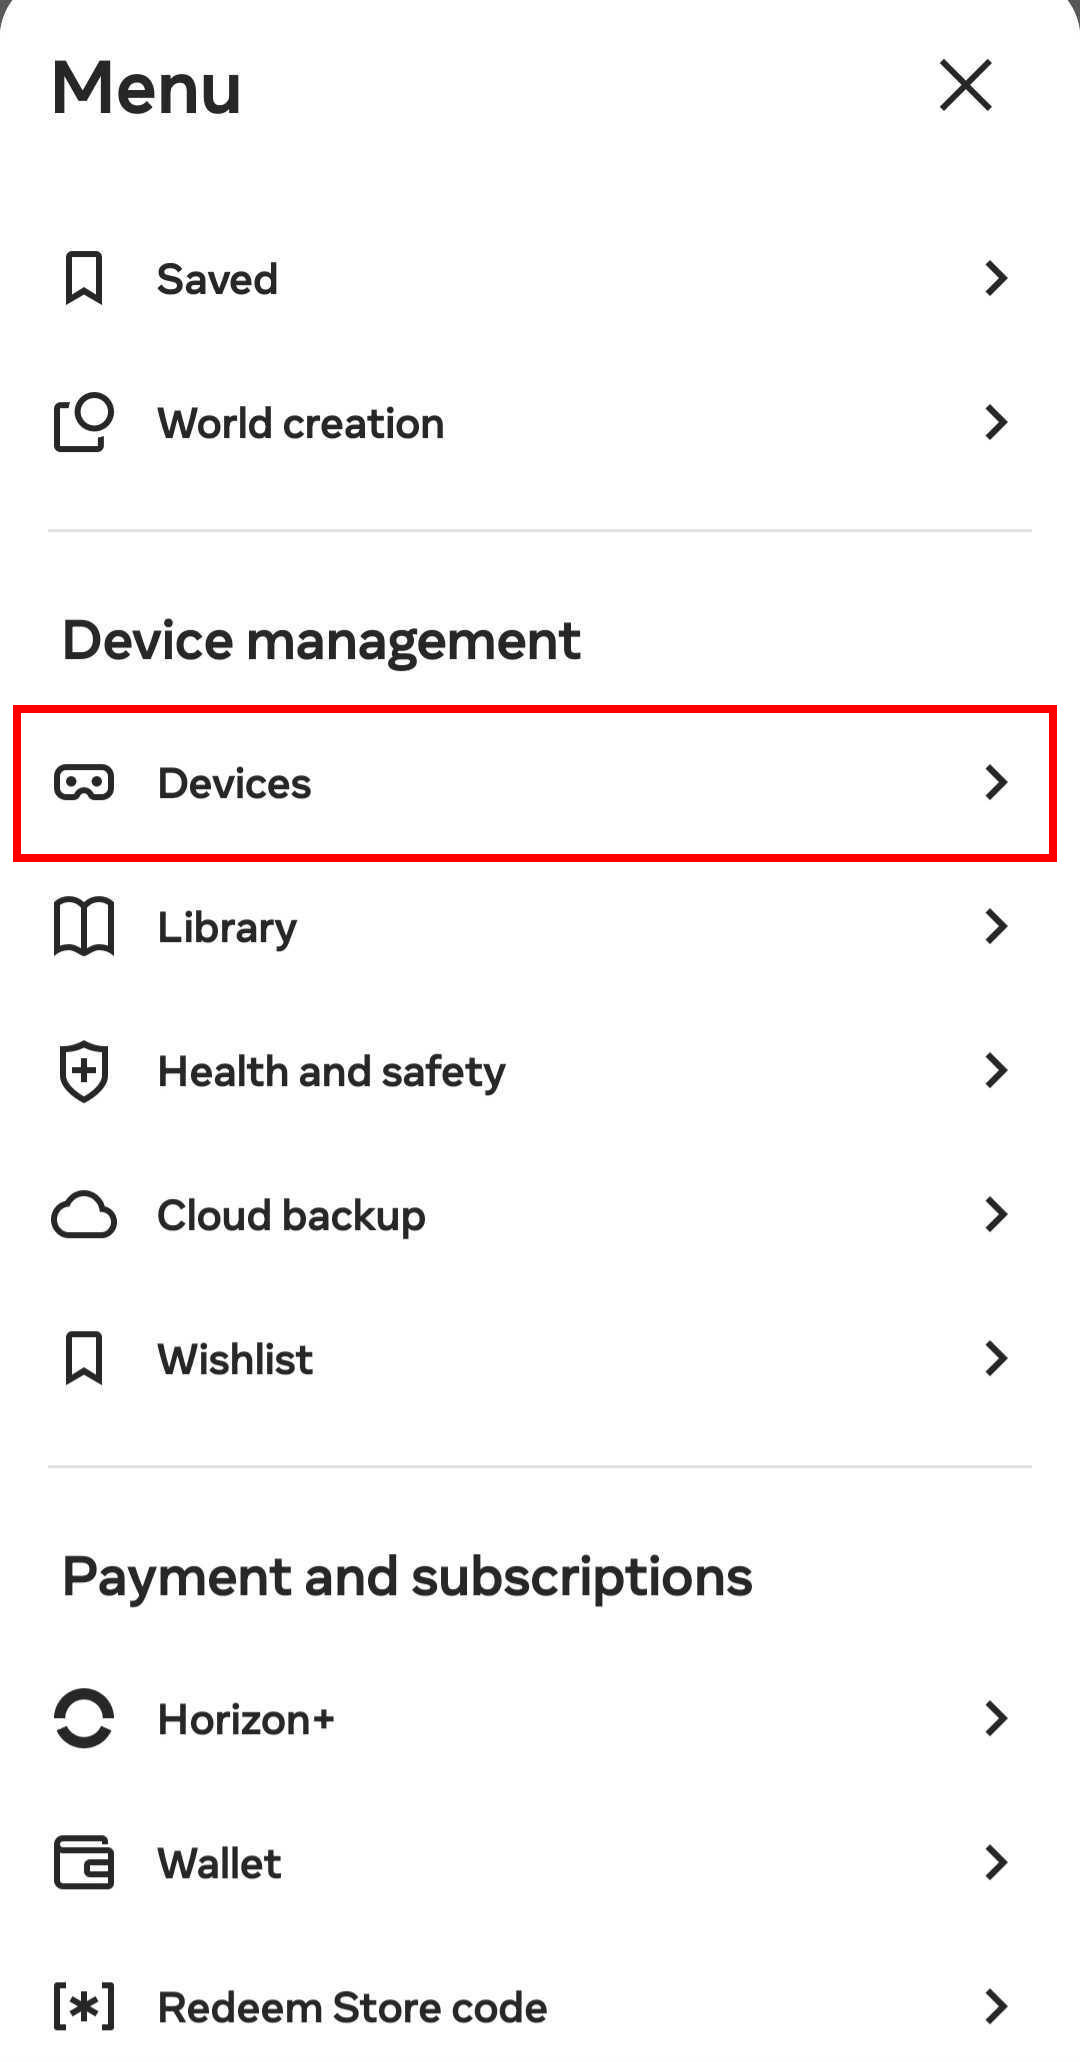
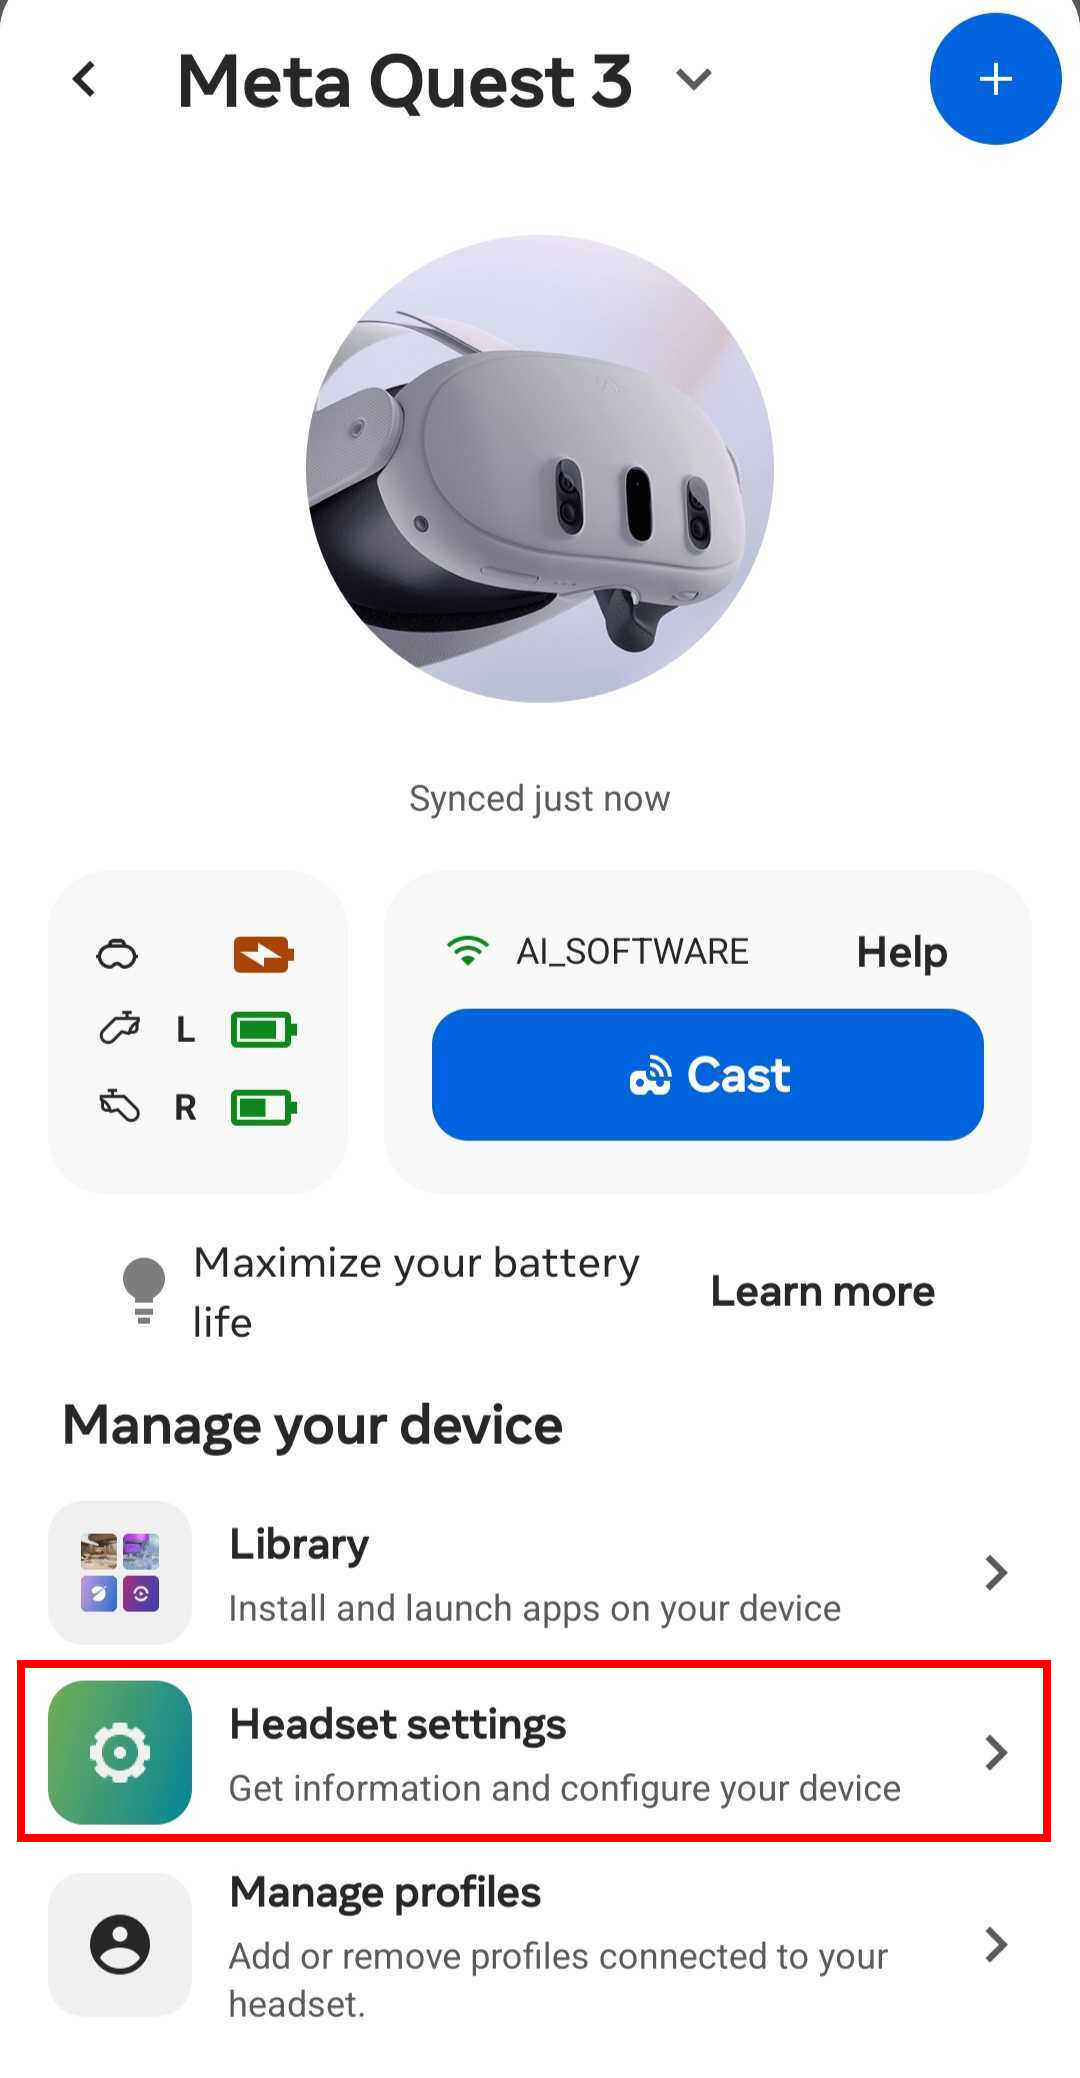
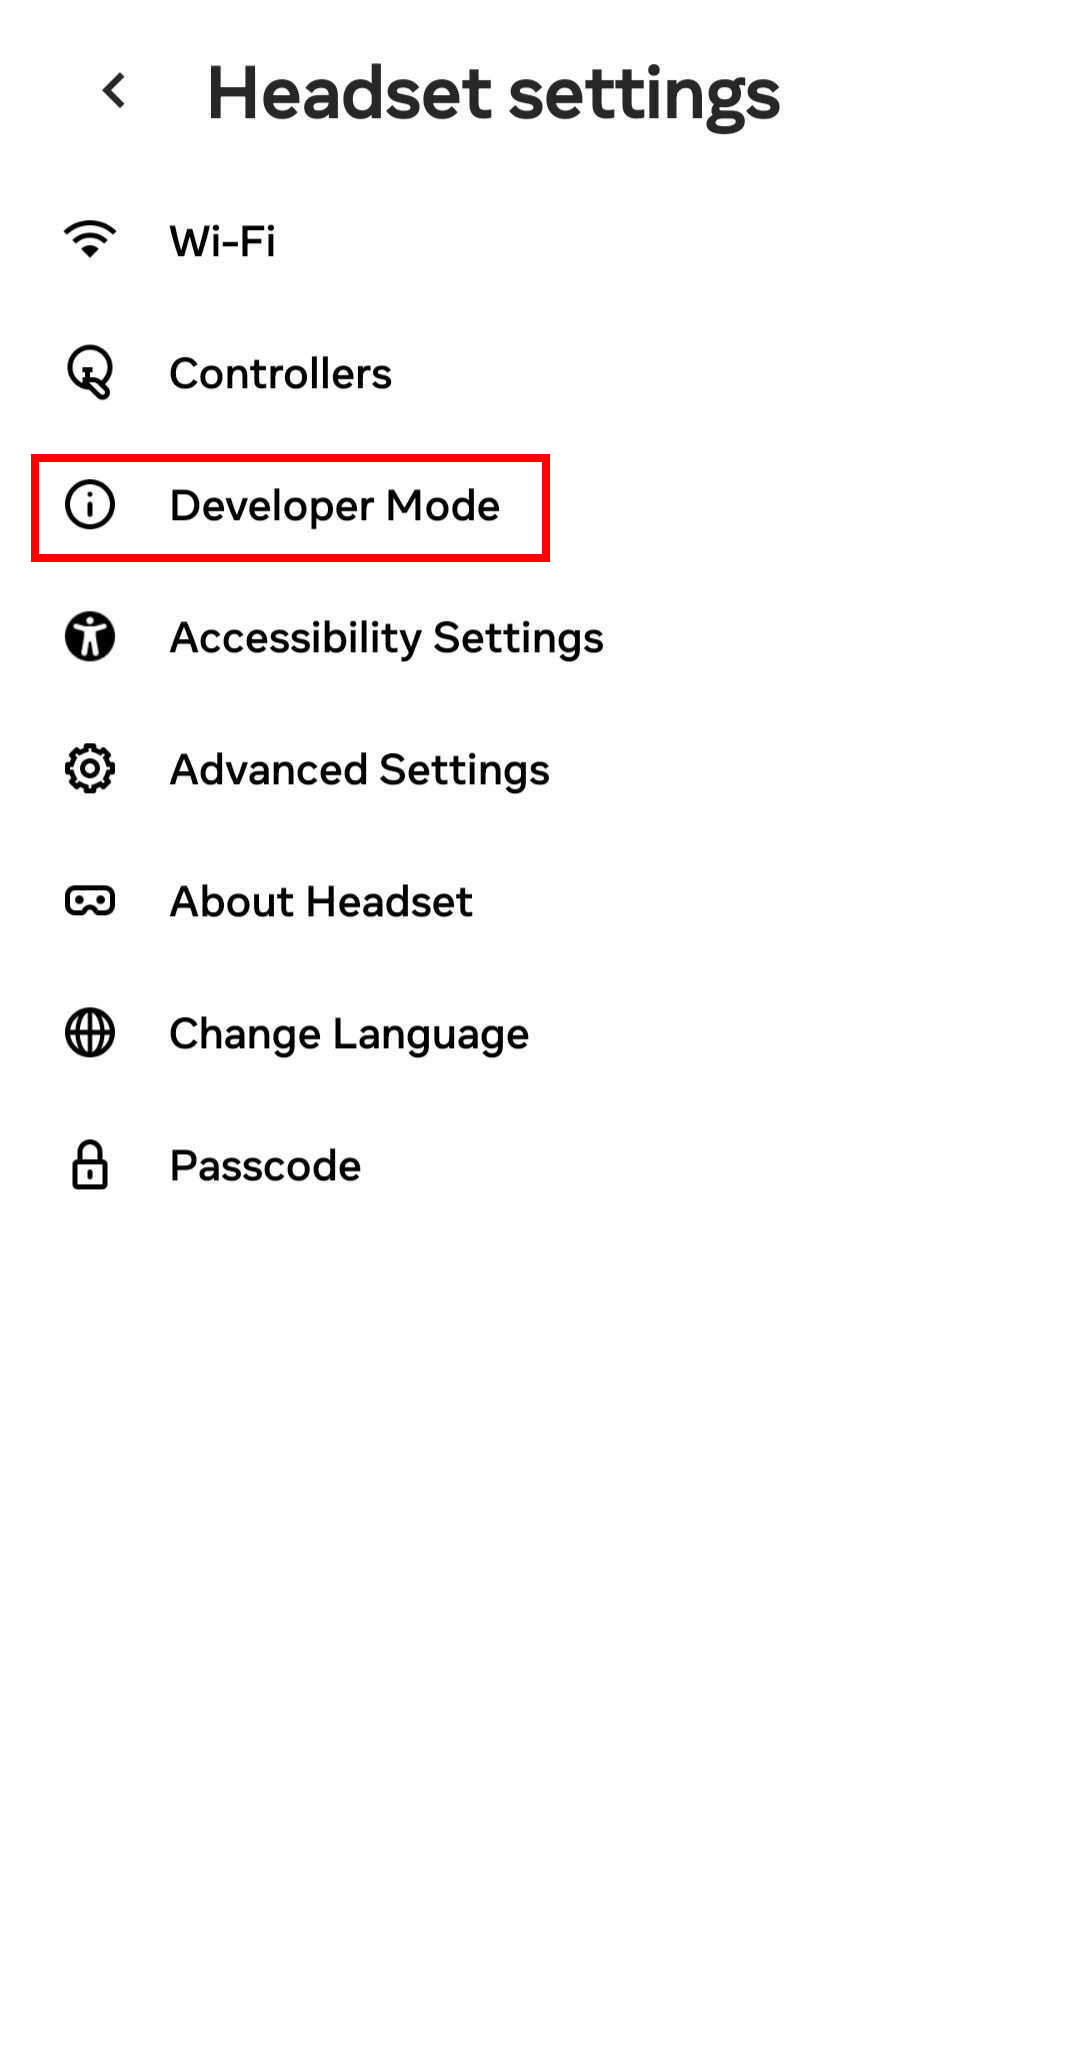
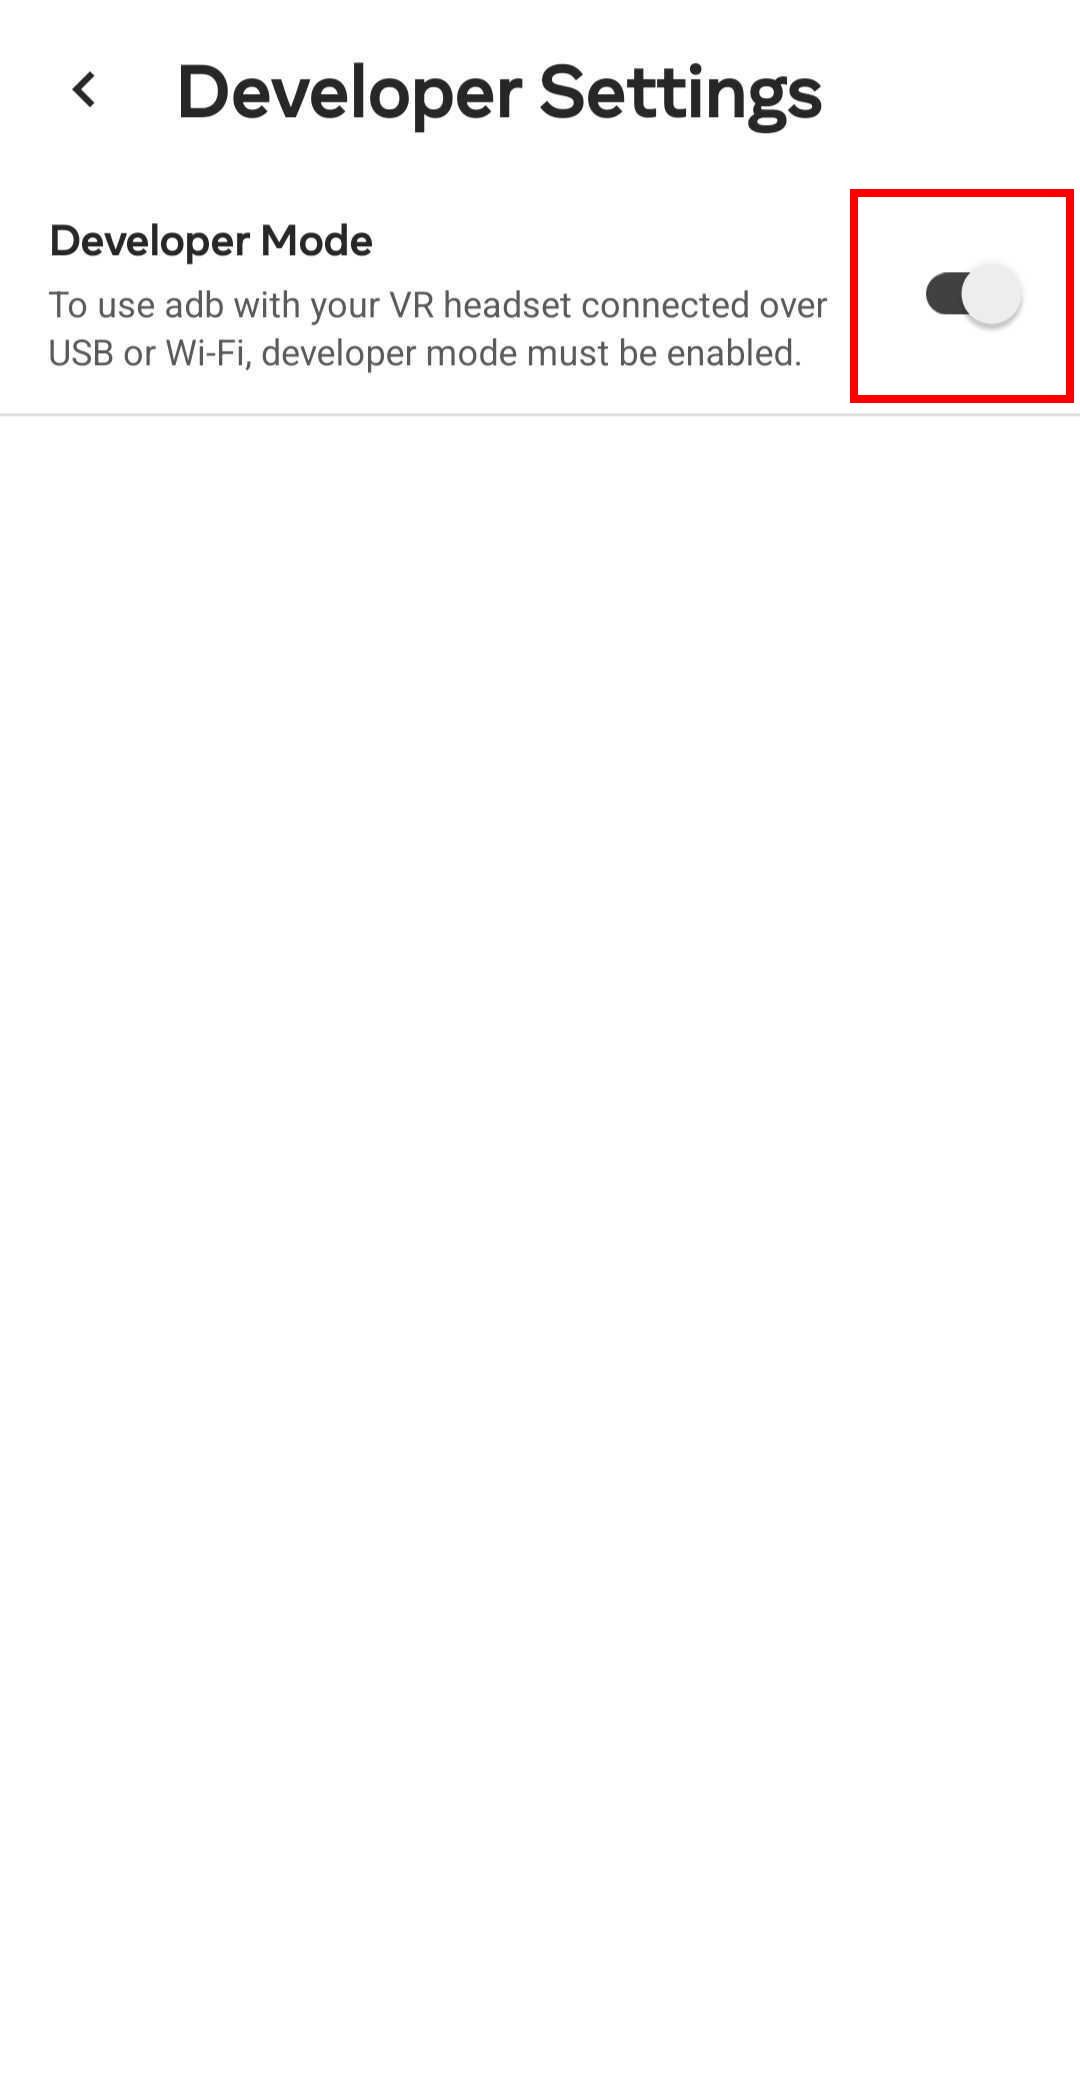
Enable Developer Mode via the Meta Horizon mobile app:
Menu → Device management → Devices → Headset settings → Developer Mode → On
2. On-headset settings
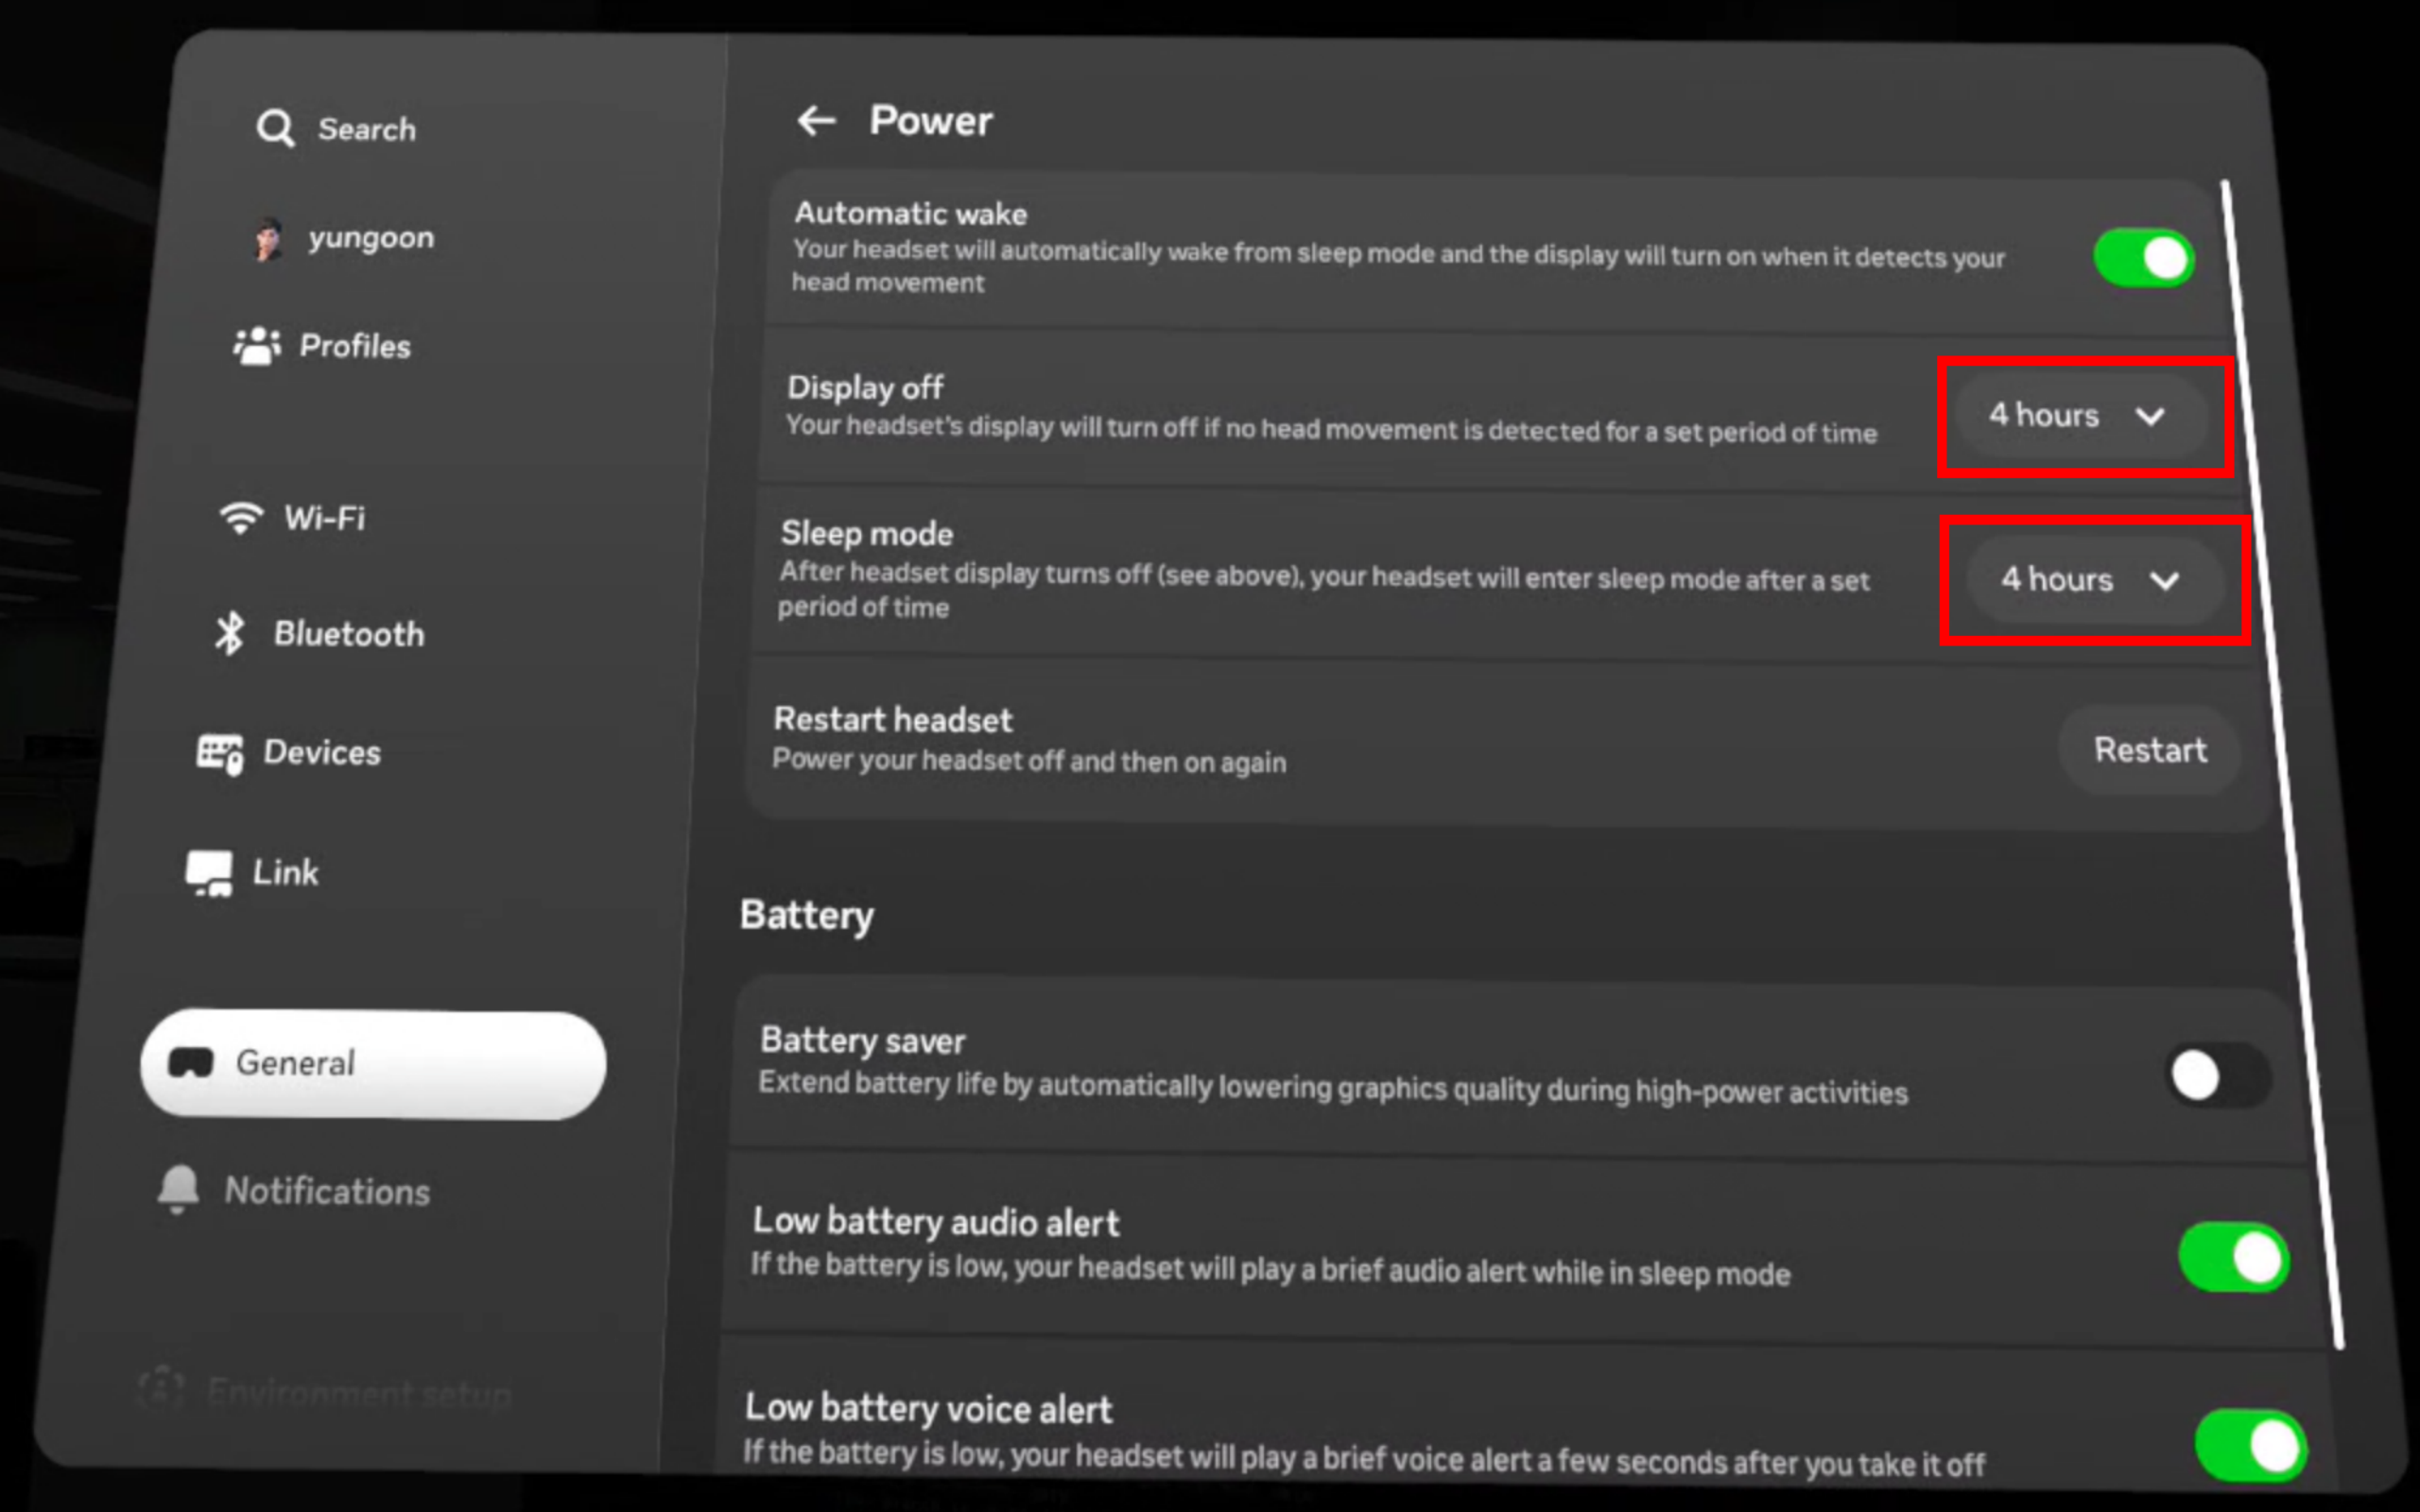
- Power / Sleep : Settings → General (use Power or Display depending on your firmware): set Display off and Sleep mode to 4 hours (or the longest option available) so the headset does not sleep during use.
- Play area : Settings → Environment setup → Boundary → Stationary boundary size → Large.
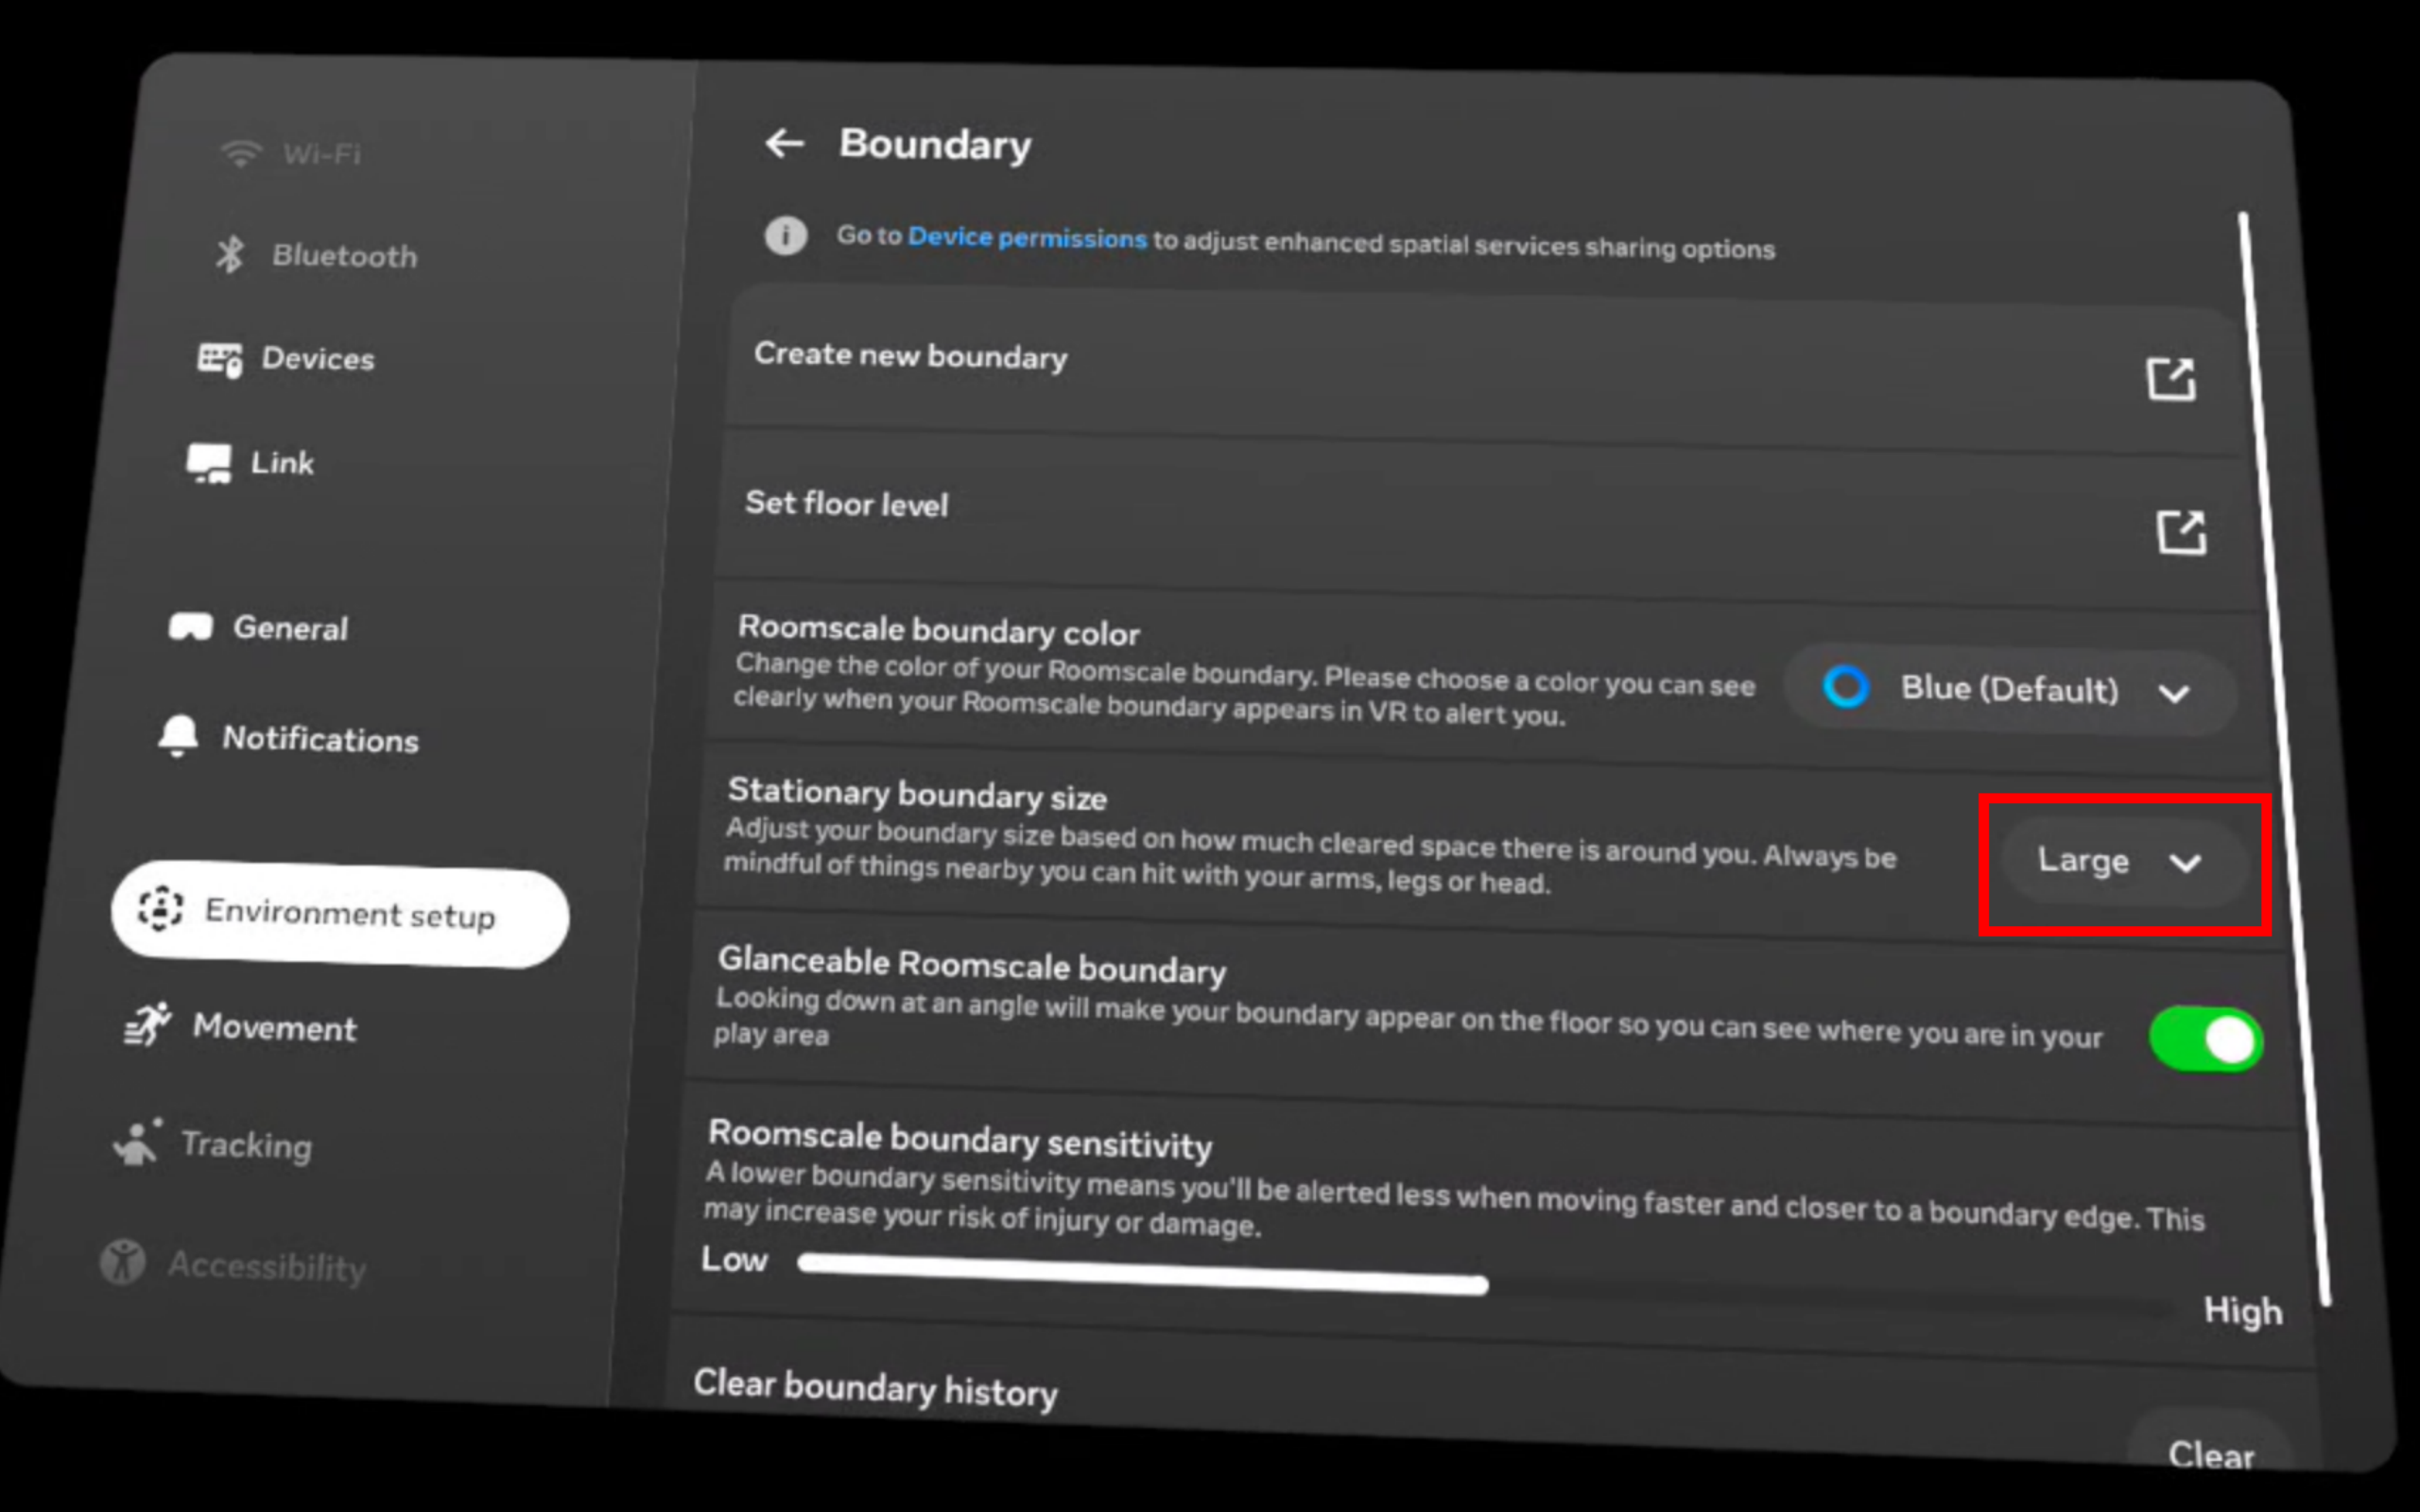
Alternatively, use Create new boundary to define the boundary manually.
VR Startup
ROBOTIS Hand VR teleoperation utilizes Vuer as the browser-based VR client. For more information regarding the VR stack and Vuer itself, see the ROBOTIS Vuer package.
1. Clone the repository
cd ~/
git clone -b jazzy https://github.com/ROBOTIS-GIT/robotis_applications.git
cd robotis_applications
2. Start and Enter the Docker Container
cd docker

# Start container
./container.sh start

# Enter running container
./container.sh enter
3. Start VR Publisher Node
Inside the Docker environment, launch the VR publisher node with the model parameter set to hx5.
ros2 launch robotis_vuer vr.launch.py model:=hx5Alternatively, use the shortcut:
vr model:=hx54. Open the Vuer Page (Quest Browser)
Open the Meta Quest browser (or a browser on the same network, if applicable) and navigate to:
https://{pc_ip}:8012?ws=wss://{pc_ip}:8012Replace {pc_ip} with the actual IP of the machine hosting the Vuer server.
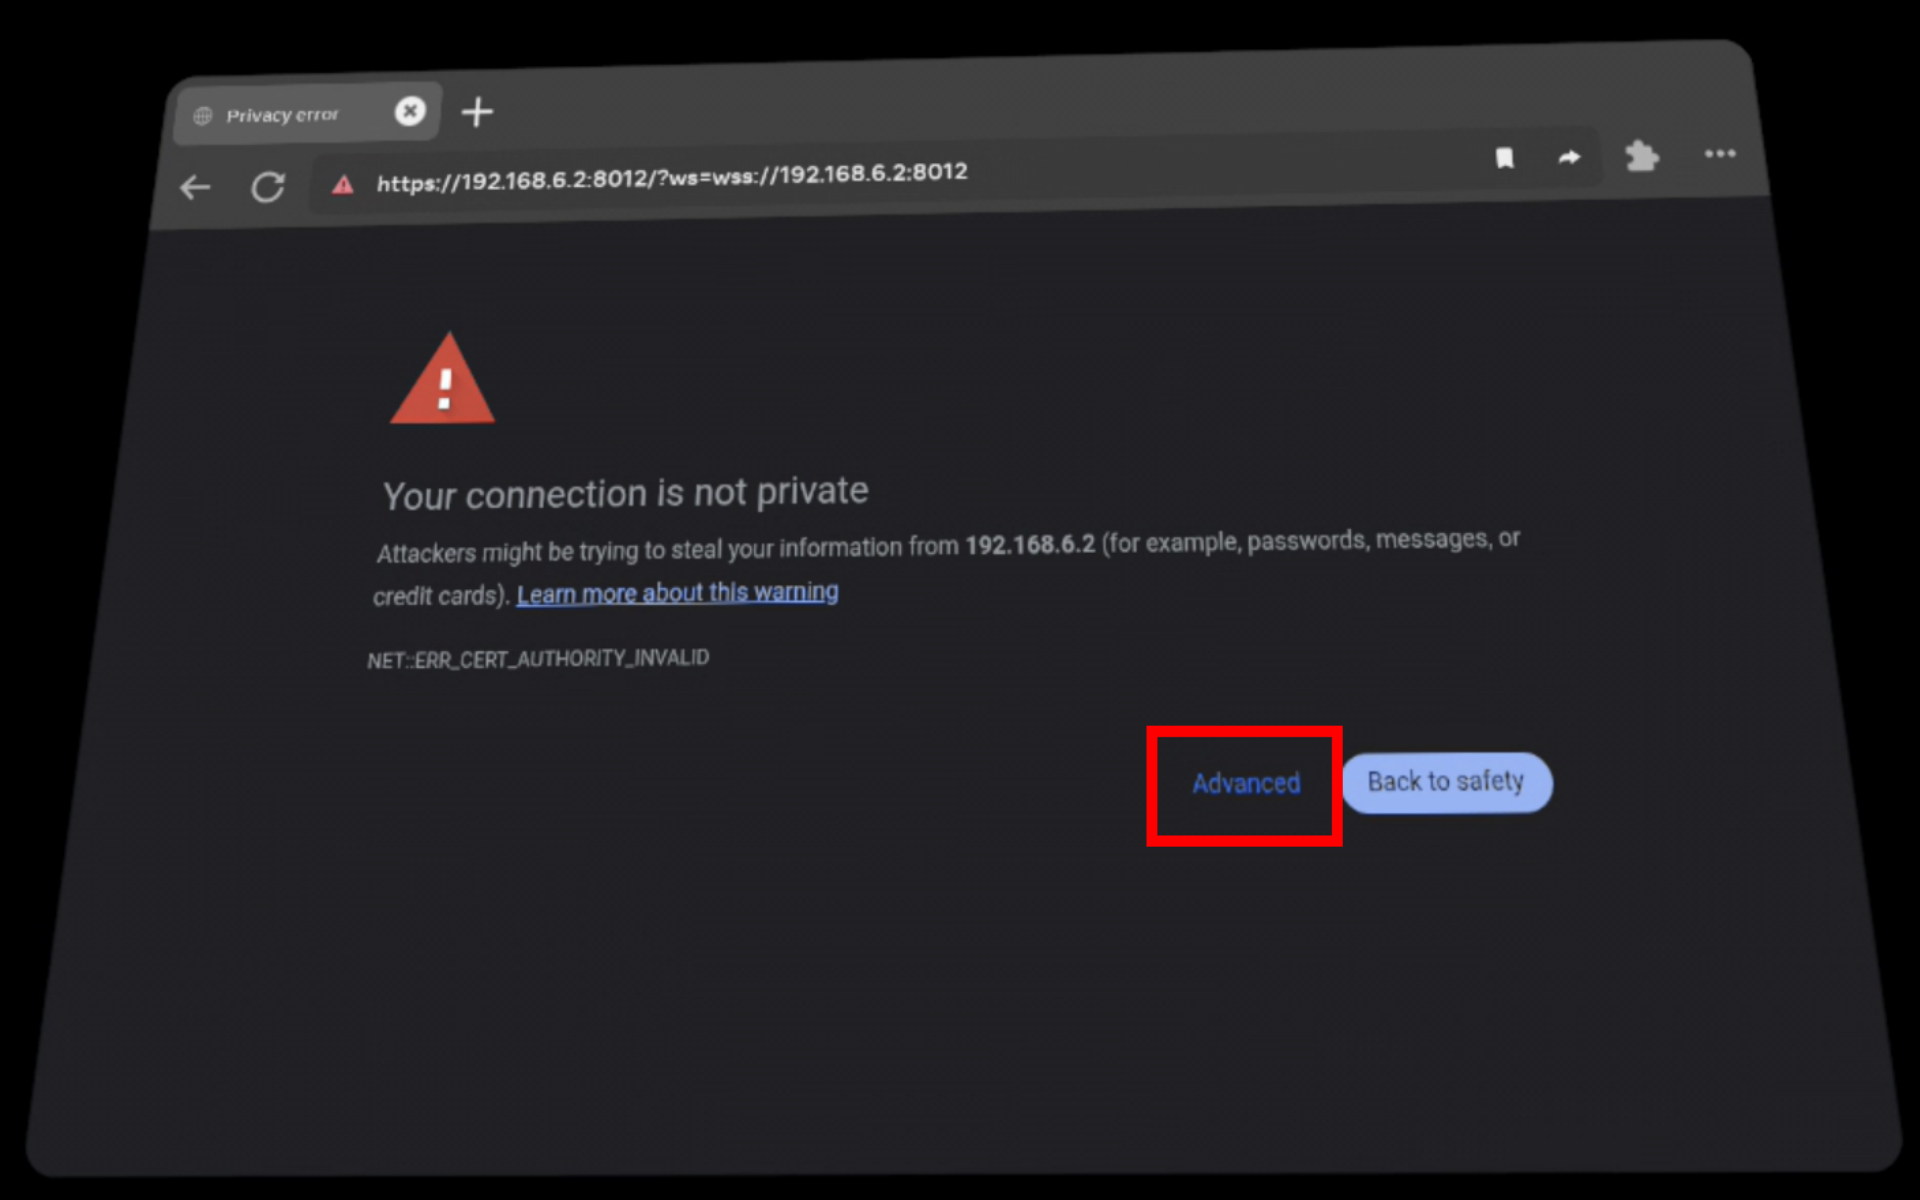
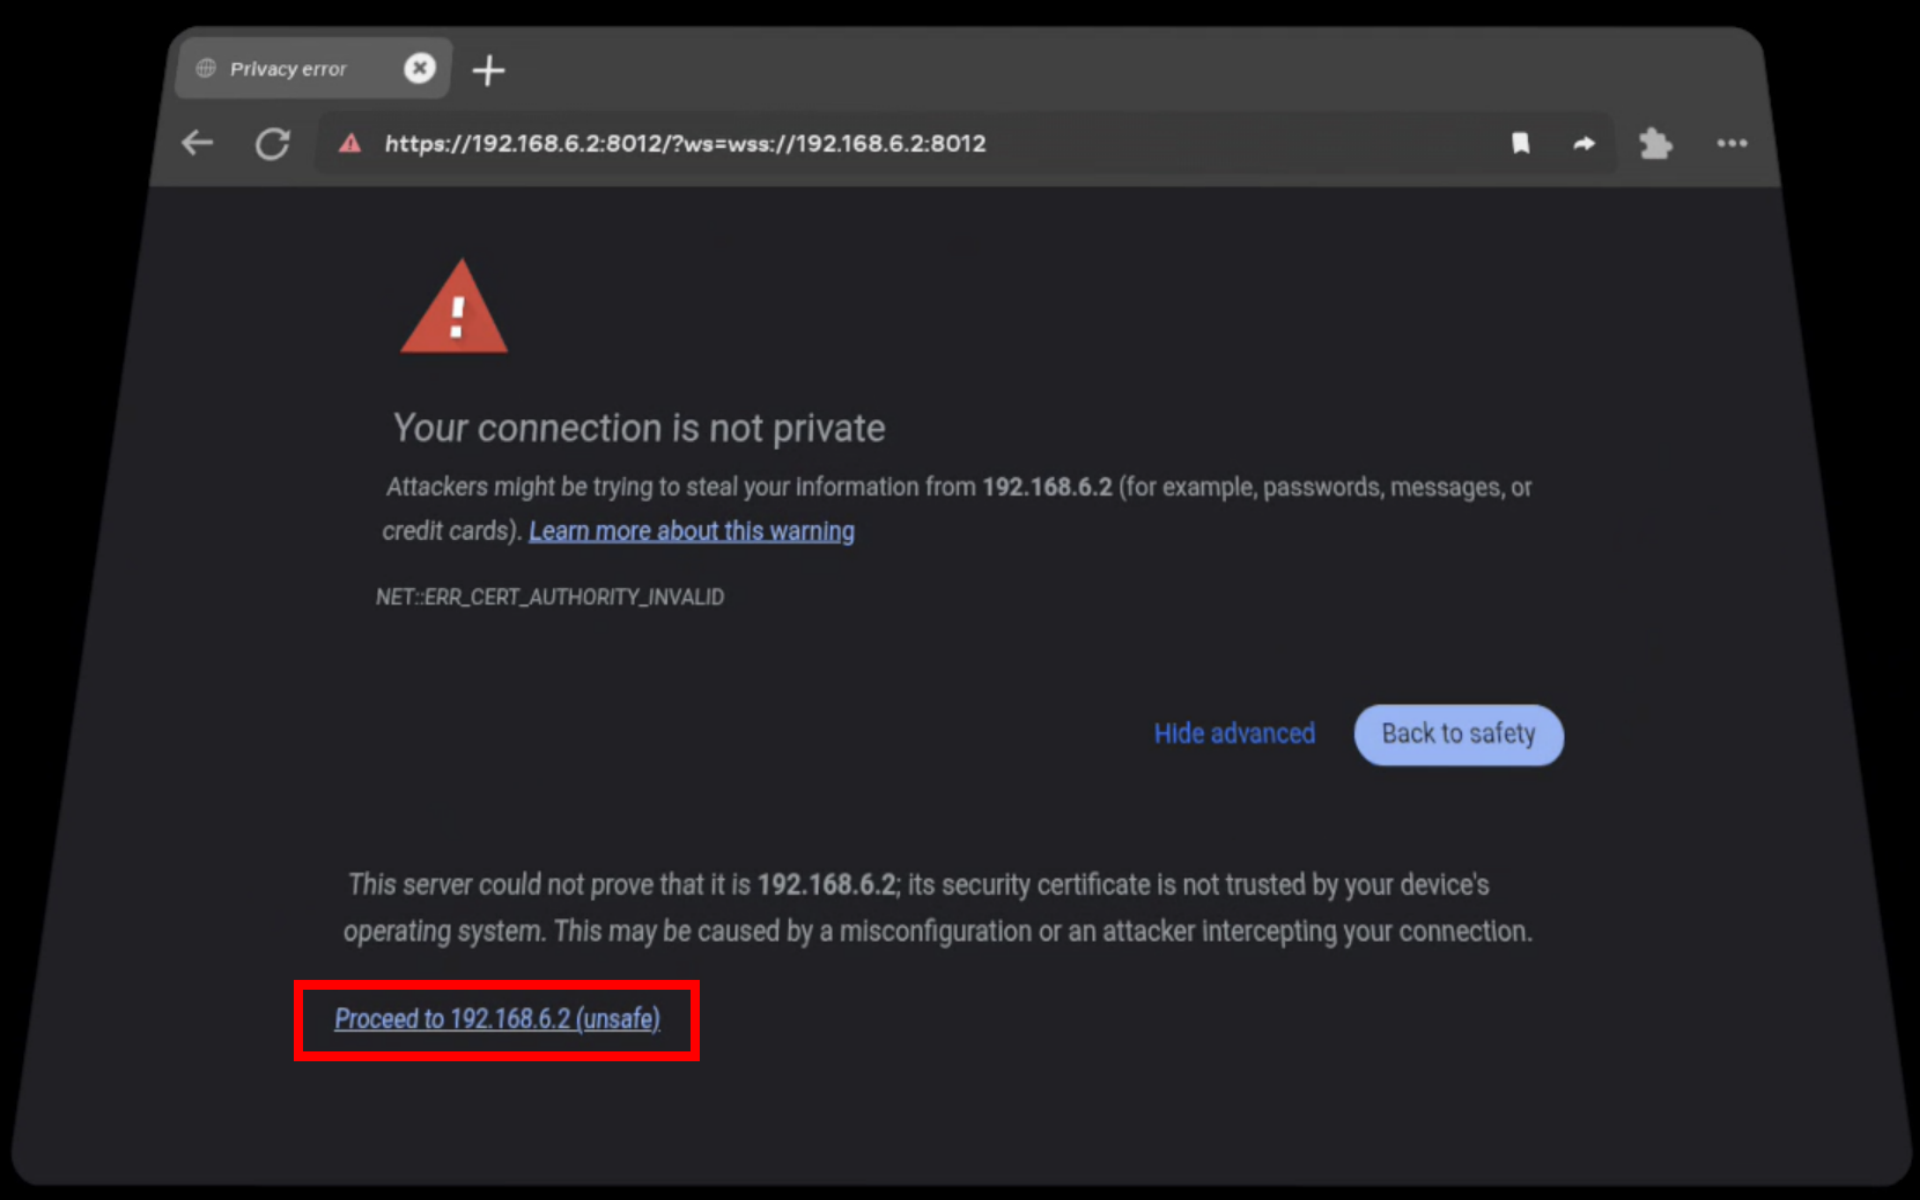
Self-signed HTTPS warning
If the browser shows a certificate warning, use Advanced → proceed to the site (exact wording may vary by browser).
Enter VR
Click the Enter VR button.

The session is ready when passthrough becomes active and axis markers appear on your hands.
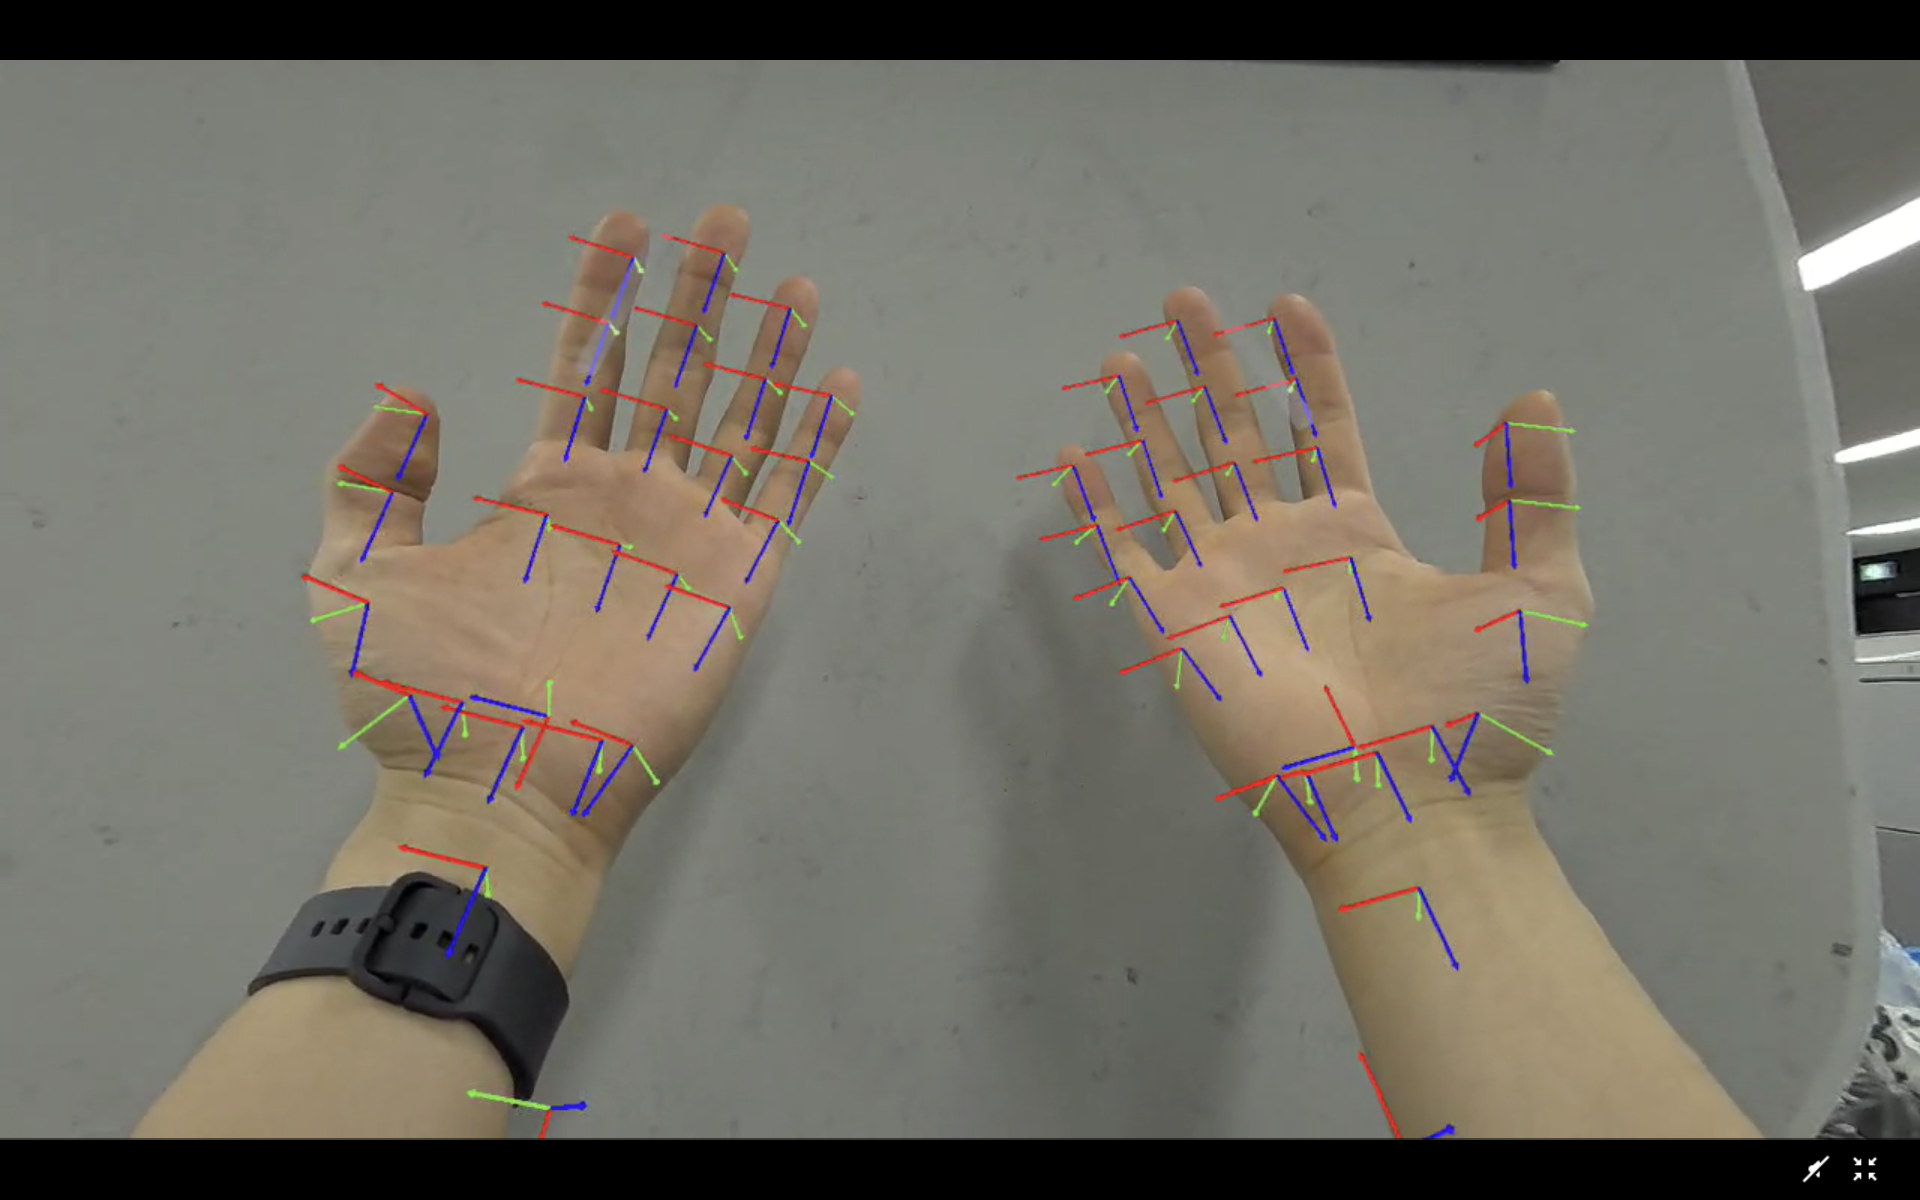
VR setup is now complete.
WARNING
If the Vuer server is restarted, you must refresh the browser page and click Enter VR again.
Cyclo Control Setup
VR teleoperation relies on Cyclo Control as the robot retargeting layer. It receives VR references and generates the hand trajectories that the robot follows. Ensure it is installed and configured before proceeding.
You can find the installation steps in the cyclo_control repository.
For more information, see Cyclo Control.
Running VR Teleoperation
First, enter the robotis_hand Docker container:
cd ~/robotis_hand
./docker/container.sh enter
1. Bring up the robot.
Launch the bringup script for your specific hand model:
# For the left hand
ros2 launch robotis_hand_bringup hx5_d20_left.launch.py

# For the right hand
ros2 launch robotis_hand_bringup hx5_d20_right.launch.py
2. Start Cyclo Motion Controller
Once the robot has reached its initial position, open a new terminal, enter the Docker container, and run the retargeting teleoperation node:
ros2 run cyclo_motion_controller_ros_py retargeting_teleop3. Activate VR Publisher
The VR node will only begin publishing reference poses upon receiving a message on the /reactivate topic.
WARNING
Pre-Activation Alignment: Physically align your hand with the current pose of the ROBOTIS Hand before activating. This prevents sudden, unintended movements upon startup.
Publish the activation signal (type std_msgs/msg/Bool) directly from the terminal:
ros2 topic pub /reactivate std_msgs/msg/Bool "{data: true}"TIP
You can integrate a custom hardware trigger, such as a foot pedal or physical button. To do this, create a node that publishes to the /reactivate topic when your device input is detected.
4. Pause and resume teleoperation
- To Pause: Publish to
/reactivatewith the data field set tofalse - To Resume: Re-align your hand pose and repeat
Step 3
Troubleshooting
Communication Issues
- If ROS communication is not working: check the
ROS_DOMAIN_ID. (ROS_DOMAIN_IDis set to30by default within the provided Docker container.) - If the Vuer server is not running: check the terminal logs.
- If the robot remains stationary after enabling VR publishing: ensure the
/reactivatetopic was published successfully.
Network Performance
- If value updates are slow: check your Wi-Fi connection. Network performance has a major effect. A wired connection is recommended.
- If wireless performance is insufficient, use a USB-C to Ethernet adapter to establish a wired connection for the Meta Quest 3.