DYNAMIXEL Wizard Guide
This guide explains how to use DYNAMIXEL Wizard 2.0 to connect, monitor, and control the ROBOTIS Hand.
Prerequisites
Before using DYNAMIXEL Wizard 2.0, make sure:
- The ROBOTIS Hand is properly set up and powered ON
- The ROBOTIS Hand is connected to the PC via a U2D2
Connecting to DYNAMIXEL Wizard 2.0
DYNAMIXEL Wizard 2.0 is a configuration and management tool for DYNAMIXEL actuators. Follow the steps below to connect the ROBOTIS Hand.
1. Install DYNAMIXEL Wizard 2.0
Download and install DYNAMIXEL Wizard 2.0 from the official ROBOTIS e-Manual:
2. Connect the Hardware
Ensure the following hardware connections are complete:
- Connect the U2D2 to your PC via USB
- Connect the U2D2 Power Hub to the U2D2
- Connect the ROBOTIS Hand to the U2D2 Power Hub using 4-pin robot cables
- Supply power to the U2D2 Power Hub (24V recommended)
3. Scan for Connected Devices
- Launch DYNAMIXEL Wizard 2.0
- Click the
Optionsbutton in the top menu bar
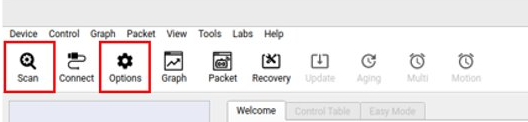
- Select Protocol 2.0
- Select the appropriate COM port (or
/dev/ttyUSB0on Linux) - Set the Baudrate to match the ROBOTIS Hand configuration
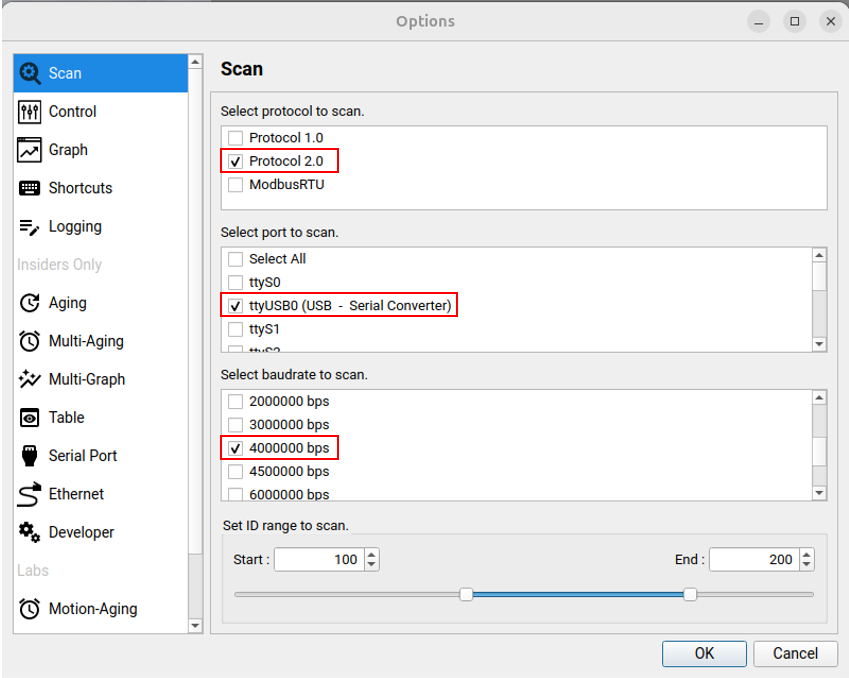
- Click
Scanto detect all connected actuators and sensors in the side panel
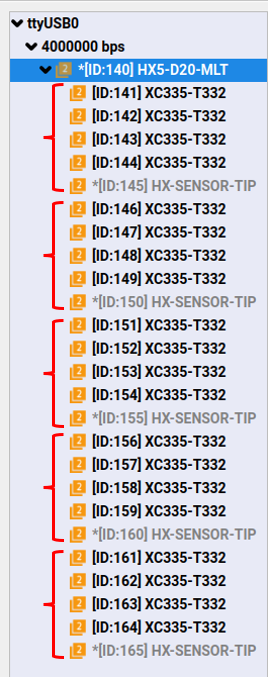
Once the scan is complete, all connected actuators will be listed in the device panel on the left side of the application.
Control Monitoring
- The ROBOTIS Hand HX5-D20 features five fingers, each equipped with four actuators and one tactile sensor. You can easily monitor the real-time status of every component.
HX Hands Tool
You can control the ROBOTIS Hand through the specialized HX Hands Tool.
- In the menu bar, navigate to
Toolsand selectHX Hands - Click the
Syncbutton to synchronize the hand with the Wizard software - Choose a control mode:
PresetorHand - Monitor the hand's current status via the GUI
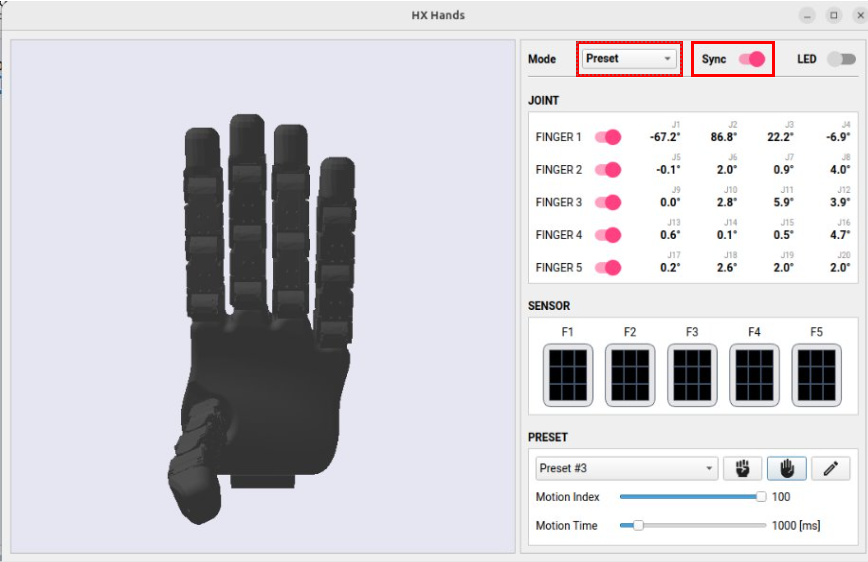
Preset Control via Tools Menu
The Preset feature allows you to save and load up to three custom configurations. This is ideal for quickly testing and switching between predefined poses or grip patterns.
Accessing the Preset Feature
- Open DYNAMIXEL Wizard 2.0 and connect to the ROBOTIS Hand
- Go to Tools > HX Hands and navigate to the preset configuration section
Default Presets
| Preset | Example Use Case |
|---|---|
| Preset 1 | Pinch Grip |
| Preset 2 | 3-Finger Grasp |
| Preset 3 | Envelope Grasp |
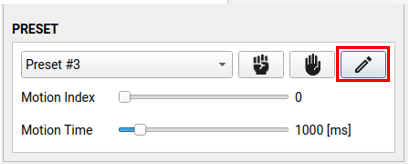
Custom Preset
Click Custom Preset as shown in the image below.
You can customize the release and grasp positions as shown in the image below.
- Set a joint value for each finger
- Set PID gain values and current limits for the robot hand.
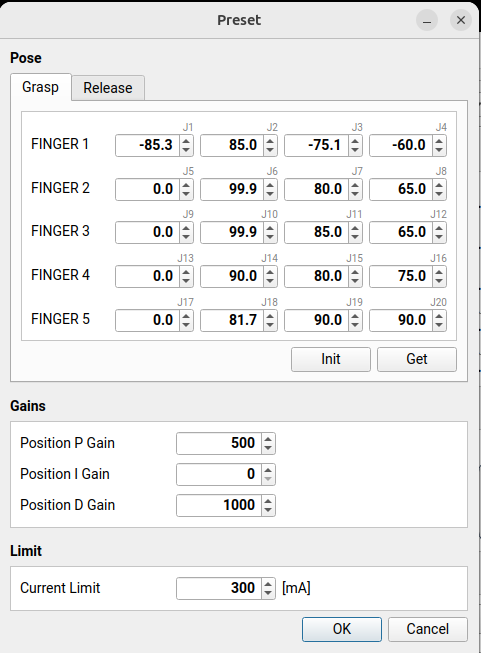
When using preset mode, executing the release pose before the grasp pose is recommended.
Saving Presets
You can save up to three presets, each storing specific joint positions. There are two ways to capture a pose:
Method A: Manual Posing
- Select Hand Mode
- Physically move the ROBOTIS Hand into the desired pose by hand
- Select an available preset slot (Preset 1, Preset 2, or Preset 3)
- Click Save to store the current joint configuration
Method B: Numerical Entry
- Select an available preset slot (Preset 1, Preset 2, or Preset 3)
- Manually type the desired joint values into the input fields for the selected preset slot
- Click Save to store the current joint configuration
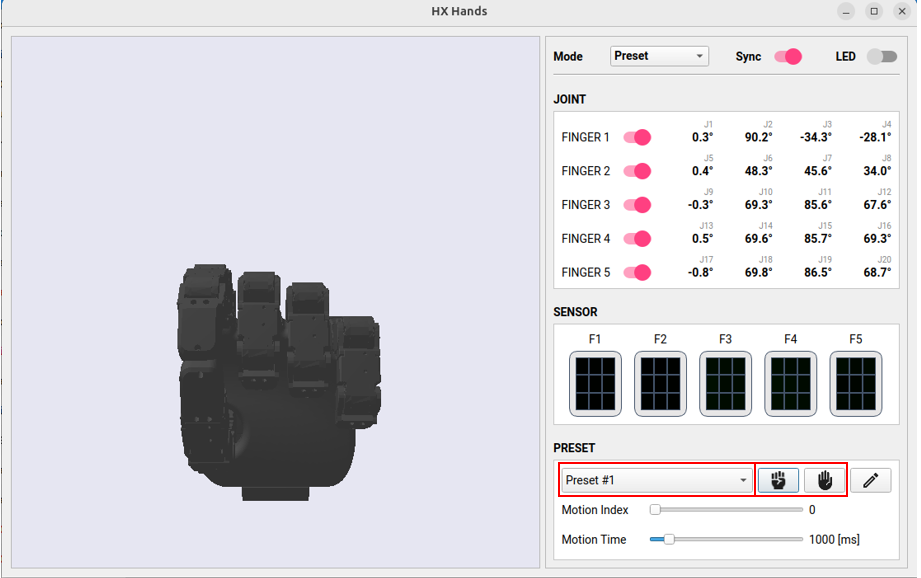
Loading and Executing Presets
Once presets are saved, you can instantly apply them to control the ROBOTIS Hand:
- Open the preset configuration window via Tools
- Select the desired preset (Preset 1, Preset 2, or Preset 3)
- Click Execute (or Load) to apply the saved joint positions to the hand
- Click Grasping (or Releasing) to execute a saved preset
- Use the hand icon next to the Preset table
- It is safe to execute Grasping and Releasing alternately
Ensure the hand is in a safe position before executing a preset to avoid unexpected collisions or movements.
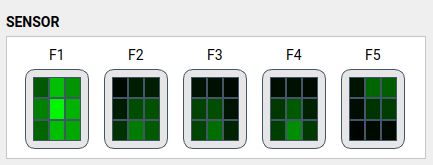
Checking Tactile Sensors
The GUI provides a visual representation of tactile sensor data. Pressure levels are indicated by color changes:
- Bright Green: Strong pressure detected
- Black Background: Weak or no pressure