
Multi-turn error — clearing procedure (OMY)
If you see logs like the following while running bringup, a multi-turn error has occurred.
[ros2_control_node-1] [ID:01] RX_PACKET_ERROR : [RxPacketError] Hardware error occurred. Check the error at Control Table (Hardware Error Status)!
[ros2_control_node-1] [comm_id:01][ID:01] Request ping	 - RX_PACKET_ERROR : [RxPacketError] Hardware error occurred. Check the error at Control Table (Hardware Error Status)!
[ros2_control_node-1] [ReadItem][ID:01][comm_id:01] RX_PACKET_ERROR : [RxPacketError] Hardware error occurred. Check the error at Control Table (Hardware Error Status)!
[ros2_control_node-1] [comm_id:01][ID:01] Error Code Details: 0xc (Multi-turn Error): An issue has occurred with the Multi-turn IC
[ros2_control_node-1] [ID:01] Rebooting...
In this example, the multi-turn error is on Dynamixel ID 1.
Use one of the methods below, depending on whether you use noVNC on the robot or a PC connected to the debug USB port.
Method 1: noVNC and Dynamixel Wizard 2.0
1. Set up the noVNC container
docker-compose.novnc.yml
services:
  novnc-server:
    container_name: novnc-server
    image: robotis/novnc-server:latest
    restart: no
    cap_add:
      - SYS_NICE
    ulimits:
      rtprio: 99
      rttime: -1
      memlock: 8428281856
    network_mode: host
    environment:
      - ROS_DOMAIN_ID=${ROS_DOMAIN_ID:-30}
      - DISPLAY=:99
      - DISPLAY_WIDTH=1920
      - DISPLAY_HEIGHT=1080
      - WEBSOCKIFY_PORT=8090
    volumes:
      - /dev:/dev
      - /dev/shm:/dev/shm
    privileged: true
Then run docker compose -f docker/docker-compose.novnc.yml up to start the noVNC container.
2. Open noVNC in a browser
In a Web browser (for example Chrome), open http://omy-snpr44b{serial-number}.local:8090, replacing {serial-number} with your robot’s serial number. Example: http://omy-snpr44b0000.local:8090
3. Connect noVNC and Dynamixel Wizard 2.0
Connect noVNC and Dynamixel Wizard 2.0 so you can use the wizard on the robot’s desktop.
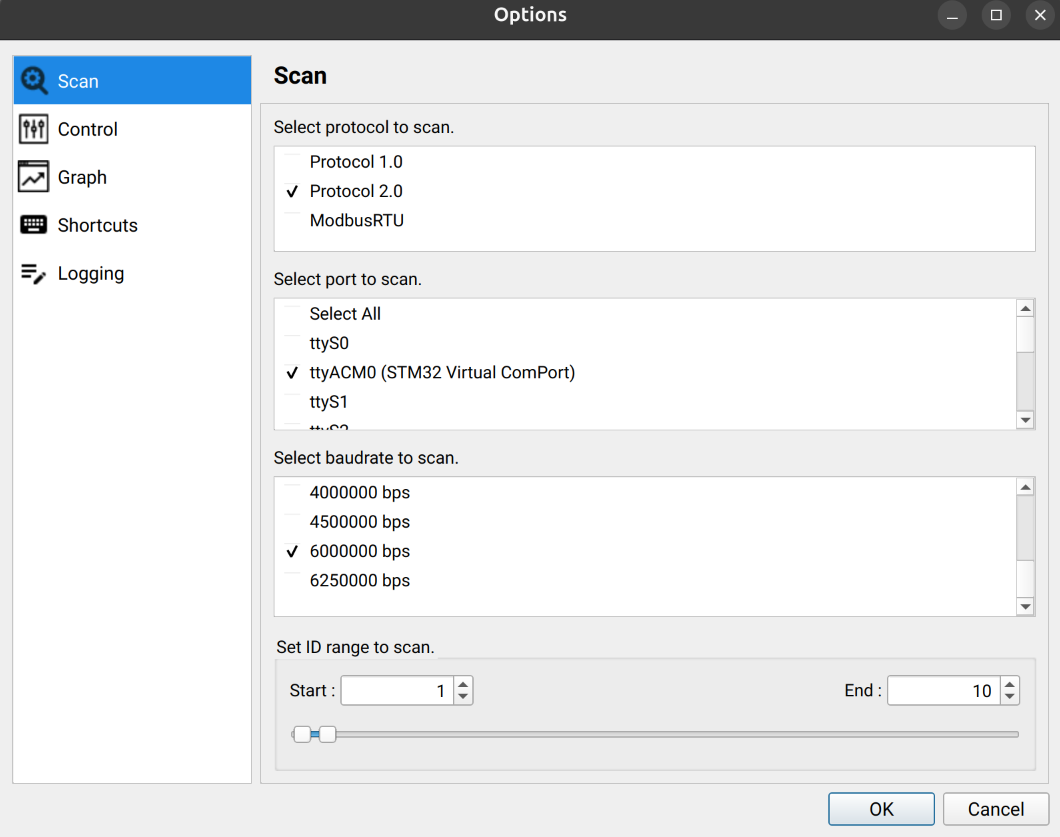
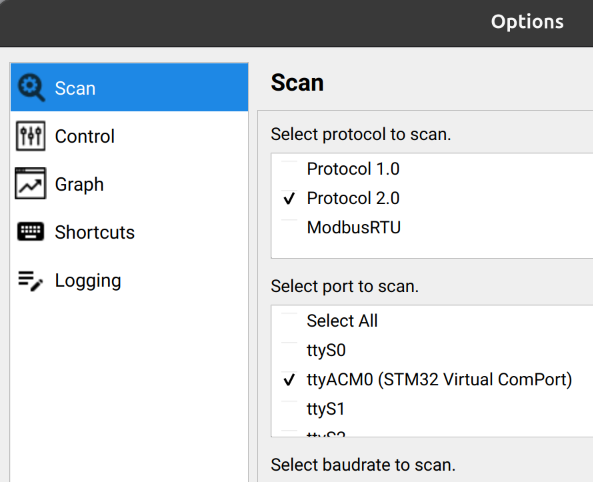
4. Configure Dynamixel Wizard 2.0 and run Scan
In Dynamixel Wizard 2.0, set the following and run Scan:
- Select protocol to scan: Protocol 2.0
- Select port to scan:
/dev/ttyAMA2 - Baud rate: 6250000bps
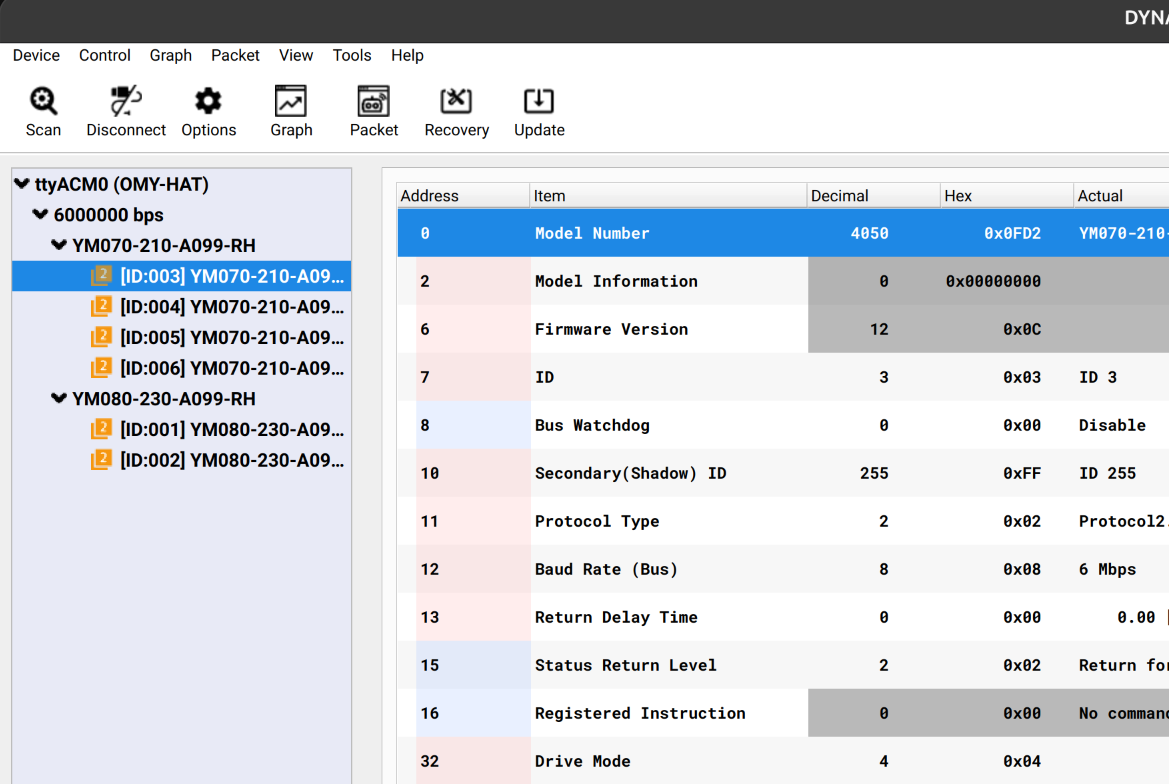
5. Search for DYNAMIXEL-Y actuators
- In the OMY-HAT control table, turn on
DXL Power Enable (512).
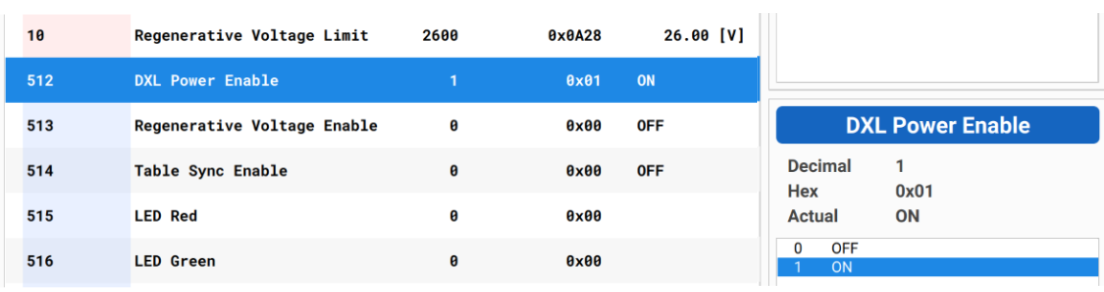
- In Wizard 2.0, open Settings → Search. Enable the 6 Mbps baud rate and select the port to scan
/dev/ttyAMA4, then set the ID search range from 1 to 10.
Click the DYNAMIXEL search button in Wizard 2.0.
Confirm that six DYNAMIXEL-Y actuators (IDs 1–6) are detected.
6. Manually move joints toward the home position
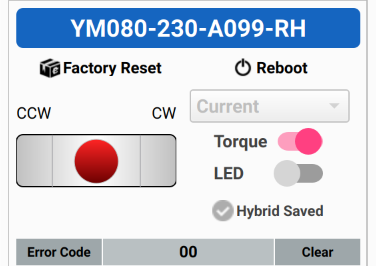
- Set
Operating Mode (33)on the target DYNAMIXEL-Y to Current. - Turn torque on.
WARNING
The robot may move or fall under gravity. Support the robot by hand while torque is enabled.
- Move the joint toward the marked home position.
- Turn torque off.
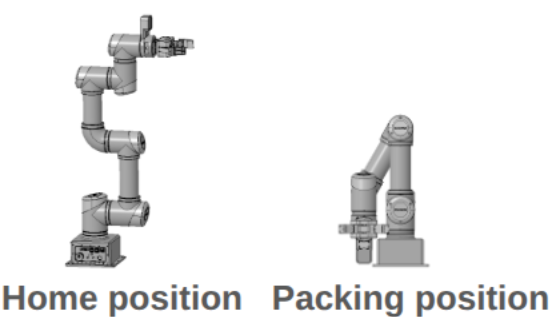
- Repeat substeps 1–4 for each axis until the arm is at the home or packing position.
7. Clear the multi-turn error (Tools menu)
- Select the Dynamixel that reported the error.
- In the top menu, choose Tools → Encoder battery change.
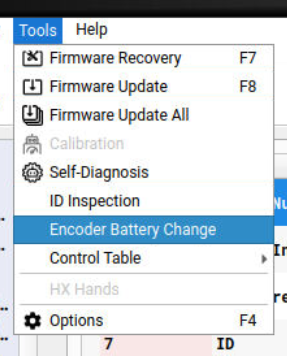
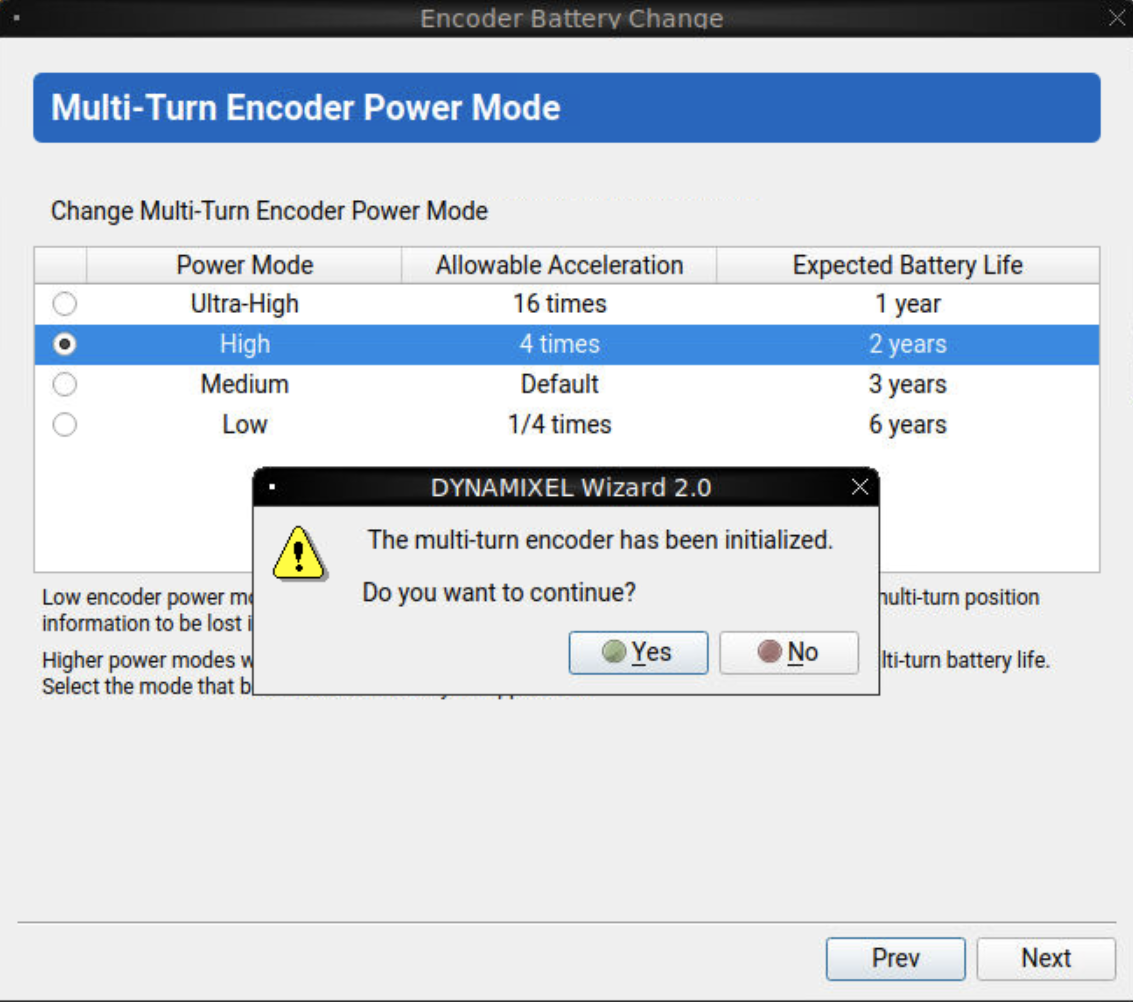
- Set Multi-turn encoder power mode to High, then run Clear.
8. Initialize the home position
- Move the robot to the home position.
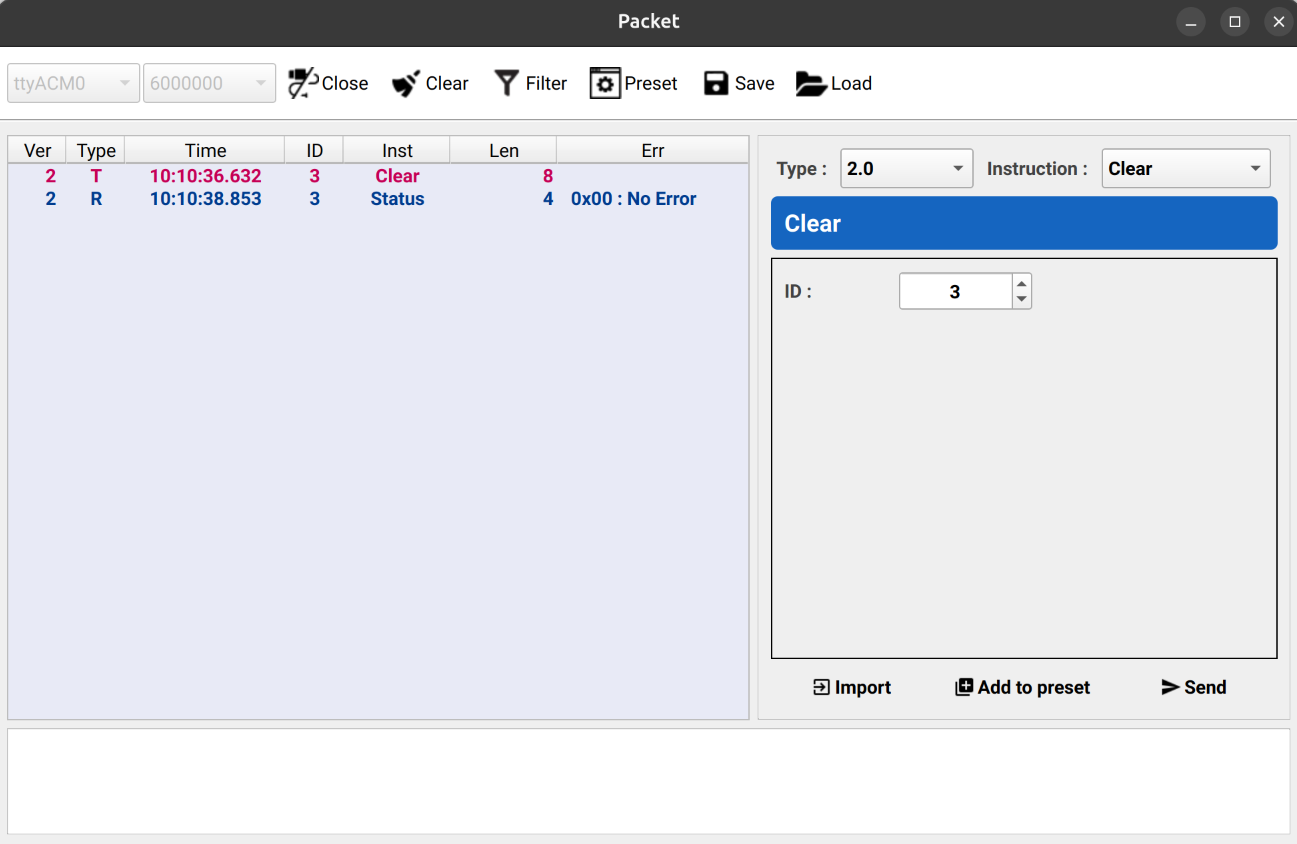
- In Wizard 2.0, open the Packet Monitoring window, open the COM port, and send the
Clearcommand to IDs 1 through 6.
- Check that each joint’s present position is within 1 degrees of the target.
- For any joint outside that range, return to step 6, adjust the joint manually, then repeat step 2.
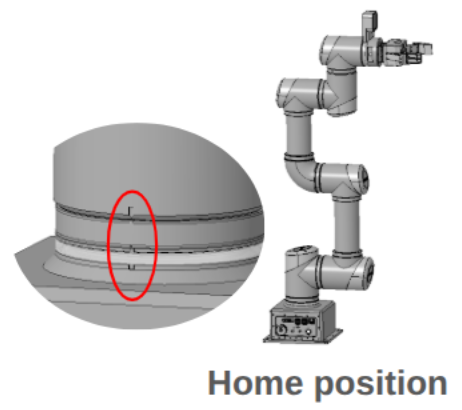
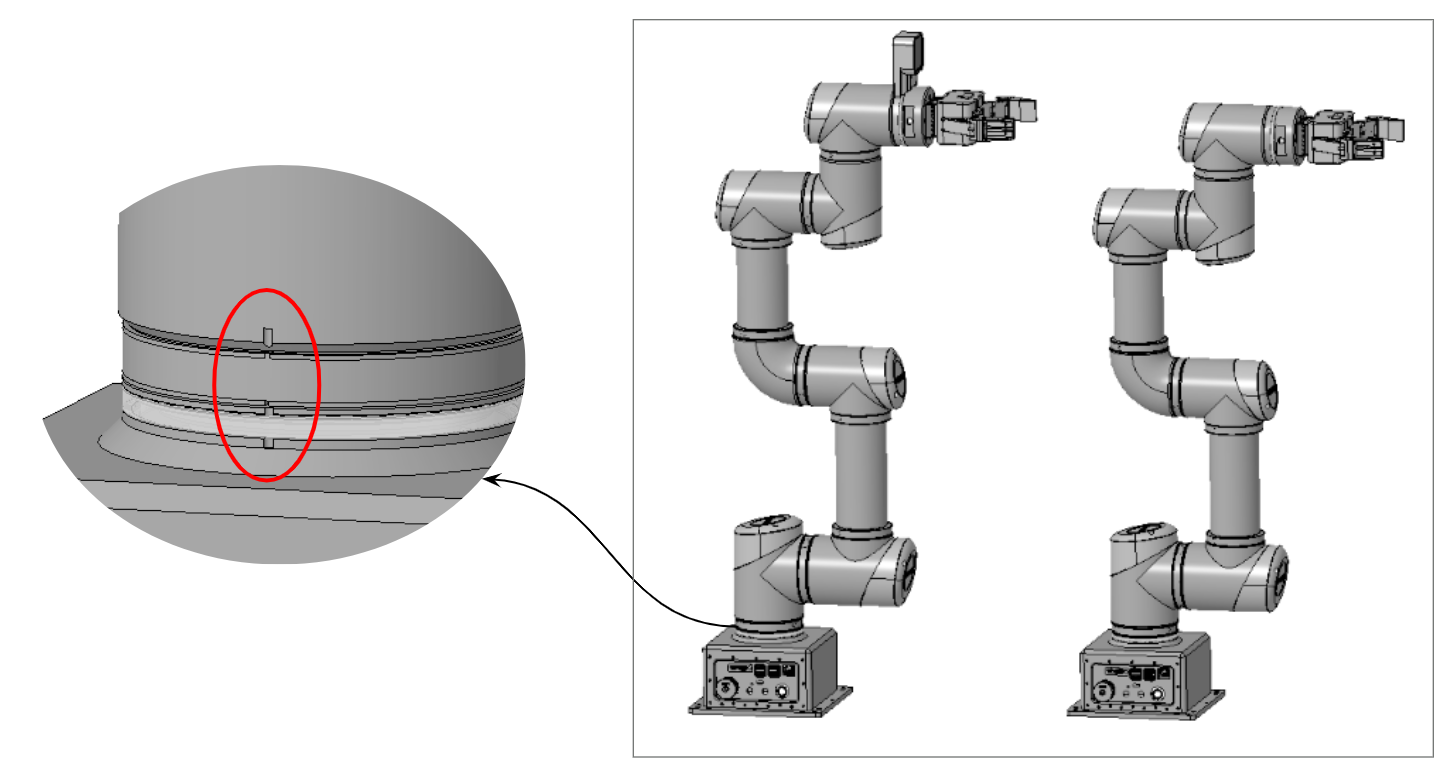
9. OMY home position (slit alignment)
Align the robot to the home position using the home-position slits as shown.
10. Verify with bringup
Run bringup again and confirm the multi-turn error no longer appears.
Method 2: Debug USB port and Dynamixel Wizard 2.0
1. Prepare a PC with Dynamixel Wizard 2.0
Install Dynamixel Wizard 2.0 on a PC or laptop.
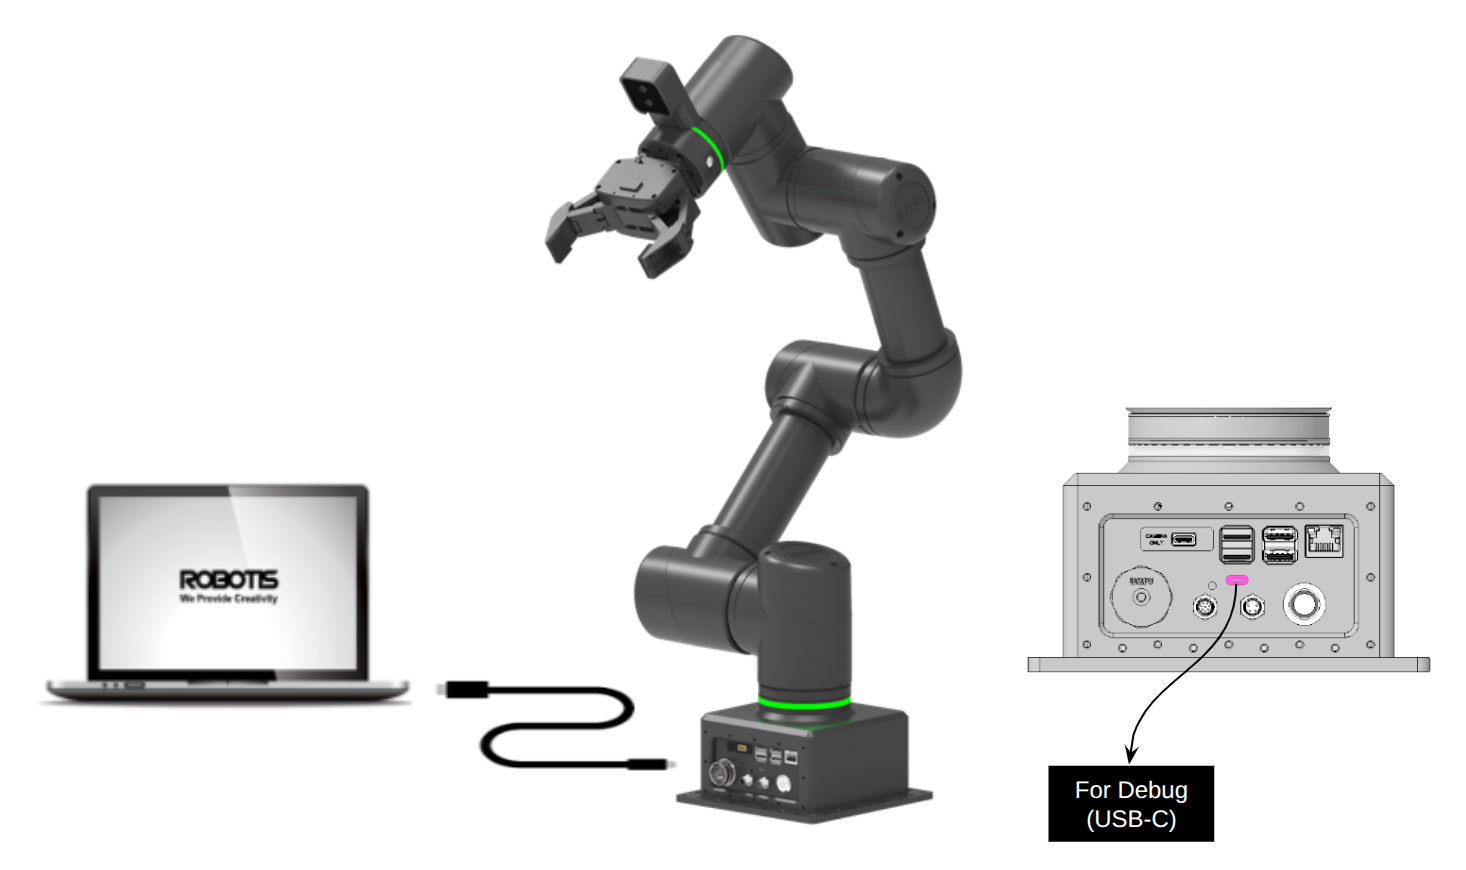
2. Connect the debug USB port
- Connect the Debug USB-C port on the main body panel to the PC with a USB-C cable.
- Power on OMY.
- On the PC, confirm the serial port appears (Windows:
COM*, Ubuntu:/dev/ttyACM*).
3. Search for OMY (OMY-HAT)
- In Wizard 2.0, open Settings and select the COM port the PC recognized.
Click DYNAMIXEL search.
Confirm OMY-HAT (ID 200) is found.
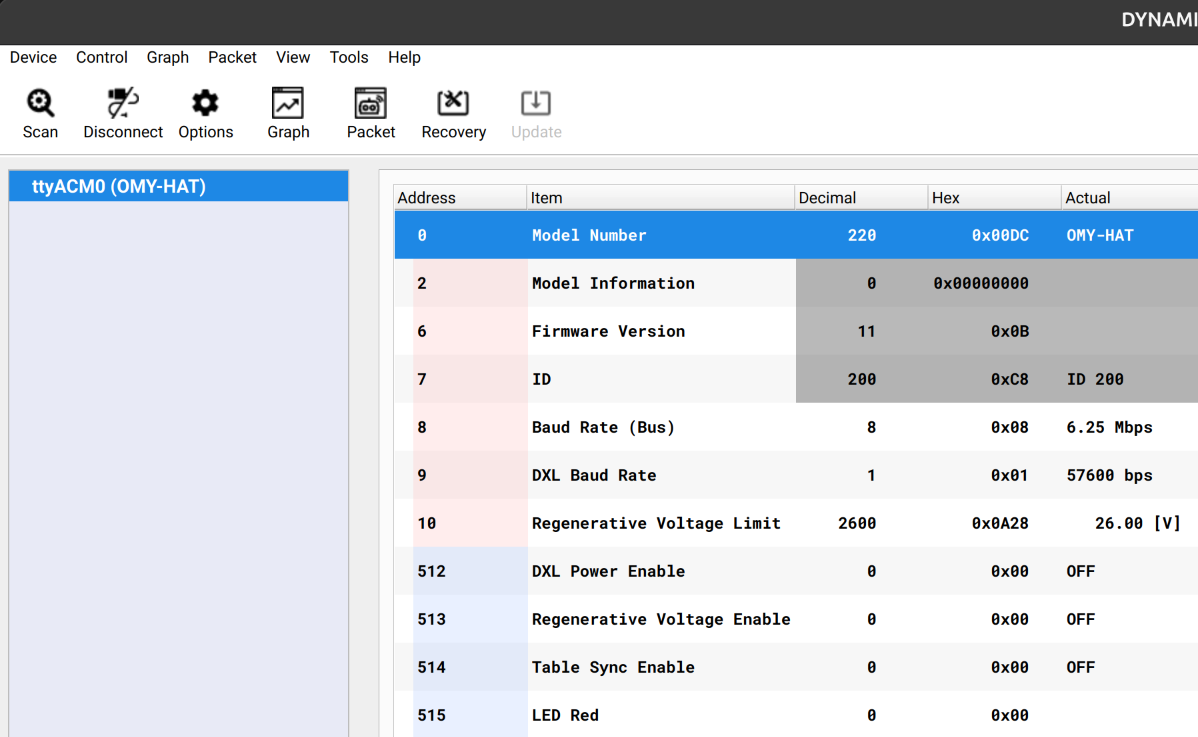
4. Search for DYNAMIXEL-Y actuators
- In the OMY-HAT control table, turn on
DXL Power Enable (512).
- In Settings → Search, enable 6 Mbps and set the ID range from 1 to 10.
Click DYNAMIXEL search.
Confirm six DYNAMIXEL-Y actuators (IDs 1–6) are detected.
5. Reset the DYNAMIXEL-Y multi-turn alarm
- Note the ID of the DYNAMIXEL-Y that reported the alarm.
- In Packet Monitoring, open the COM port and send the
Clearcommand to that actuator.
- Confirm the multi-turn alarm is cleared.

6. Manually move joints toward the home position
- Set
Operating Mode (33)on the target DYNAMIXEL-Y to Current. - Turn torque on.
WARNING
The robot may move or fall under gravity. Support the robot by hand while torque is enabled.
- Move the joint toward the marked home position.
- Turn torque off.
- Repeat substeps 1–4 for each axis until the arm is at the home or packing position.
7. Initialize the home position
- Move the robot to the home position.
- In Packet Monitoring, open the COM port and send
Clearto IDs 1 through 6.
- Check that each joint is within 1 degree.
- If not, return to step 6, adjust manually, then repeat step 2.
8. OMY home position (slit alignment)
Align the robot using the home-position slits.
9. Verify with bringup
Run bringup again and confirm the error no longer appears.