Manual Packing Procedure for OMY
This page describes the procedure for manually moving the OMY to the packing pose when normal operation is unavailable.
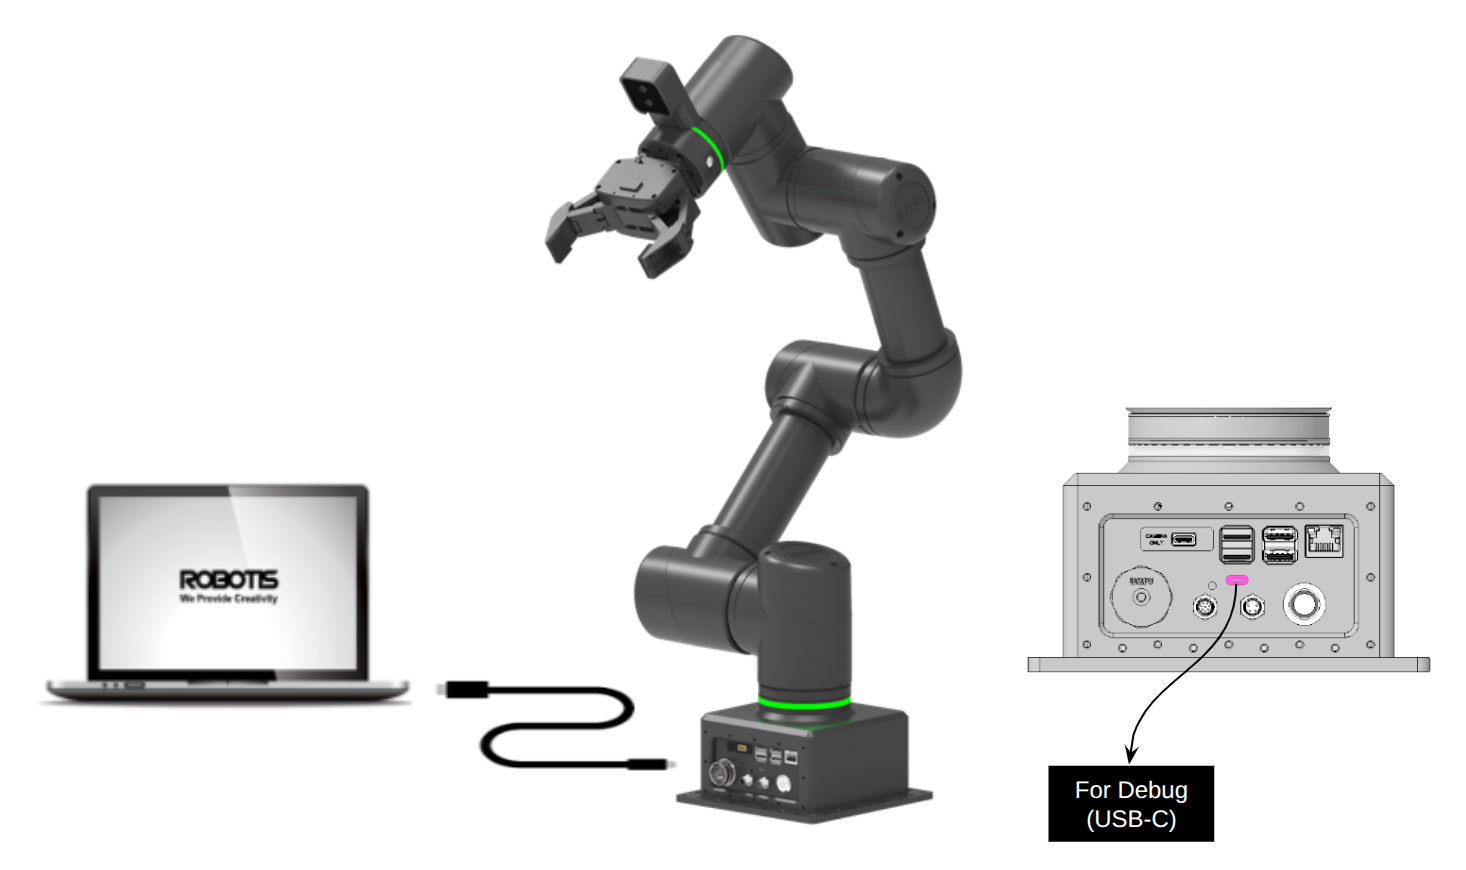
Connect OMY with Wizard 2.0
- Prepare a PC or laptop with Wizard 2.0 installed.
- Connect the Debug USB-C port on the main body panel to the PC using a USB-C cable.
- Turn on OMY.
- On the PC, check in Device Manager that the Virtual COM port is recognized.
Search for OMY on Wizard 2.0
- In the Wizard 2.0 settings window, select the COM port recognized by the PC.
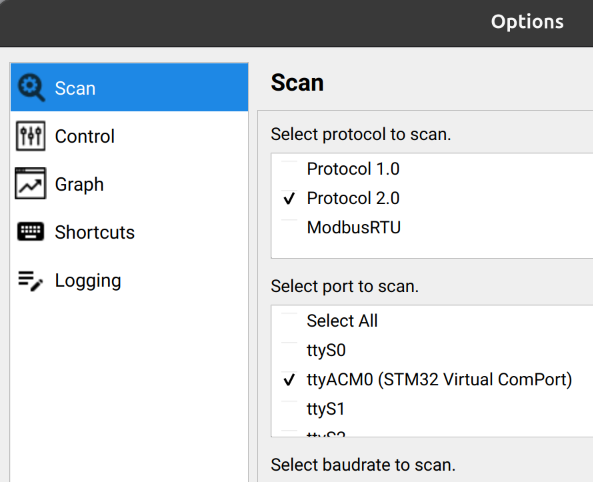
- Click the DYNAMIXEL search button in Wizard 2.0.
- Confirm that
OMY-HAT (ID 200)is recognized.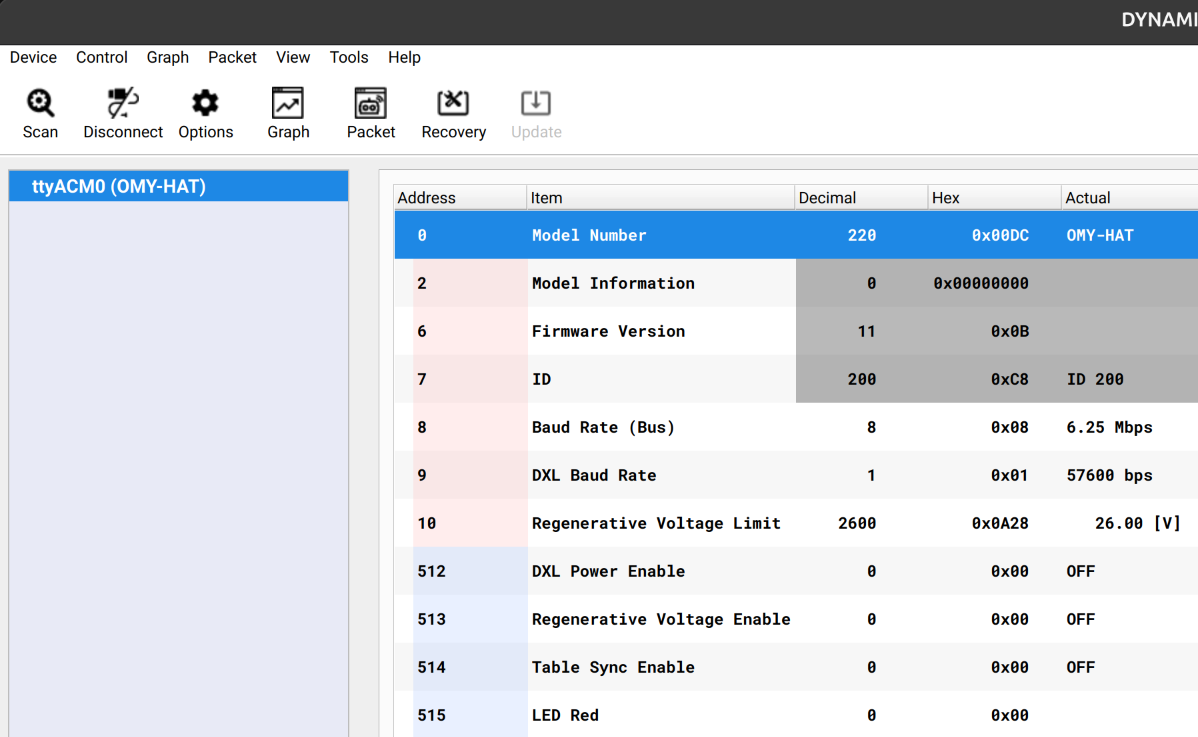
Search for DYNAMIXEL-Y on Wizard 2.0
- Turn on
DXL Power Enable (512)in theOMY-HATcontrol table.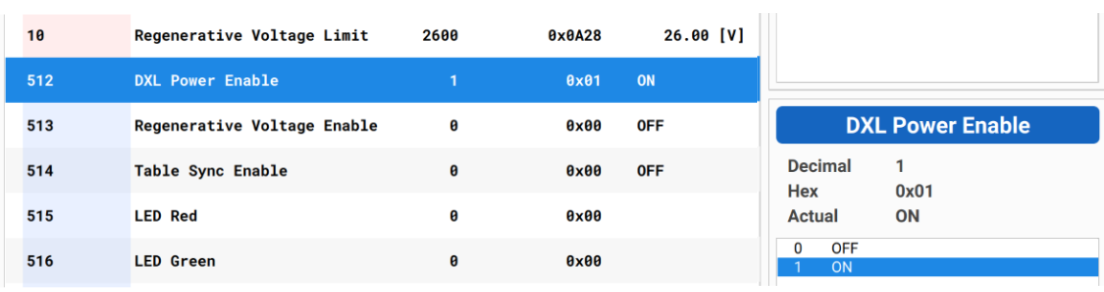
- In
Settings -> Searchin Wizard 2.0, check the6 Mbpsbaud rate and set the ID range to search from1to10.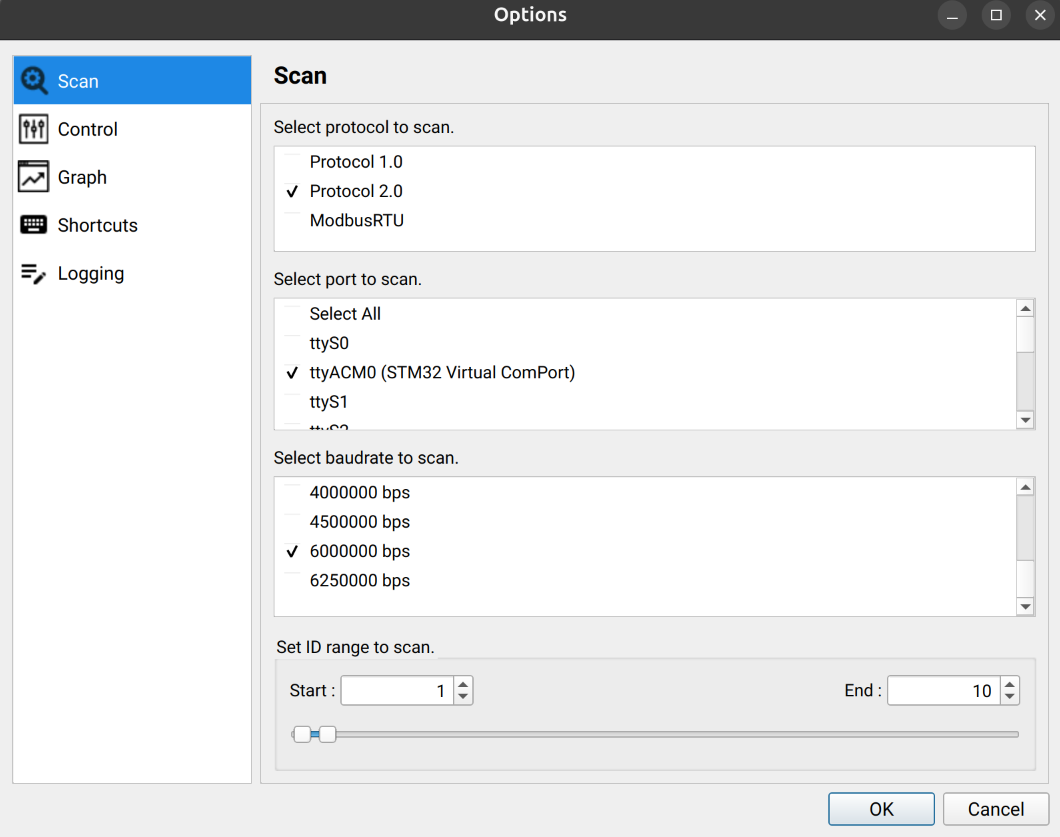
- Click the DYNAMIXEL search button in Wizard 2.0.
- Confirm that six DYNAMIXEL-Y actuators (ID
1to6) are recognized.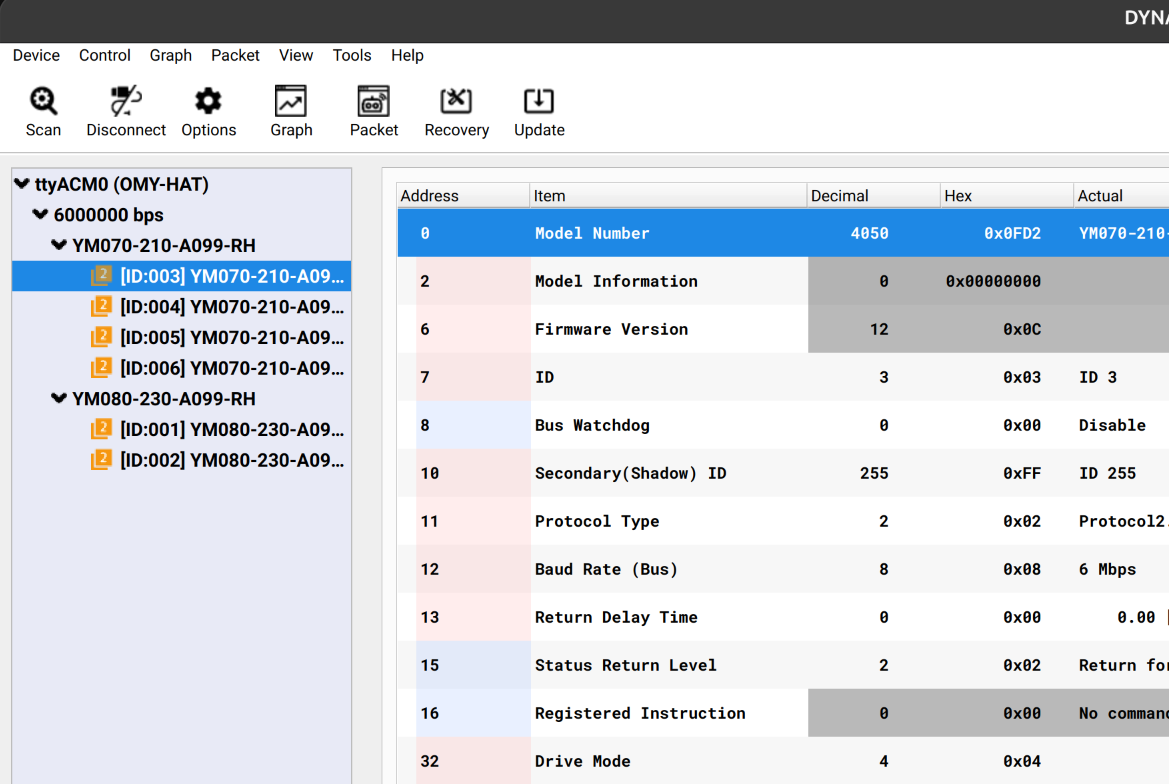
Reset DYNAMIXEL-Y multi-turn alarm
- Check the ID of the DYNAMIXEL-Y actuator that raised the alarm.
- In the Packet Monitoring window of Wizard 2.0, open the COM port and send the
Clearcommand.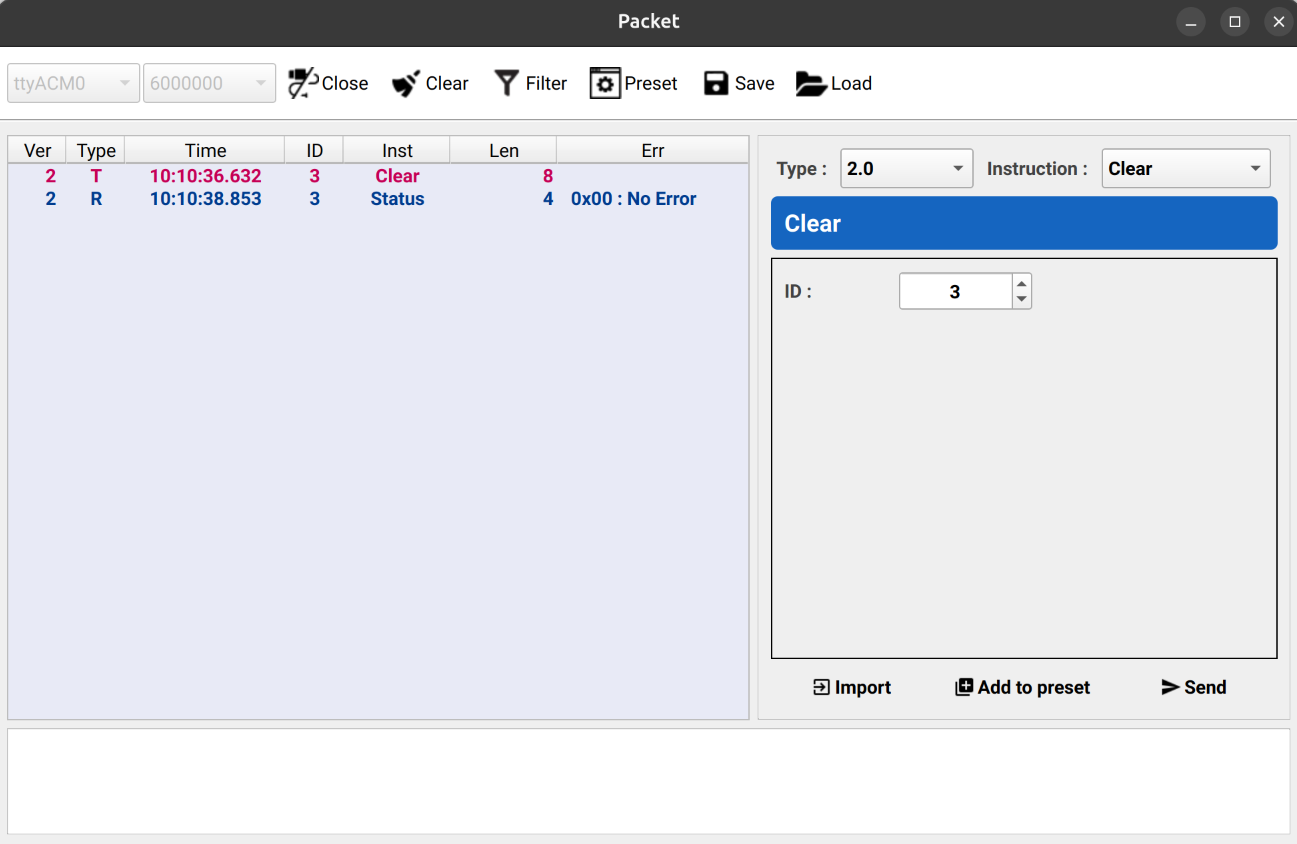
- Confirm that the multi-turn alarm has been cleared.

Manual operation of DYNAMIXEL-Y
- Change
Operating Mode (33)of the target DYNAMIXEL-Y toCurrent. - Turn the torque on.
WARNING
Caution: The robot may fall in the direction of gravity, so it must be held by hand.
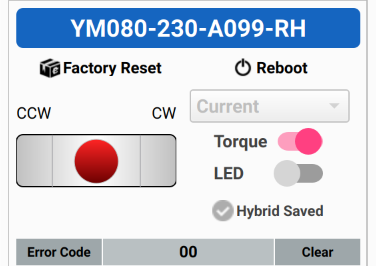 3. Move the target axis to the marked home position. 4. Turn the torque off. 5. Repeat steps 1 to 4 for each axis until the robot reaches the home position or the packing position (see the next block).
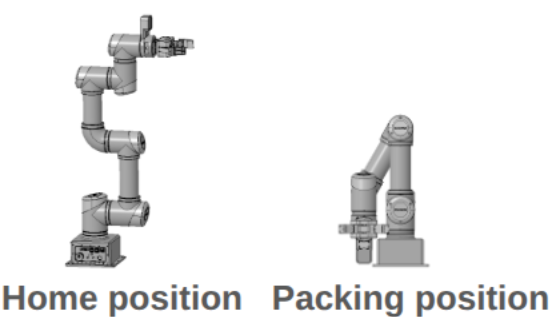
Initialize the home position
- Move the robot to the home position.
- In the Packet Monitoring window of Wizard 2.0, open the COM port and send the
Clearcommand to IDs1through6. - Check that the current position of each joint is within
1degree. - For any joint outside that range, refer to the previous block and manually move it to the home position, then repeat step 2.
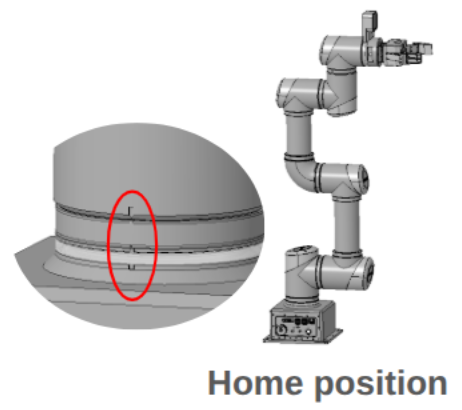
OMY home position
Move the robot to the home position by aligning it with the home-position slit. 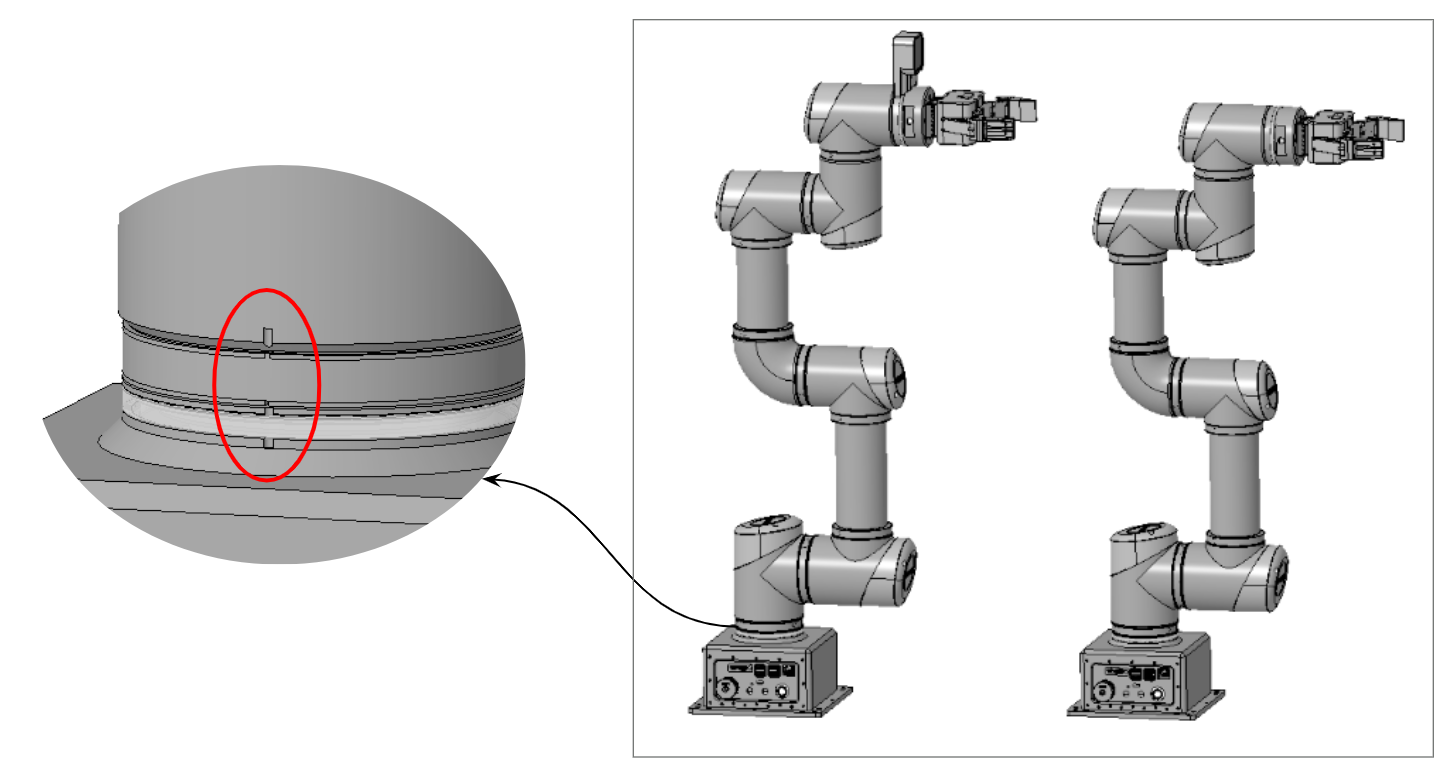
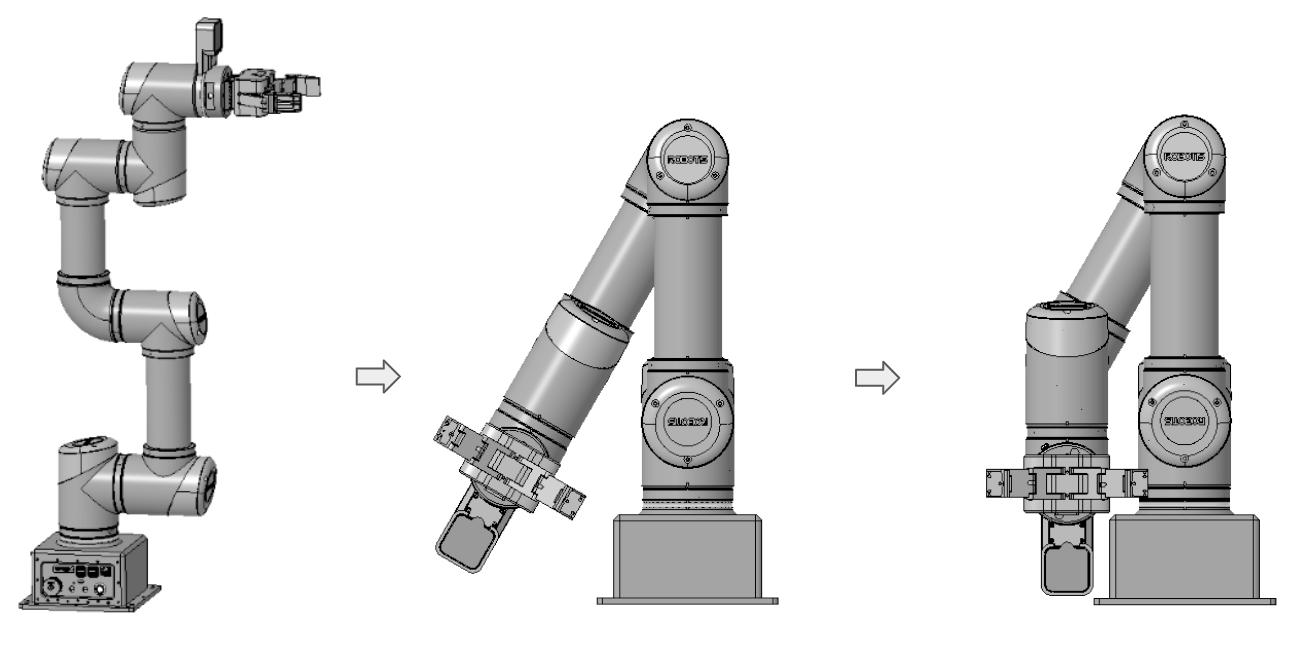
OMY packing position
- Confirm that the robot is in the home position.
- Move joint 3 to
150degrees toward the base panel. - Move joint 4 to
30degrees.