Setup Guide for OMY
This guide will walk you through the process of setting up your OMY hardware and software environment.
Hardware Setup
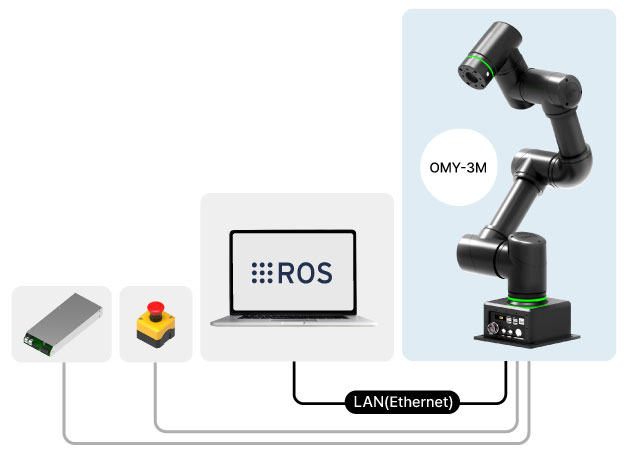
OMY-3M
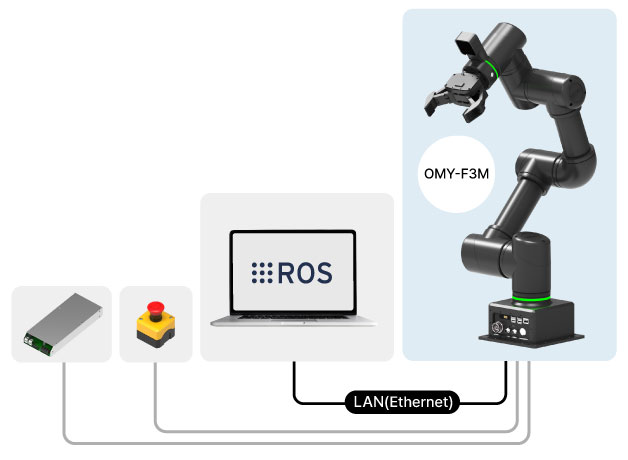
OMY-F3M
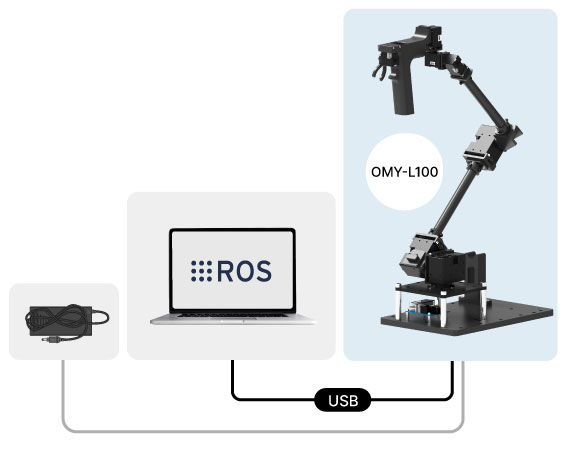
OMY-L100
OMY-AI3M
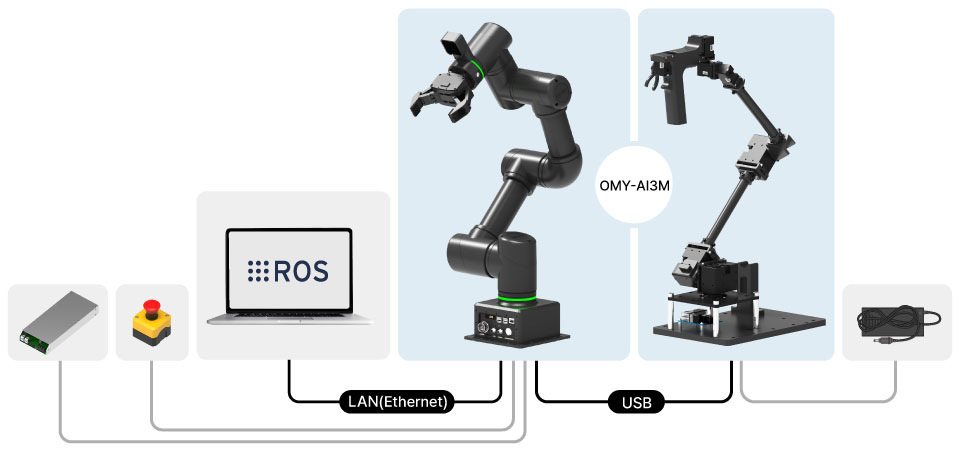
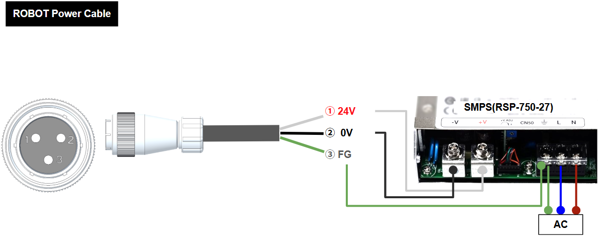
Power connection
Download Repositories
Clone the necessary packages for OMY.
git clone https://github.com/ROBOTIS-GIT/open_manipulator
git clone --recurse-submodules https://github.com/ROBOTIS-GIT/physical_ai_tools.git
SSH connection
Network Access Method
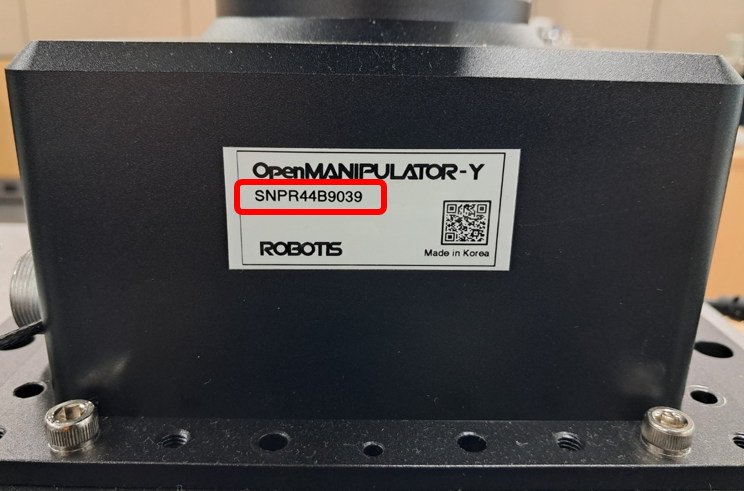
Start by connecting the ROBOT PC to the same network as the USER PC using a LAN cable, then power on the OMY (press and release the power button until it turns white). The OMY OS uses mDNS technology to discover its IP address. Each time OMY OS boots, it sets the SBC’s hostname to the serial number (SN) written on the product (e.g., SNPR44B9999). In environments where UDP Multicast is available (such as being on the same router), you can connect directly to the ROBOT PC using the hostname. Static IP assignment and other network settings for more advanced connection options are supported through the Manager.
SSH Access Method
(Assuming the SN is SNPR44B9999) To access via SSH over the local network from a Linux environment, use the following command:
ssh root@omy-SNPR44B9999.localTIP
No password is required for SSH access. If you have connection issues, please double-check that you have entered the command correctly, especially the username root.
Docker Setup
- Connect to the OMY via SSH.
- open_manipulator package is located in
/data/docker/open_manipulator. Navigate to this location usingcd:
cd /data/docker/open_manipulator- Update the package and recreate the container with the latest docker image:
git checkout jazzy
git pull
./docker/container.sh start- Access the container:
./docker/container.sh enterTIP
The /workspace folder inside the container is volume mapped (a feature that links file systems) to /data/docker/open_manipulator/workspace on the host. All other areas are volatile and will be lost if the container is damaged or deleted. For more details, see the Docker Volume Configuration section.
Set ROS 2 Domain ID
To allow ROS 2 nodes to communicate properly within the same network and avoid conflicts with other systems, you should set a consistent ROS_DOMAIN_ID.
echo 'export ROS_DOMAIN_ID=30' >> ~/.bashrc
source ~/.bashrc
Unpacking
DANGER
- Following initial setup, the Unpacking script must be executed to prevent self-collision.
- Run this script ONLY in the packed posture, running it in any other orientation may cause damage.
WARNING
- Executing the code will cause OMY to move immediately. Please stay clear and be cautious.
When you first receive the OMY, the manipulator is folded as shown in the image below.
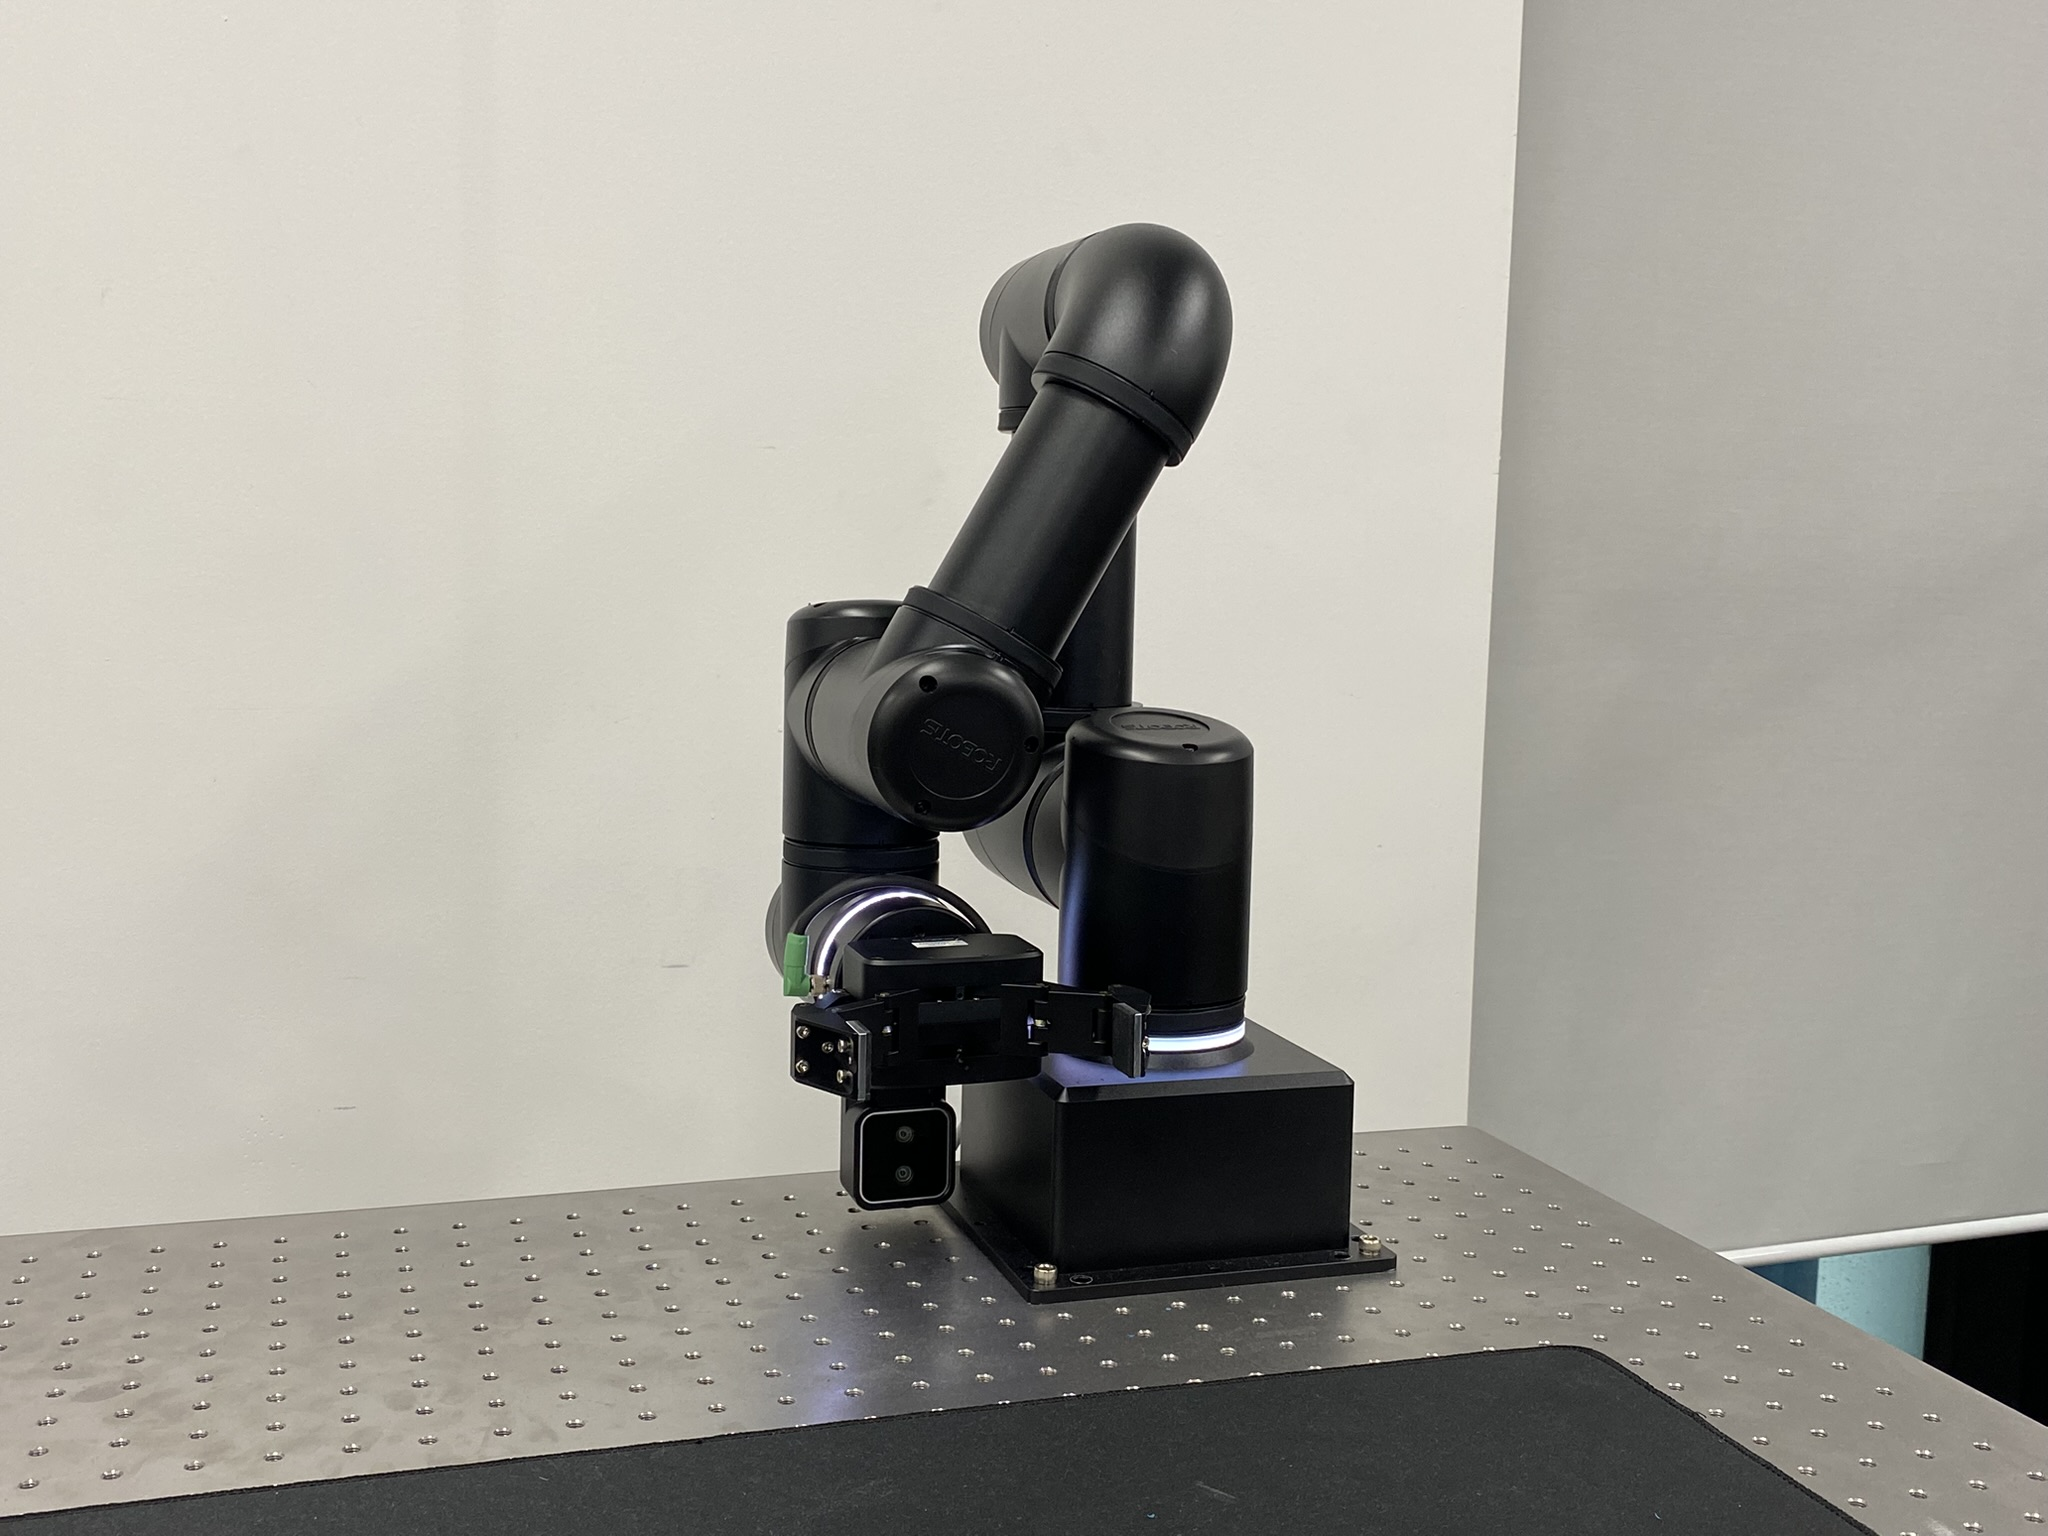
Packed Position
You can move it to the initial position by running the following command for UNPACKING:
ros2 launch open_manipulator_bringup omy_3m_unpack.launch.pyThe image below shows the initial position after UNPACKING.
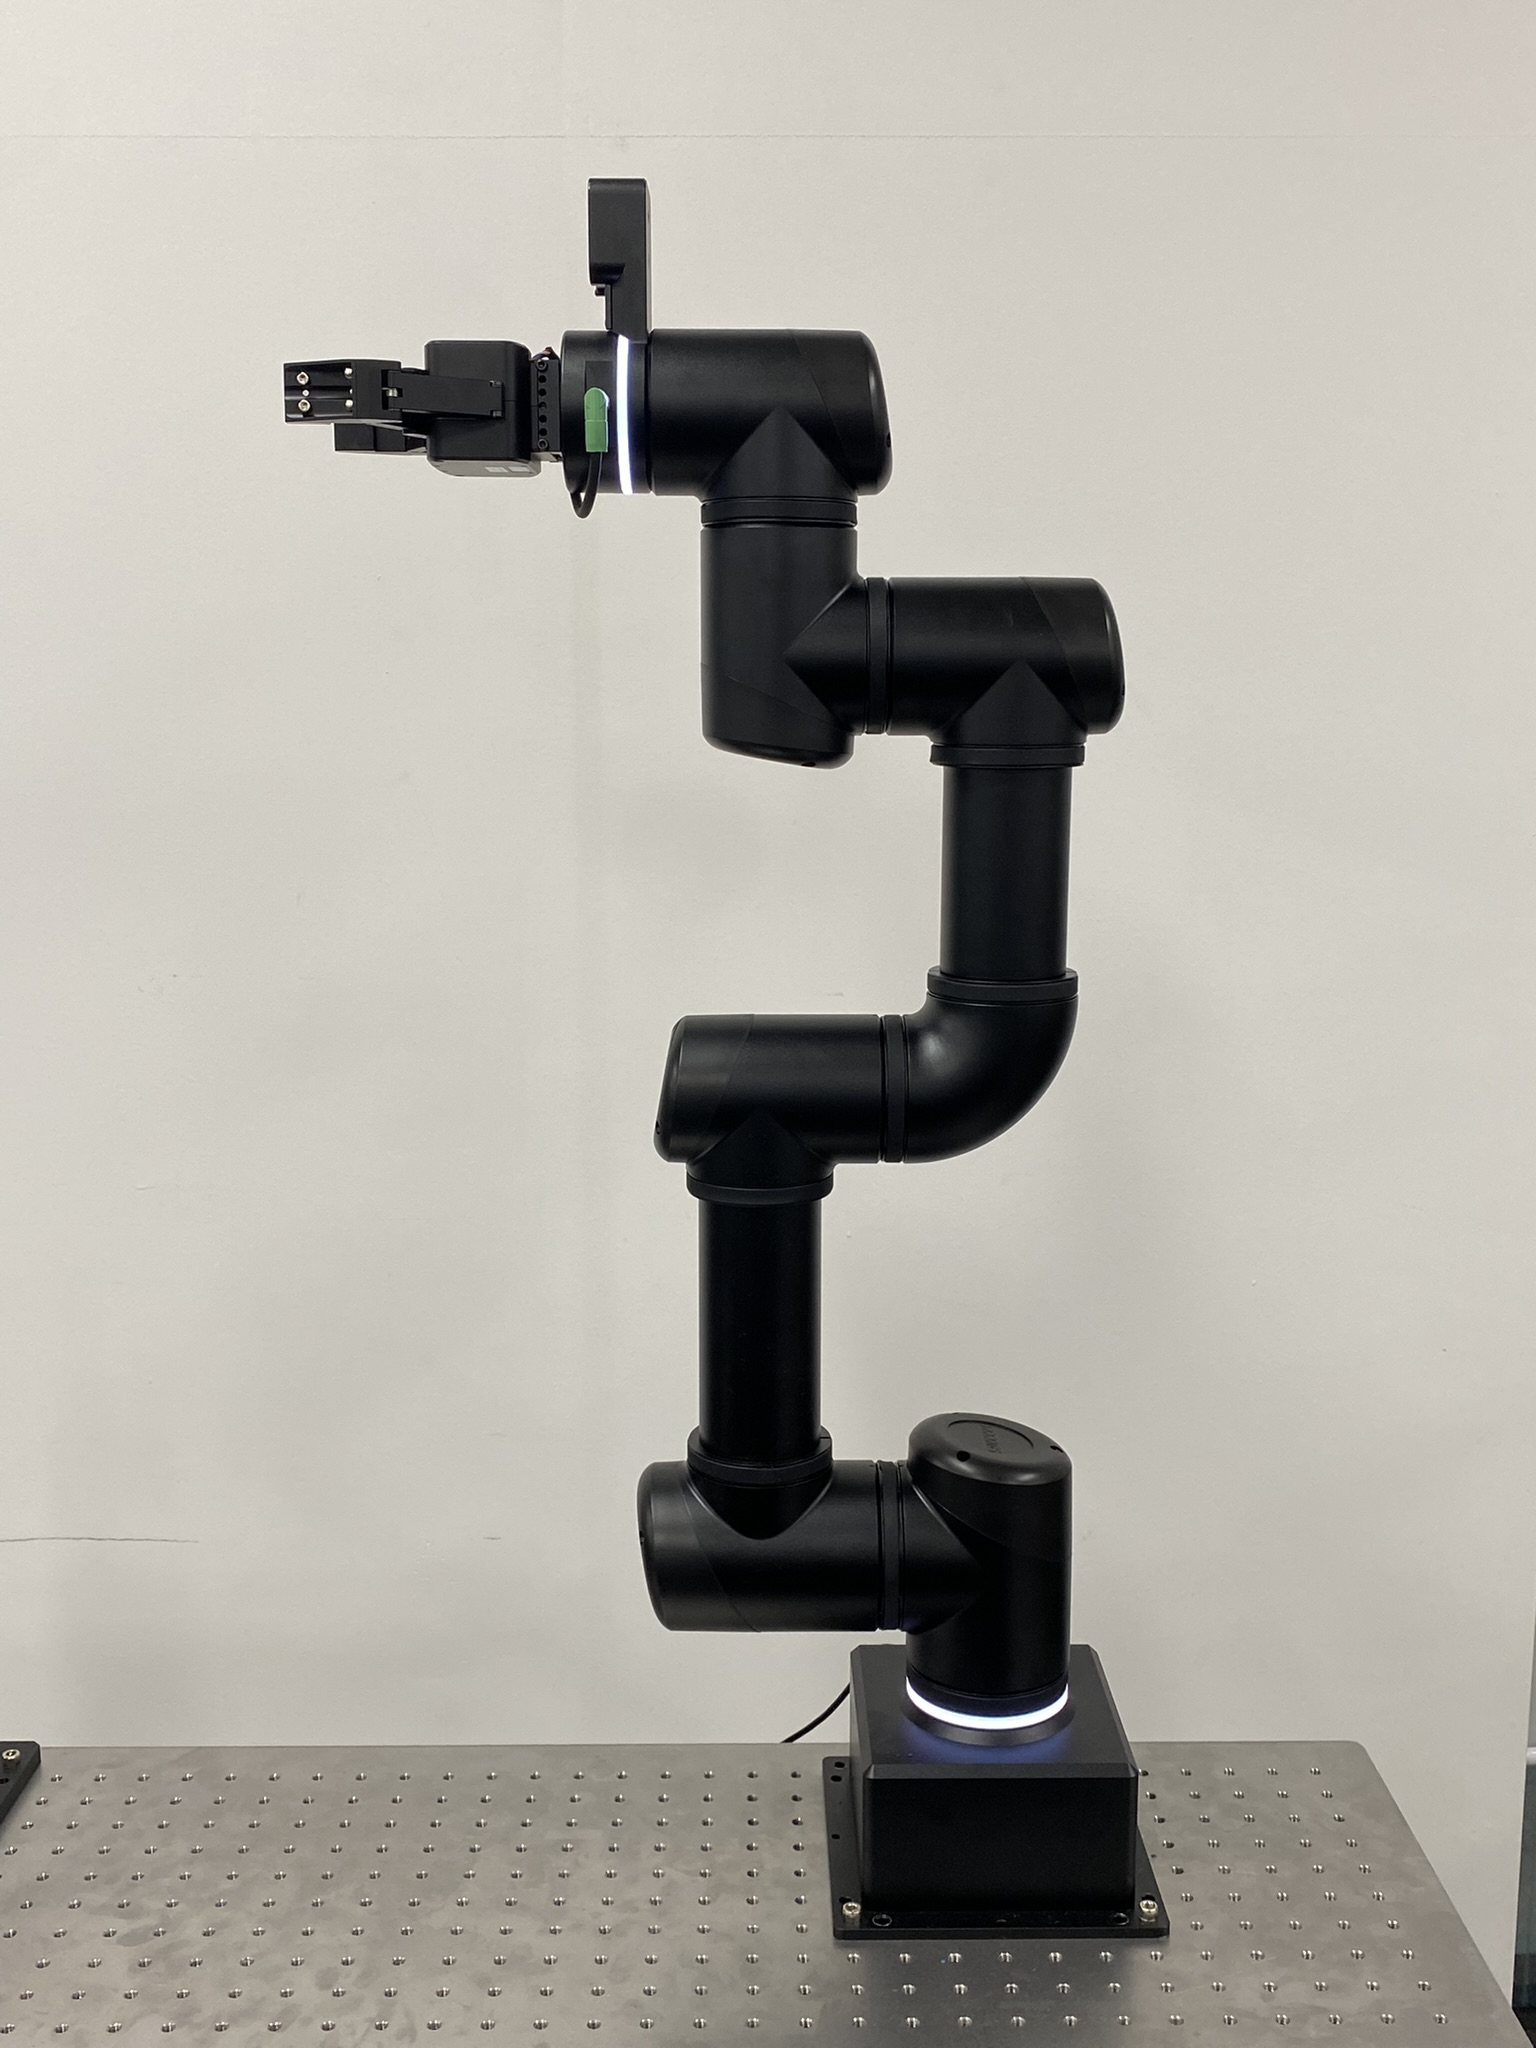
Initial Position
Packing
To return to the packed pose, simply run the following command:
ros2 launch open_manipulator_bringup omy_3m_pack.launch.pySoftware Setup
WARNING
This setup is intended for development on the user PC. The robot PC included with OMY comes pre-configured with the same software stack.
Software Setup for OMY
The ROBOTIS OMY robotic arm utilizes two key software packages to enable intelligent manipulation through Physical AI:
- open_manipulator: Provides control of the 6-DOF OMY arm via ros2_control using DYNAMIXEL-Y actuators. Supports teleoperation and low-level control.
- physical_ai_tools: A toolkit for imitation learning, including modules for data collection, training, inference, and visualization.
Prerequisites
Operating System: Any Linux distribution
- The container runs Ubuntu 24.04 + ROS 2 Jazzy
- The Host OS version does not need to match.
Docker Engine
Install using the official Docker guide
After installation:
bashsudo usermod -aG docker $USER sudo systemctl enable docker docker run hello-world
Git
bashsudo apt install gitNVIDIA Container Toolkit
- Follow the official installation guide
Required steps:
- Configure the production repository
- Install
nvidia-container-toolkit - Configure Docker runtime using
nvidia-ctk - Restart Docker daemon
For detailed configuration, see the Docker configuration guide
- Follow the official installation guide
Docker Volume Configuration
The Docker container uses volume mappings for hardware access, development, and data persistence:
volumes:
  # Hardware and system access
  - /dev:/dev
  - /tmp/.X11-unix:/tmp/.X11-unix:rw
  - /tmp/.docker.xauth:/tmp/.docker.xauth:rw

  # Development and data directories
  - ./workspace:/workspace
  - ../:/root/ros2_ws/src/open_manipulator/
TIP
Store your development code in /workspace to preserve your codes.
Container Lifecycle
Initial Setup
# Clone the open_manipulator repository
cd ~
git clone -b jazzy https://github.com/ROBOTIS-GIT/open_manipulator.git
cd open_manipulator
Starting and Managing the Container
# Start container
./docker/container.sh start

# Enter the running container
./docker/container.sh enter

# Stop the container
./docker/container.sh stop
WARNING
Stopping the container with ./container.sh stop will remove the container. Any files that are not located in the volume-mapped directories (such as /workspace or other mapped paths) will be permanently deleted. Make sure to save your important files in the appropriate volume-mapped locations to avoid data loss. For more details, see the Docker Volume Configuration section.
Docker Command Reference
| Command | Description |
|---|---|
help | Display usage help |
start | Start container |
enter | Enter the running container |
stop | Stop and remove the container |
Example Usage
./container.sh help
./container.sh start
./container.sh enter
./container.sh stop