Operation Guide — ROS 2
Teleoperation
After accessing the Open Manipulator Docker container, use the following command:
ros2 launch open_manipulator_bringup omx_ai.launch.pyThis command will sequentially execute the following procedures:
- Move to Follower's initial position.
- Start Leader launch file.
- Synchronize Leader and Follower.
After these steps, the Leader-Follower system will be operational.
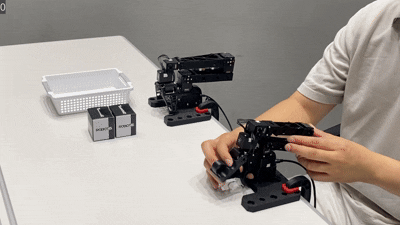
Real-time synchronized motion between Leader and Follower
INFO
Teleoperation mode does not support MoveIt 2, GUI, and Keyboard Teleop.
Please follow the next steps to use these features.
Launch Bringup
The OMX controller has been restructured to utilize the ros2_control framework and MoveIt 2 for enhanced flexibility, modularity, and usability. This updated controller allows for seamless integration with ROS 2-based systems, offering advanced features such as trajectory planning, real-time control, and state feedback.
To use the MoveIt 2, GUI, and Keyboard Teleop features, open a new Docker container and launch the OMX packages.
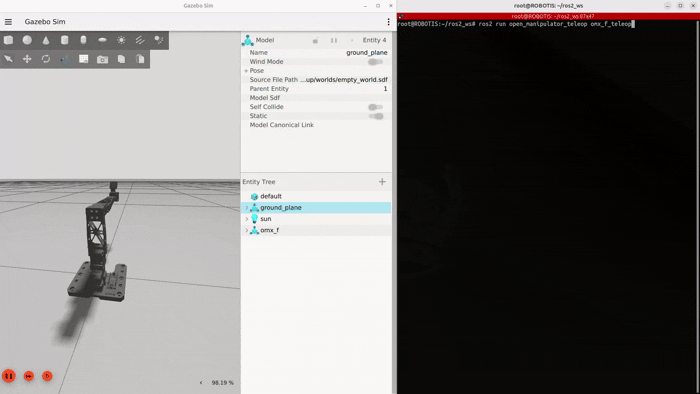
ros2 launch open_manipulator_bringup omx_f.launch.pyMoveIt 2
MoveIt 2 is a set of packages for your robot to manipulate for Motion Planning, Manipulation, Inverse Kinematics, Control, 3D Perception and Collision Checking.
Launching MoveIt 2
Enable MoveIt 2 functionality for advanced motion planning in RViz. For more information about MoveIt 2, check out the official documentation.
ros2 launch open_manipulator_moveit_config omx_f_moveit.launch.pyMove interactive markers to position the robotic arm, then click Plan & Execute. 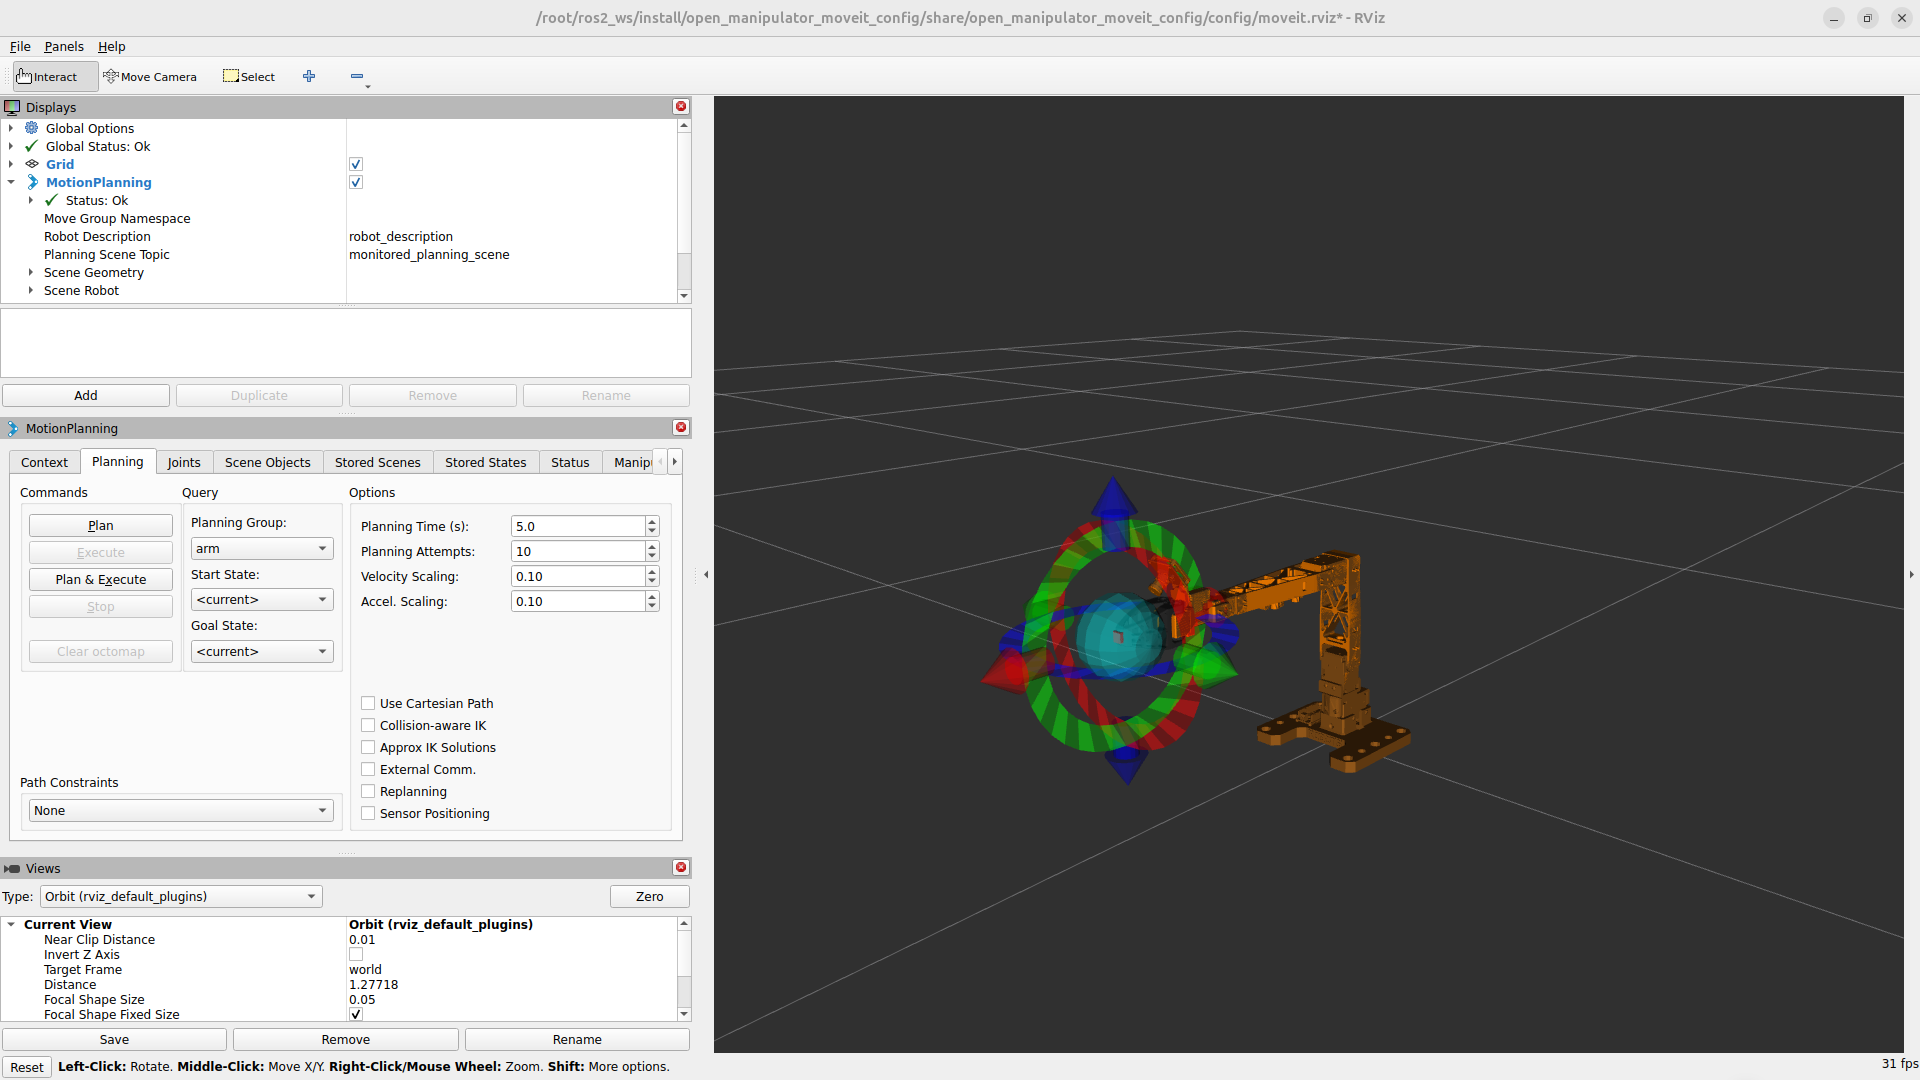
Simple Instructions for Using MoveIt 2:
- You can move the robot to your desired pose using the Interactive Marker visible in RViz.
- Use the Plan option in the Commands column to simulate the motion of the robotic arm.
- Click Execute to move the robot according to the simulated motion.
- Set the Planning Group to
armand use the Goal State optionsinitorhometo move the robot to predefined poses. - Change the Planning Group to gripper and use Goal State options such as
closeoropento open and close the gripper.
GUI
Launch the OpenMANIPULATOR GUI
After running bringup and MoveIt 2, launch the GUI.
ros2 launch open_manipulator_gui omx_f_gui.launch.pyExplore GUI Features
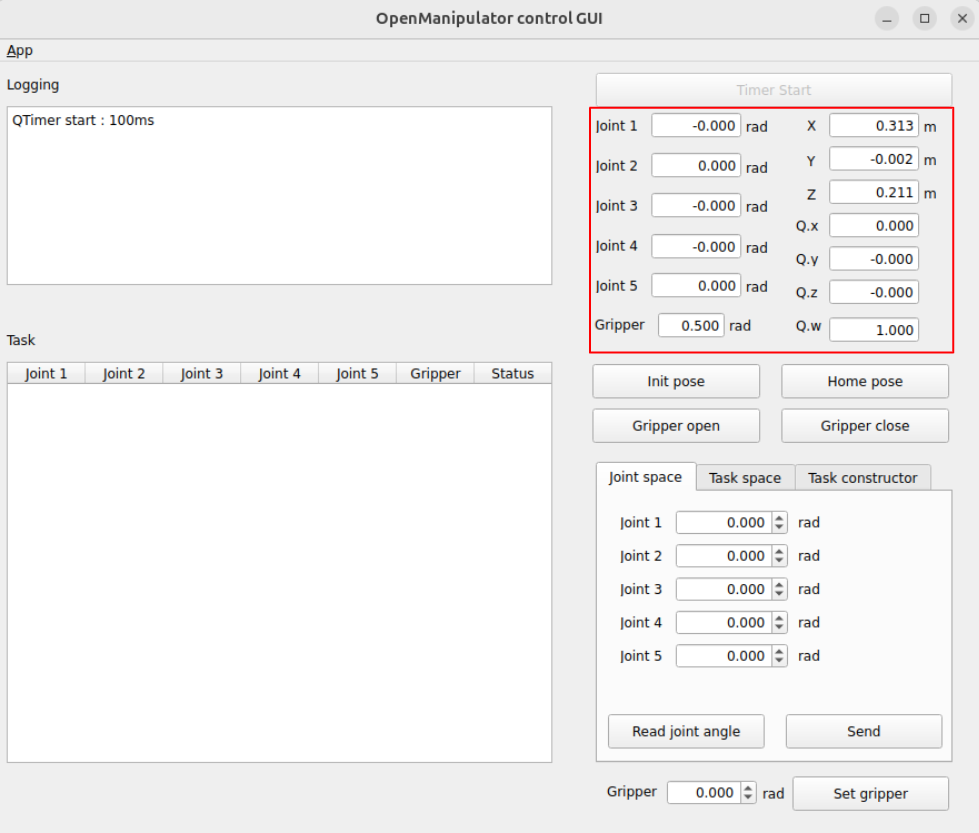
Basic Controls
Start Timer: Activates the system.Robot Status: Displays current manipulator state.Init Pose: Moves the manipulator to a vertical position.Home Pose: Moves the manipulator to a compact, safe position.Gripper Open/Close: Opens or closes the gripper.
Task Execution
Joint Space Tab: Adjust individual joint angles.Task Space Tab: Control the end-effector position.Task Constructor TabRead Task: View saved poses.Save Pose: Save current state.Rap: Set task repetition (1–999).Play: Execute saved tasks.Stop: Halt operations.Reset Task: Clear saved tasks.
Explore GUI Features
Click the
Timer Startbutton.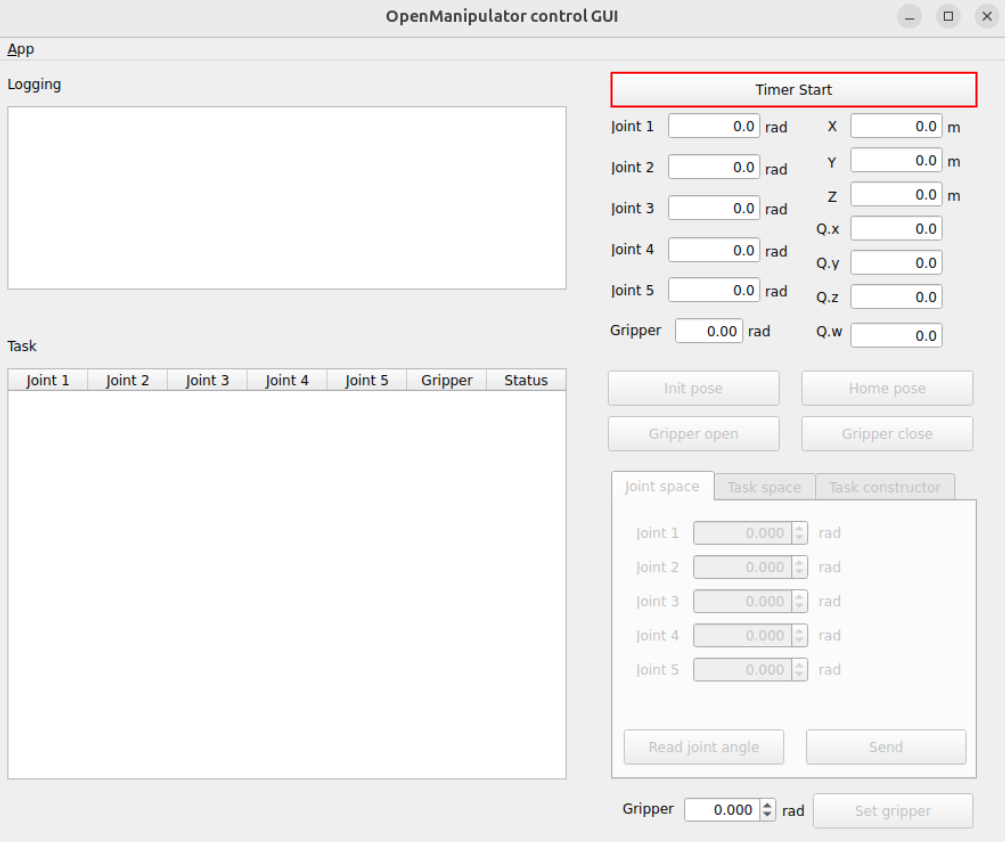
Check the status of OMX.
To manipulate OMX in the joint space, enter the joint angles and total time for the trajectory. Then click the
Sendbutton to start the motion.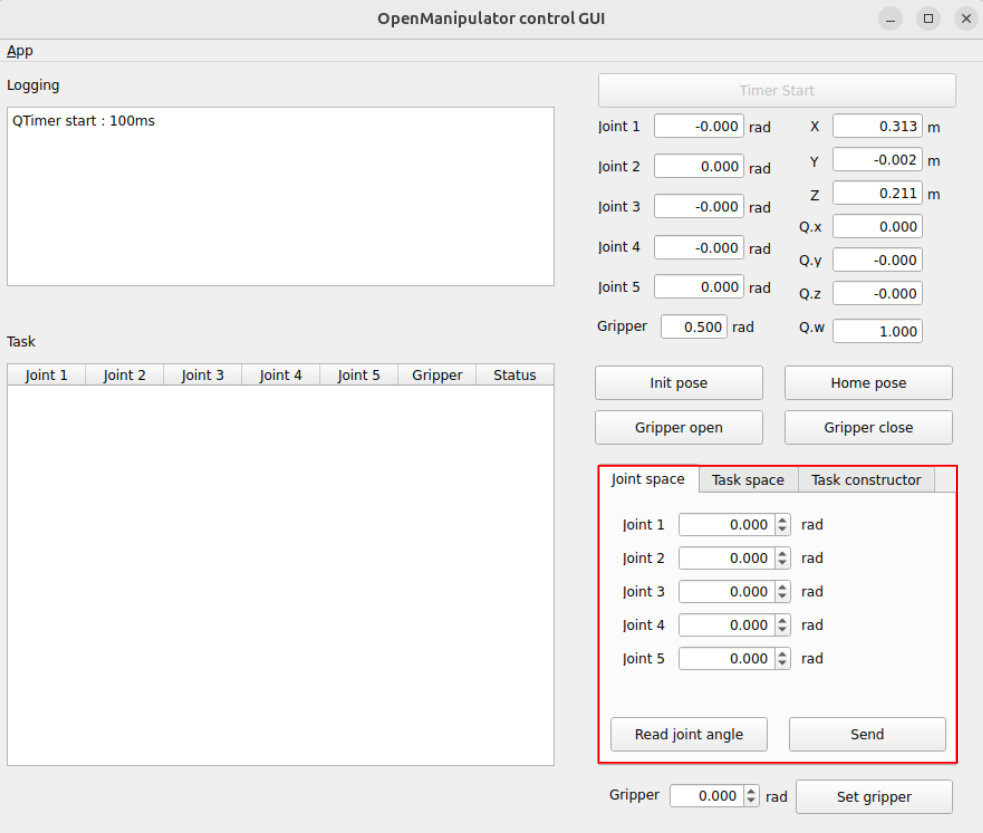
To manipulate OMX in the task space, enter the kinematics pose of the OMX end-effector(tool) in the task space. Then click the
Sendbutton to start the motion.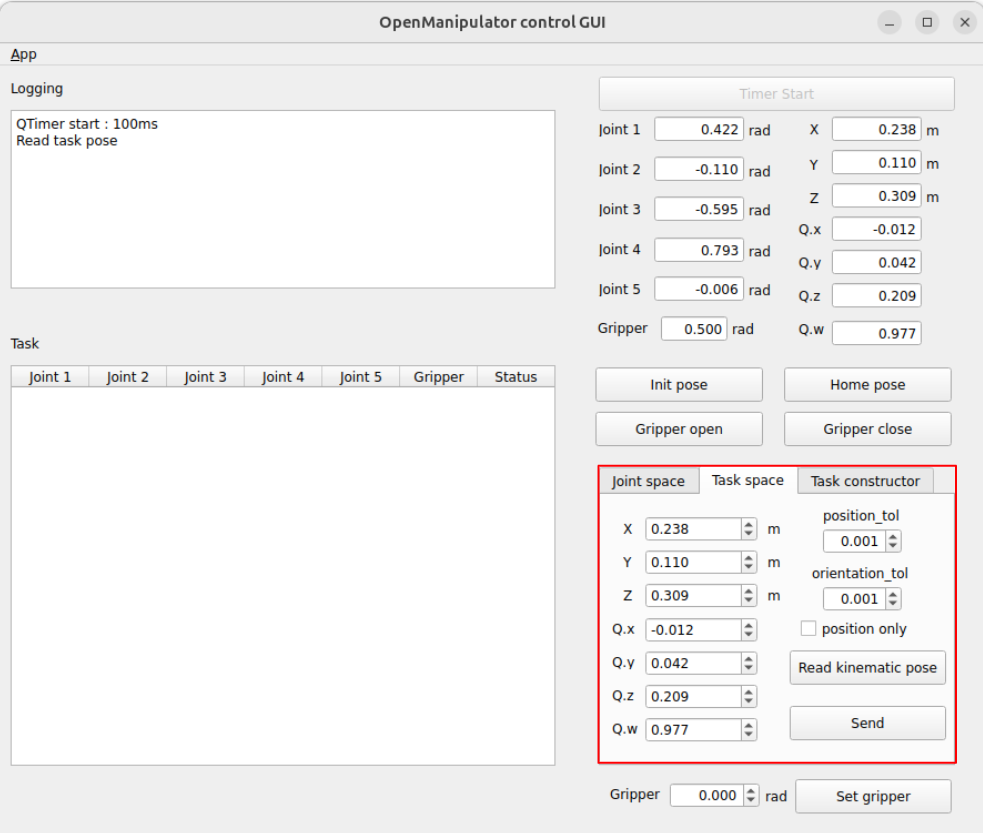
Create a task constructor with OMX.
- Click the
Read taskbutton to prepare for saving tasks.- You can create or modify the pre-saved joint values in the
robot_joint_log.csvfile. - The file's load path can be checked in the terminal when the GUI node is launched.
- You can create or modify the pre-saved joint values in the
- Adjust the manipulator's posture and save it by clicking
Save pose. - Save multiple postures to complete the preparation.
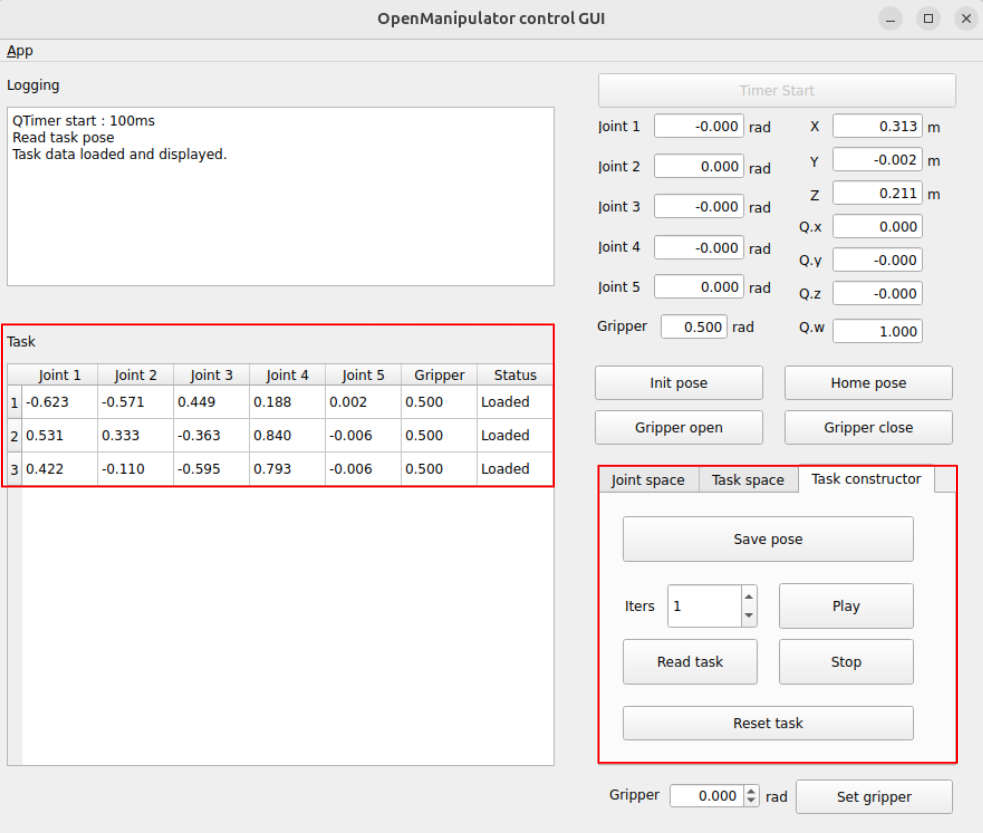
- Press the
Playbutton to make the manipulator move sequentially according to the saved tasks. Completed tasks will have their status changed to Done.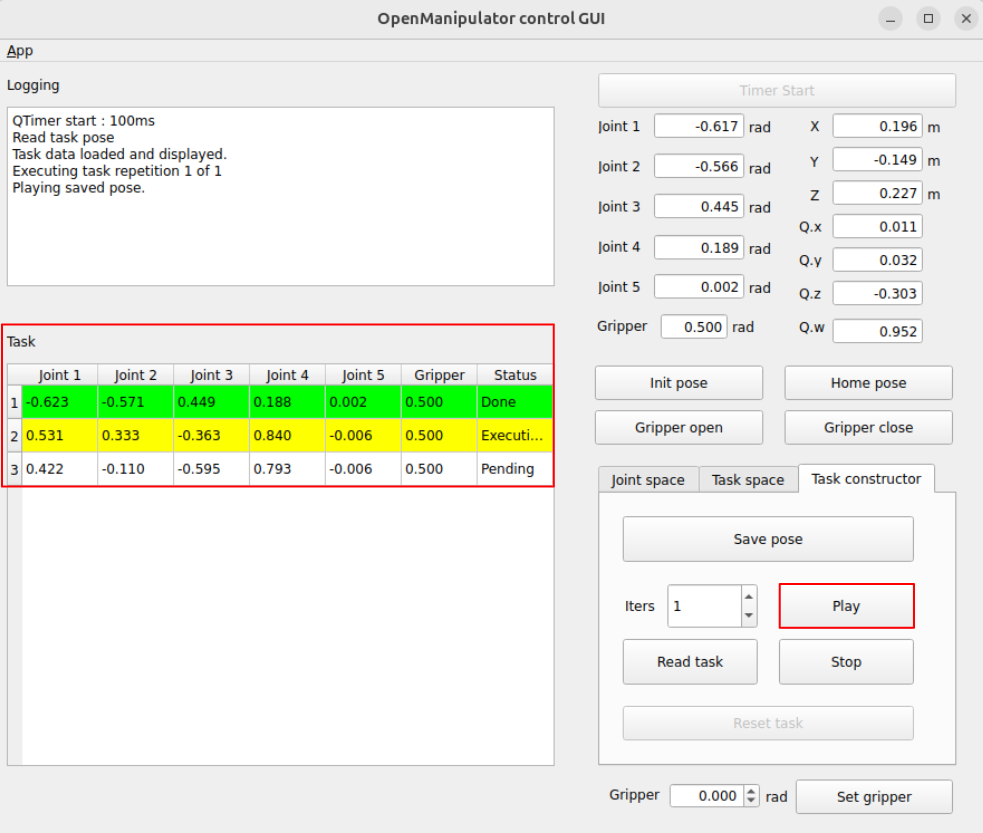
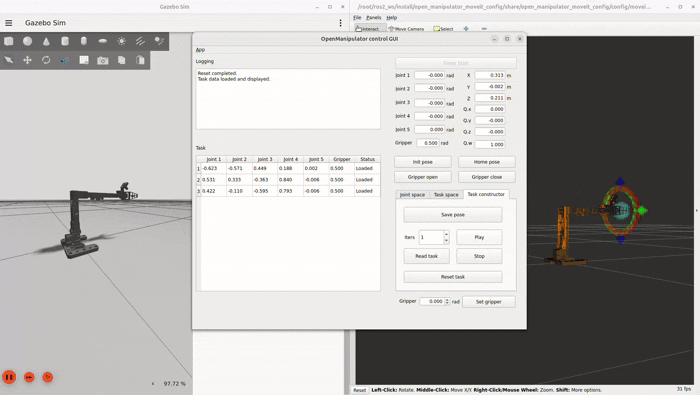
OMX GUI Demo
Keyboard Teleop
Control the manipulator (simulation or hardware) using your keyboard.
Run the Keyboard Teleop
After launching the real robot or Gazebo bringup, enter the following command in the new Docker container:
ros2 run open_manipulator_teleop omx_f_teleopJoint Control
1/q- Joint 12/w- Joint 23/e- Joint 34/r- Joint 45/t- Joint 5
Gripper Control
o- Open gripperp- Close gripper
Keyboard Teleop Demo